
Disk partitions are allocated while installing the operating system or by computer manufacturers. Many people ask whether it is possible to reallocate disk space without starting over. This article introduces how to allocate more space to the C: drive in Windows 10/11 without losing programs and data. To reallocate space to the C: drive in a Windows 10/11 computer, you may use the built-in Disk Management or third-party software. Select the corresponding method according to your own partition configuration.
Allocate Space to the C: Drive in Windows 10/11 Without Software
As with previous Windows 7, Windows 10/11 has a built-in Disk Management tool. It is able to create, delete, format, shrink, and extend partitions. However, it is not the best tool to help repartition a hard drive. To reallocate space for the C: drive in a Windows 10/11 computer, you must delete D: (or E:) first if you do not want to use any software. Disk Management can only help you when there is adjacent unallocated space on the right side of the C: drive. In addition, as with C:, the D: (or E:) drive must also be a primary partition.
If you shrink the D: drive with Disk Management, unallocated space will be generated on the right side of D:. This unallocated space is non-adjacent to the C: drive. This is why many people cannot extend the C: drive after shrinking D:. If you do not want to delete any partition, third-party software is required.
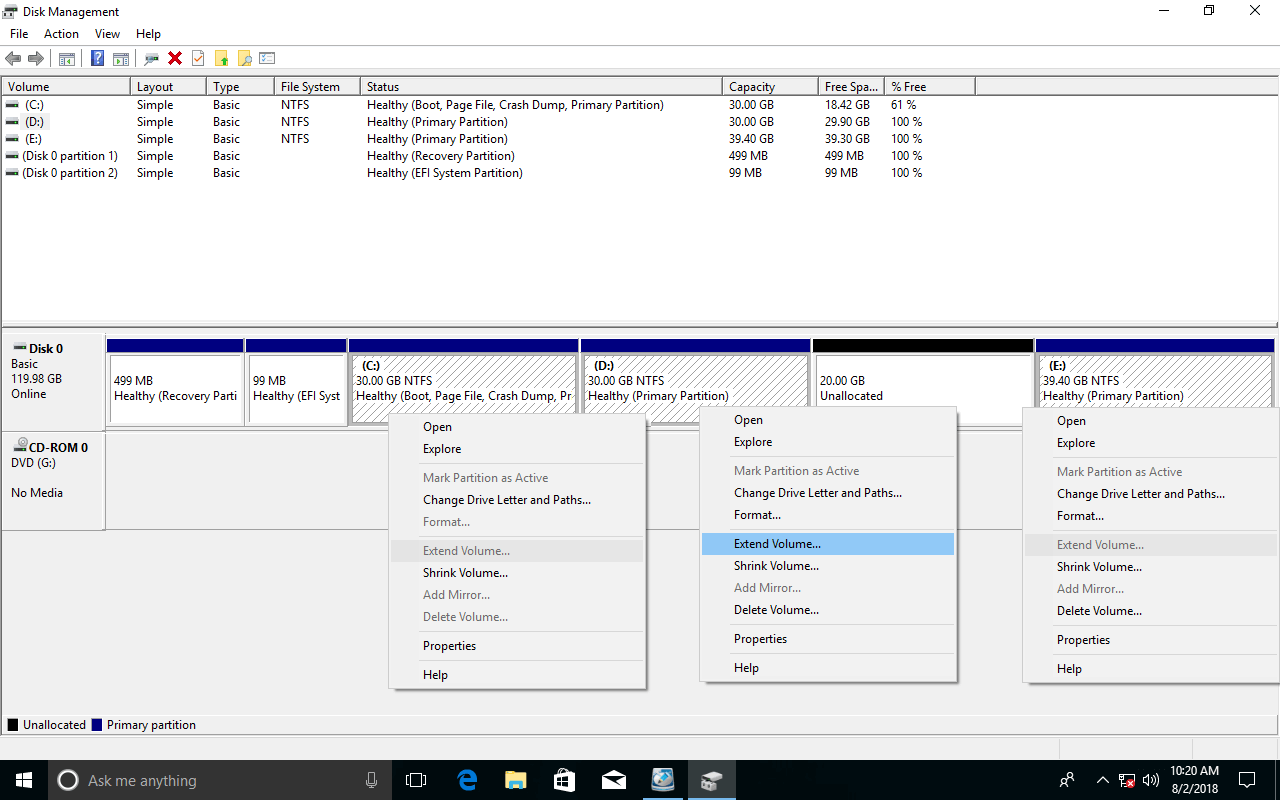
Steps to allocate space to the C: drive in Windows 10/11 with Disk Management:
- Press Windows + X on your keyboard and select Disk Management.
- Right-click the D: drive and select "Delete Volume".
- Right-click the C: drive and select "Extend Volume"; click "Next" in the pop-up window.
- Follow the "Extend Volume Wizard" through a few clicks.
Allocate More Space to the C: Drive in Windows 10/11 from the D: Drive
If you want to reallocate more space to the C: drive in Windows 10/11 without deleting a partition, third-party software is needed. Unlike Windows Disk Management, NIUBI Partition Editor can generate unallocated space on either the left or right side when shrinking a partition. It can merge unallocated space into either contiguous or any non-adjacent partitions on the same disk. To do this, you just need to drag and drop on the disk map. It has a free edition for Windows 11/10/8/7/Vista/XP home computer users. Download
How to allocate more space to the C: drive in Windows 11/10/8/7 with NIUBI:
Step 1: Right-click the adjacent partition D: and select "Resize/Move Volume"; drag the left border to the right in the pop-up window.
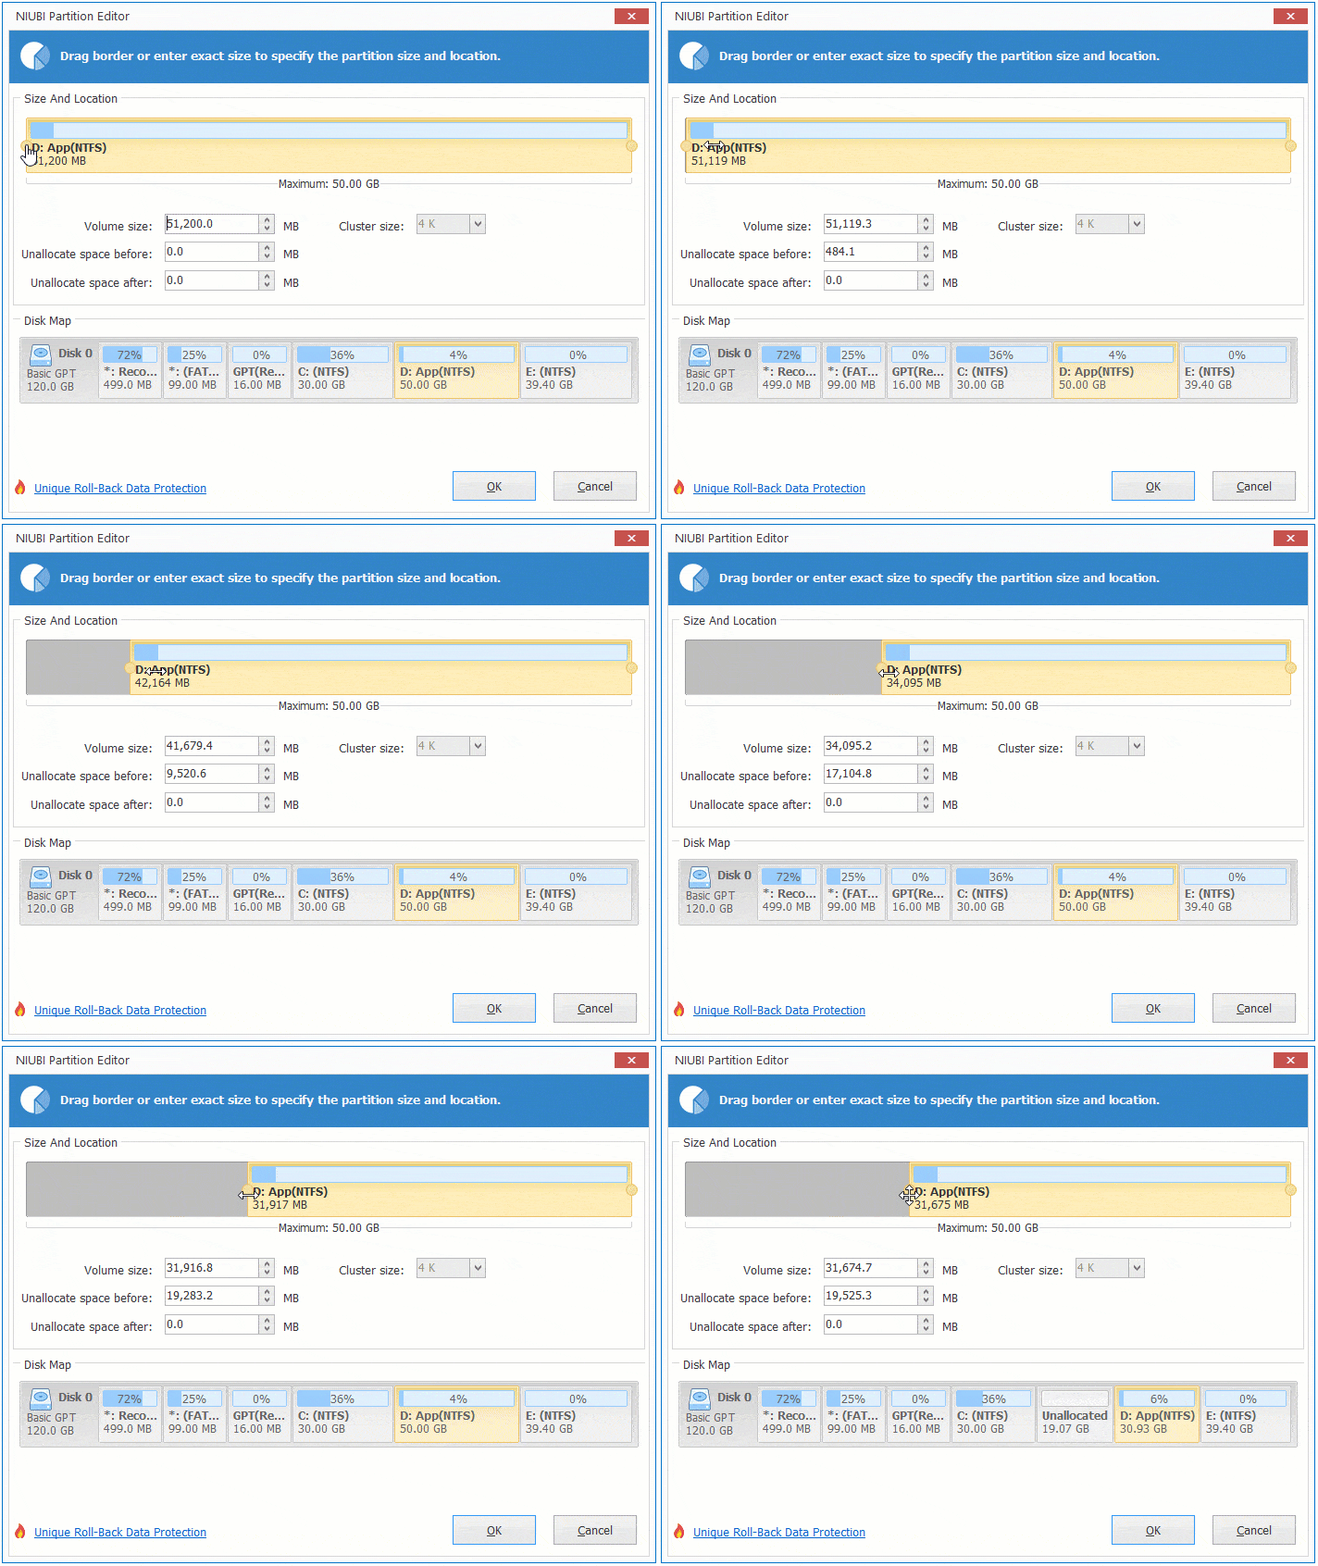
Then unallocated space will be generated on the left side of D:.
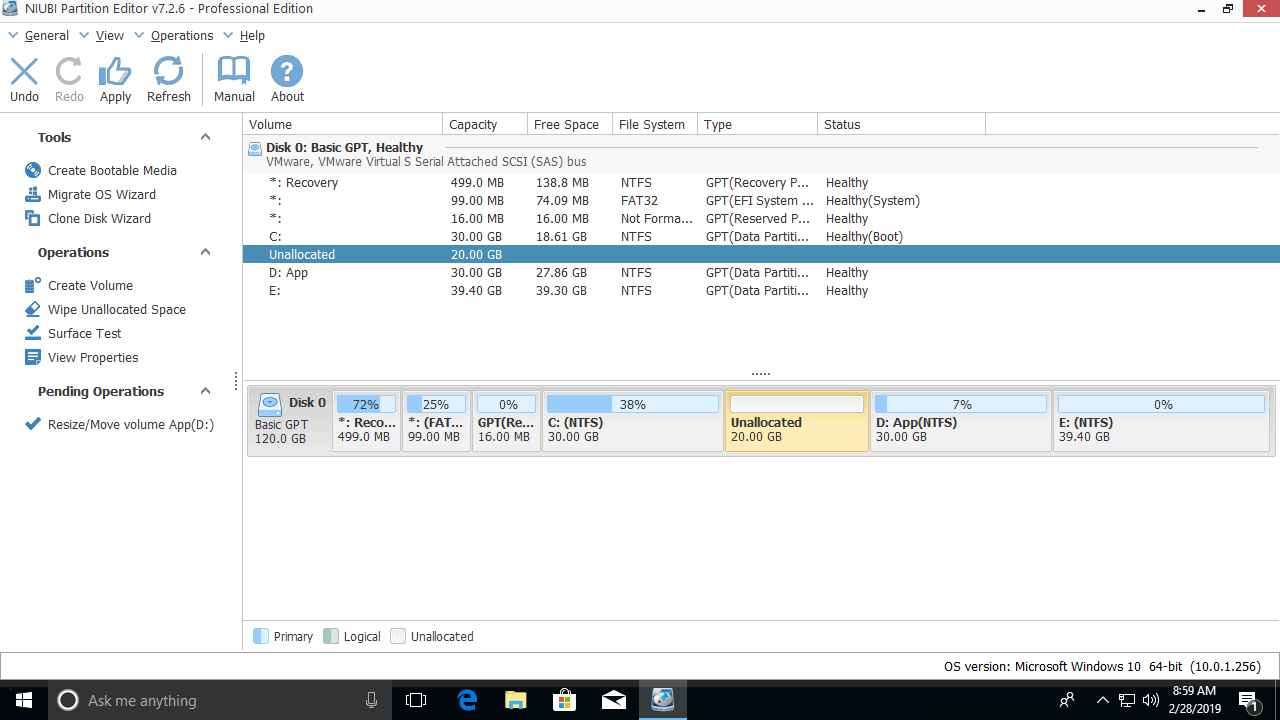
Step 2: Right-click partition C: and select "Resize/Move Volume" again; drag the right border to the right.
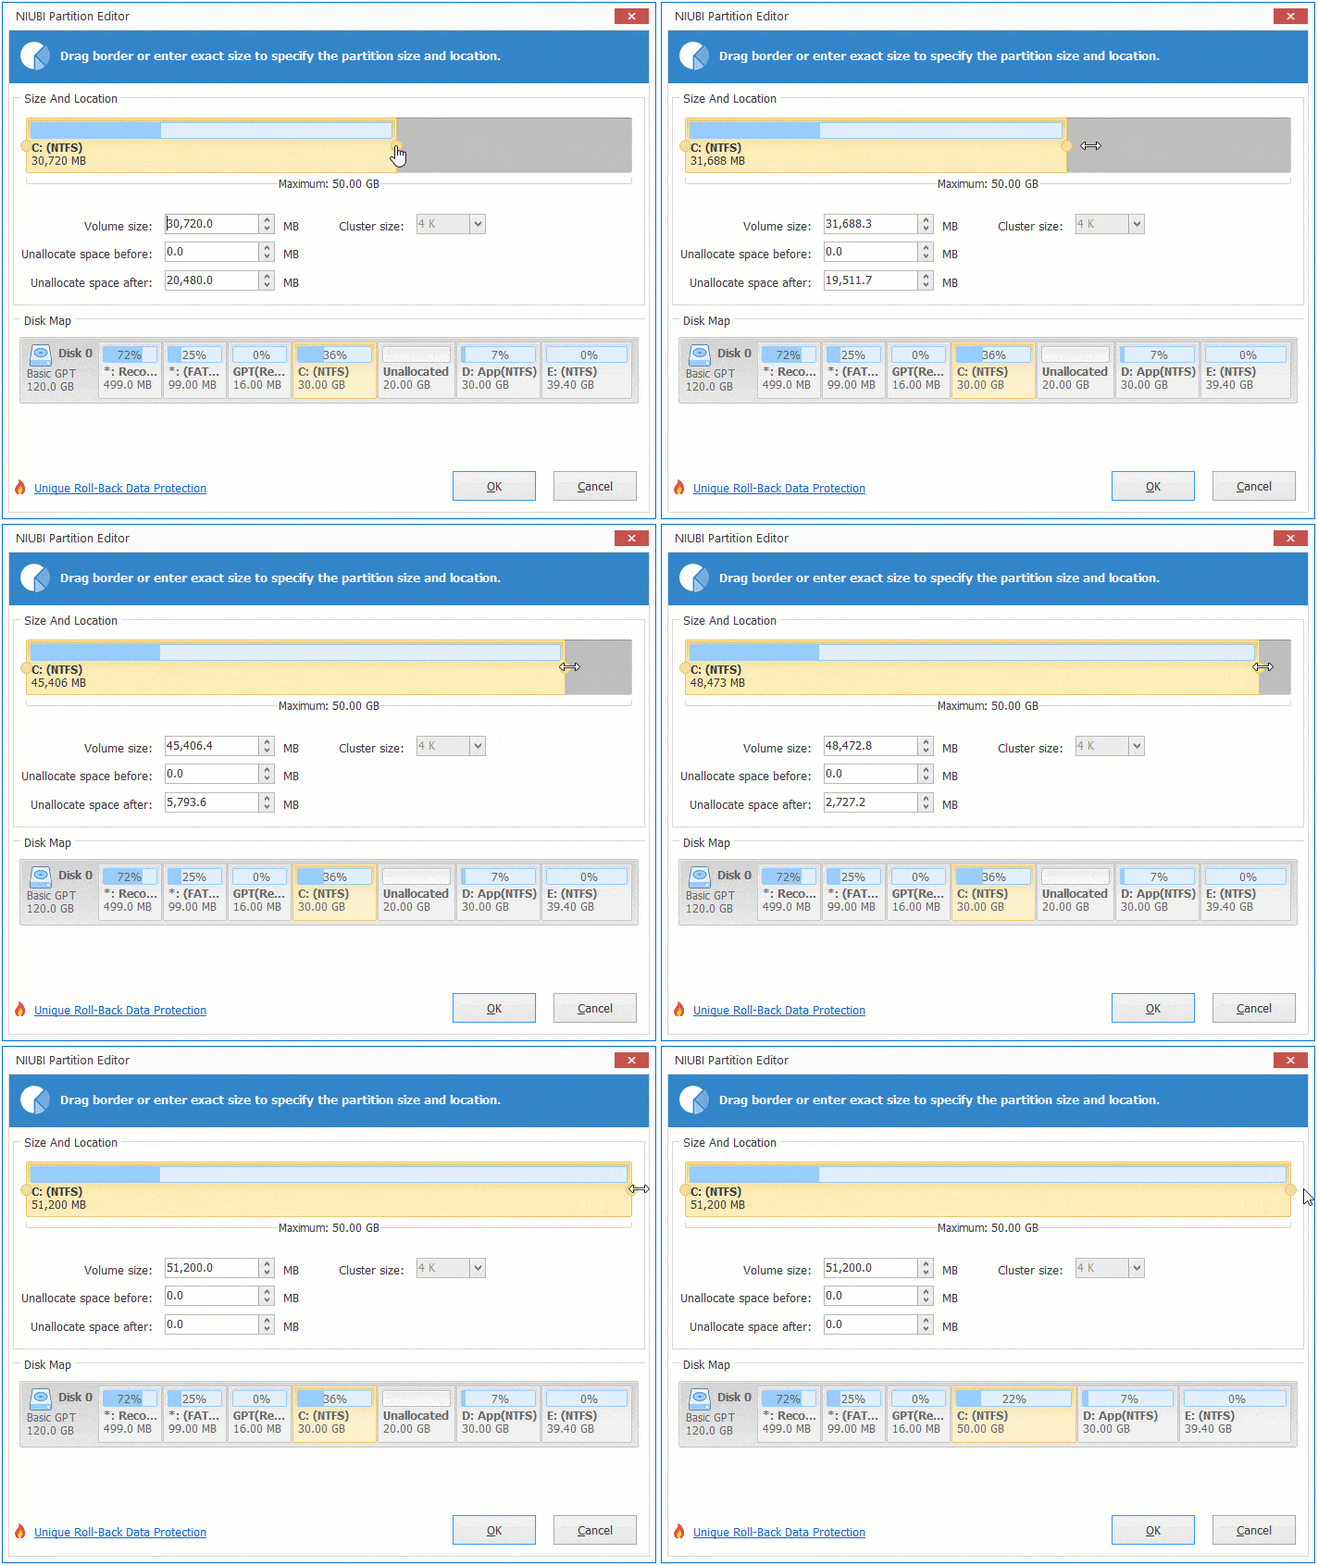
Then the unallocated space will be allocated to the C: drive.
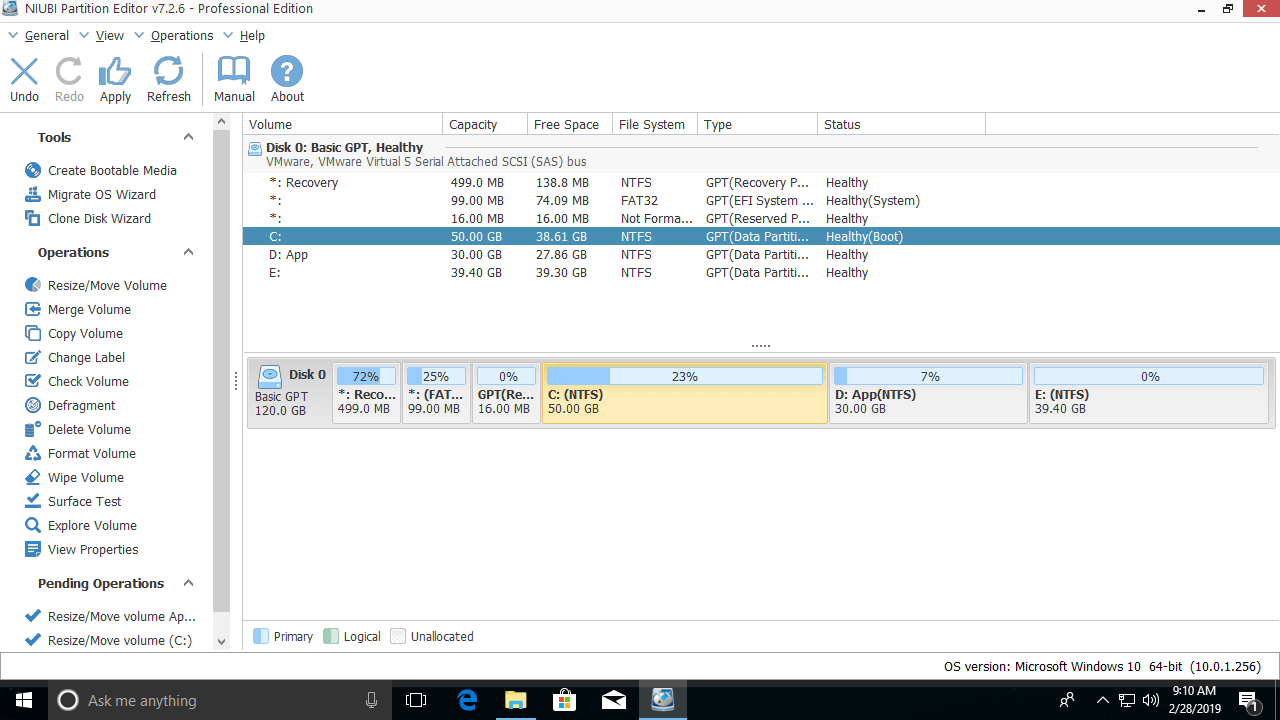
This software is designed to work in virtual mode; to resize real disk partitions, remember to click "Apply" on the top left to execute.
Allocate More Space to the C: Drive in Windows 10/11 from a Non-adjacent Volume
If there is not enough free space in the adjacent D: drive, you can allocate free space to the C: drive from any non-adjacent partition on the same disk. Follow the steps below:
Step 1: Right-click the E: drive and select "Resize/Move Volume"; drag the left border to the right to shrink it and generate unallocated space on its left side.
Step 2: Right-click the D: drive and select "Resize/Move Volume"; drag the middle of the D: drive to the right in the pop-up window. Then, you can swap its position with the adjacent unallocated space.

Step 3: Right-click the C: drive and select "Resize/Move Volume" again; drag the right border to the right to merge this unallocated space.
Reallocate the C: Drive Space with Another Disk by Cloning
If there is no other volume or not enough free space on the same disk, the methods above are invalid. This is because the size of a physical disk is fixed. No software can move free space from a different, separate disk. In that case, you can clone the disk to a larger one and extend the partition with the extra disk space. Follow the steps in the video. Besides shrinking, moving, extending, and copying disk partitions, NIUBI Partition Editor helps you perform many other operations such as merging, converting, hiding, defragging, and wiping partitions, scanning bad sectors, and much more.
 © 2009 - NIUBI Technology All Rights Reserved. |