
This article introduces how to extend a partition in Windows 10 (32 & 64 bit). Drag and drop to extend a disk partition without losing data.
Extend a Partition with Windows 10 Disk Management
Most Windows 10 computer users will encounter the problem that a disk partition is running out of space, especially the system partition C:. You can extend this partition without wasting a long time reinstalling the operating system and programs.
To extend a partition, there must be unallocated space. To get this type of space, there are two options: deleting or shrinking another volume. You will lose data if you forget to transfer files before deleting. Furthermore, you cannot delete a partition with programs or those for special purposes.
Therefore, it is better to get unallocated space by shrinking another volume. Windows 10 has built-in Disk Management that is able to delete, shrink, and extend a partition. However, you cannot extend a partition by shrinking another one with this tool.
When shrinking the D: drive with Disk Management, unallocated space can only be generated on the right side.
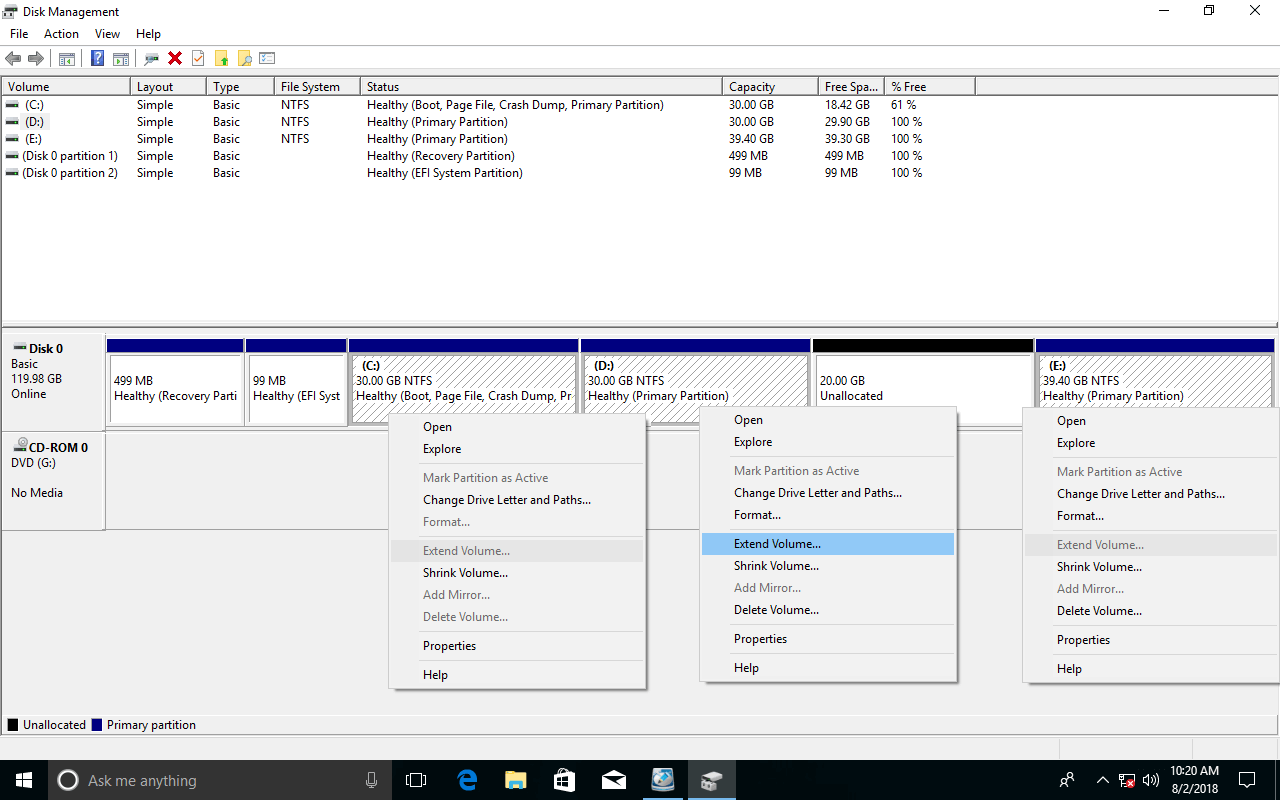
Extend Volume is disabled for both drives C: and E:, because:
- Unallocated space is non-adjacent to the C: drive.
- Unallocated space is on the left side of the E: drive.
Extend Volume can only expand an NTFS partition with contiguous unallocated space on the right side.
So it is better to extend a disk partition in Windows 10 with professional partition software.
Better than other software, NIUBI Partition Editor has Hot Clone, Cancel-at-Will, Virtual Mode, and unique 1-Second Rollback technologies to protect the system and data. It is also much faster because of its special file-moving algorithm.
How to Extend the System Partition (C:)
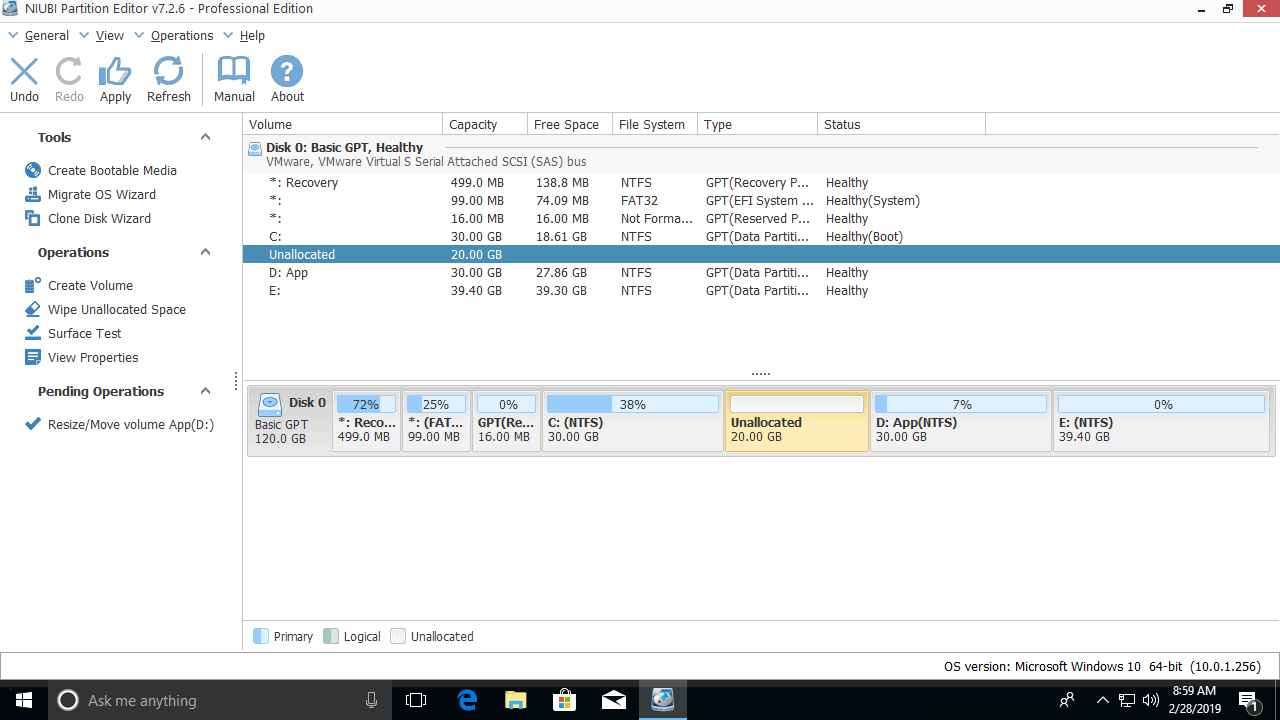
You just need to drag and drop on the disk map to shrink the contiguous partition D and generate unallocated space on the left side, and then merge it into the system C: drive.
Download NIUBI Partition Editor, and you will see the initial disk partition size and structure on the right.
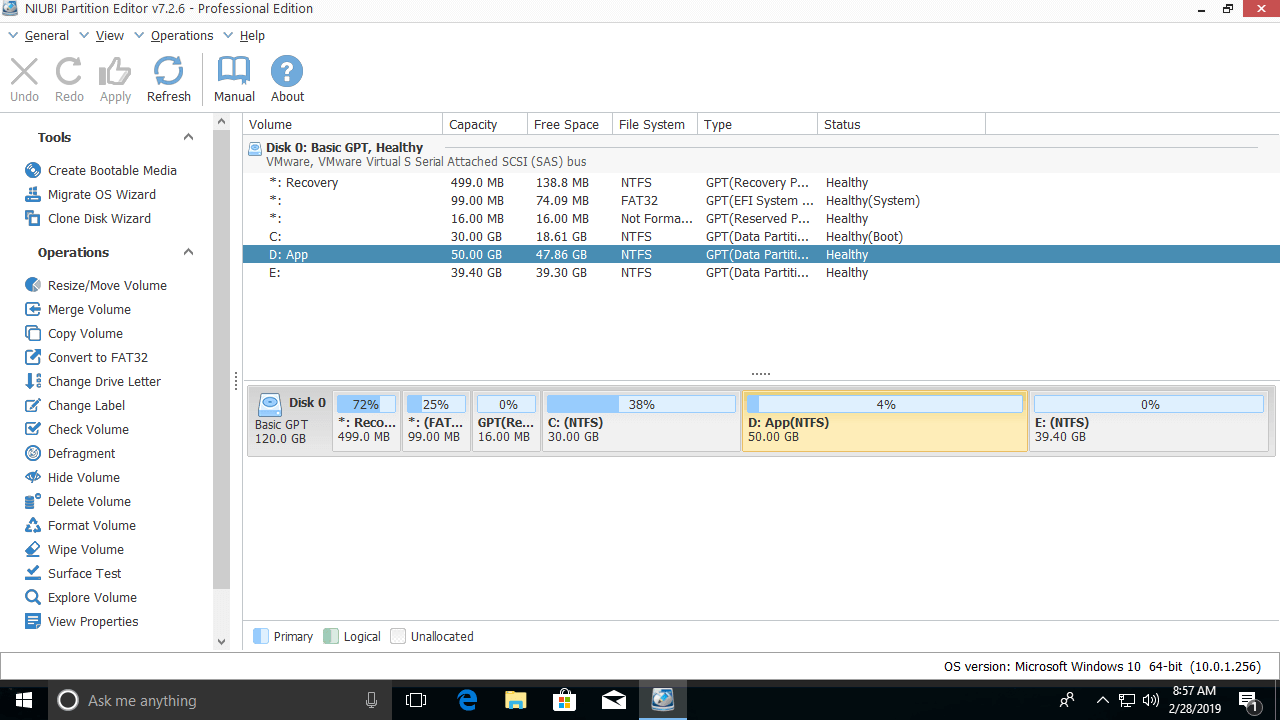
Steps to extend partition C: in Windows 10:
Step 1: Right-click the D: drive and select "Resize/Move Volume"; drag the left border to the right in the pop-up window.
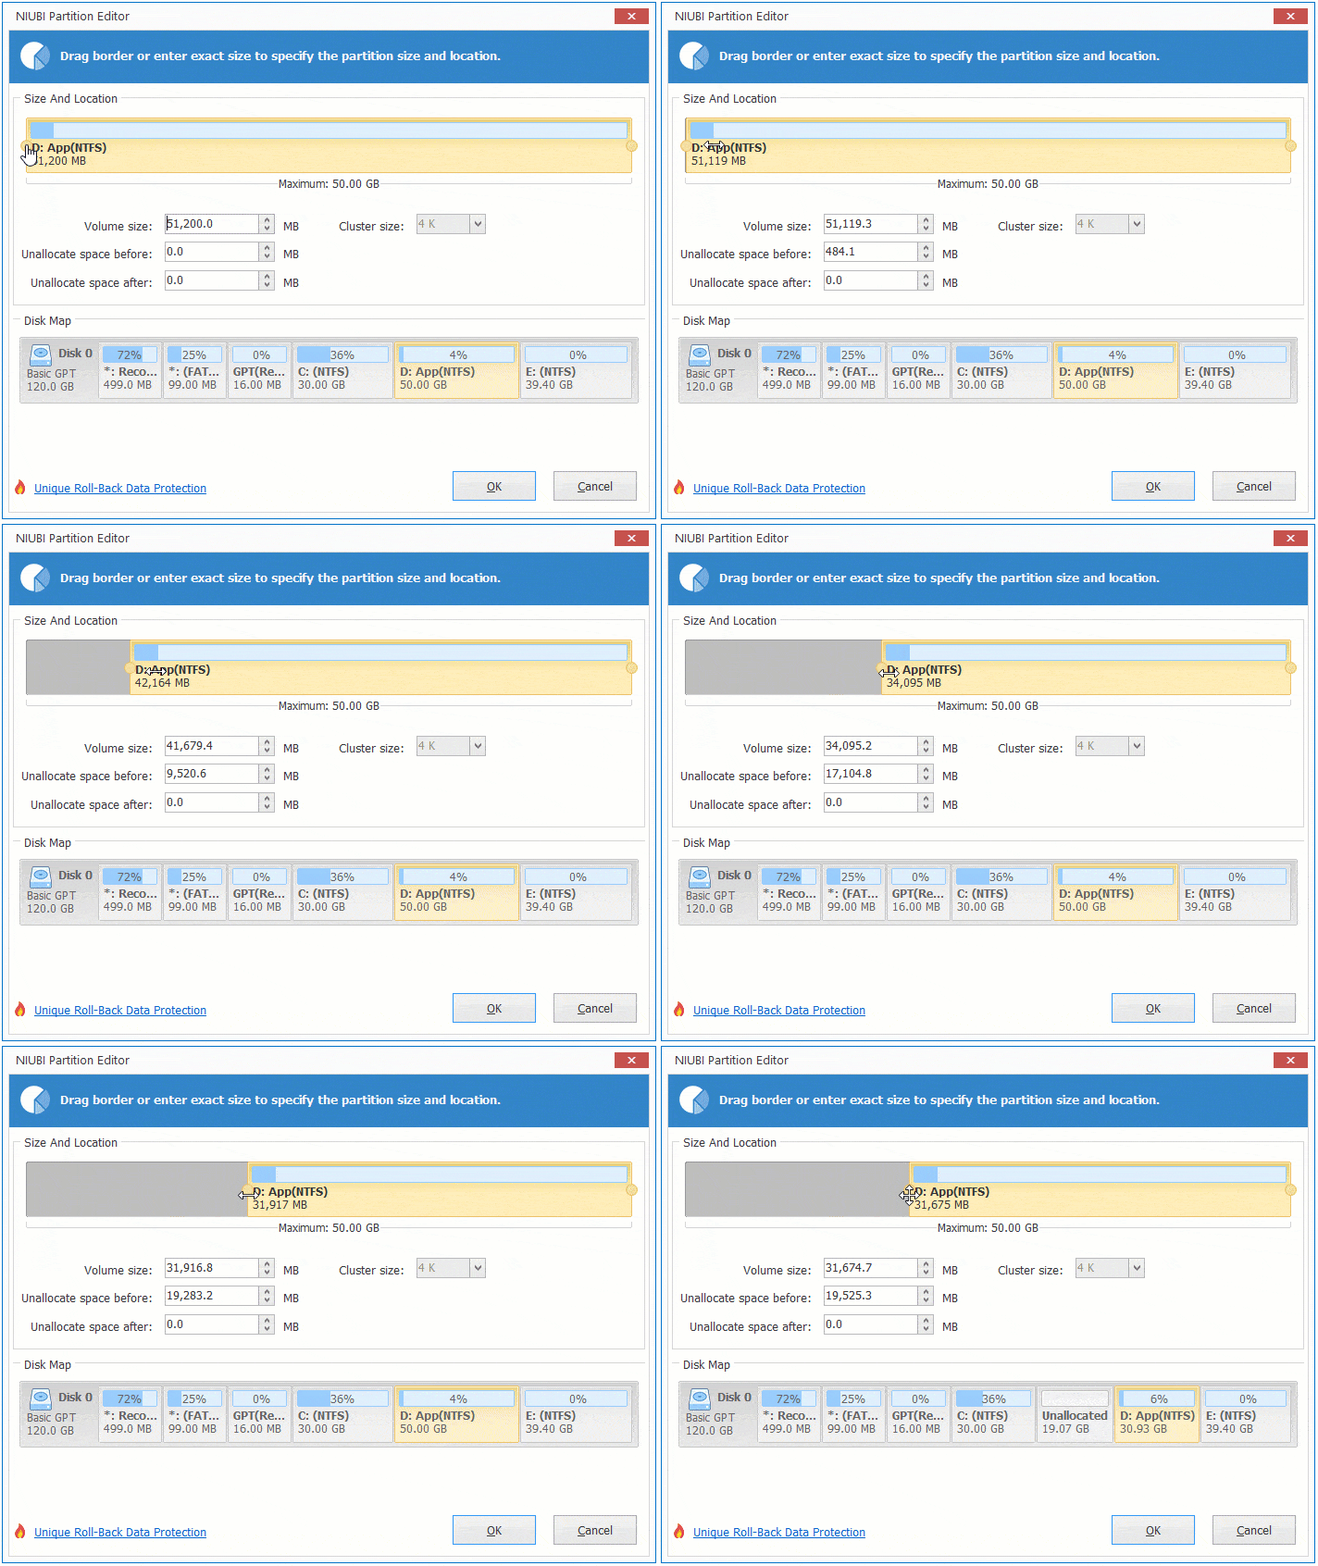
As you can see, the D: drive is shrunk and unallocated space is generated on the left side.
Step 2: Right-click the C: drive and select "Resize/Move Volume" again; drag the right border to the right to merge the unallocated space.
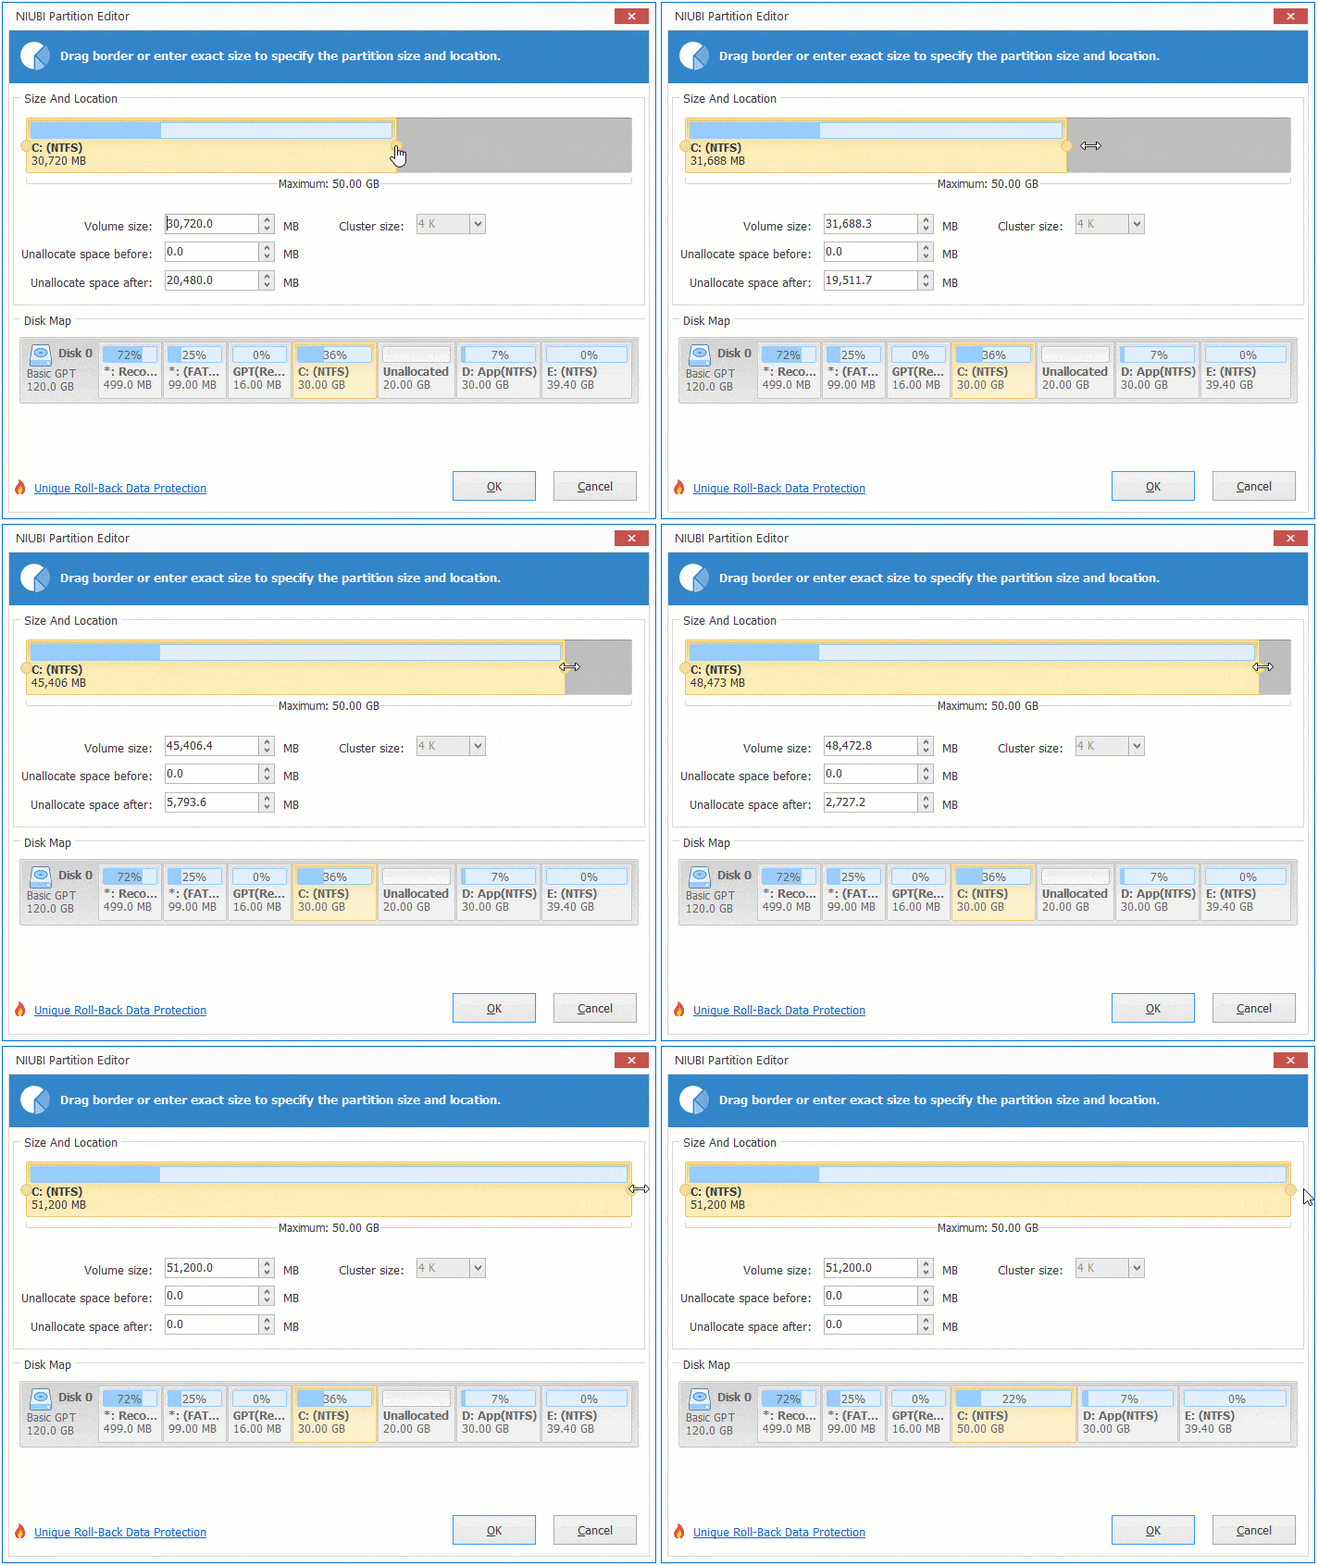
As you can see, the system partition C: is extended from 30GB to 50GB.
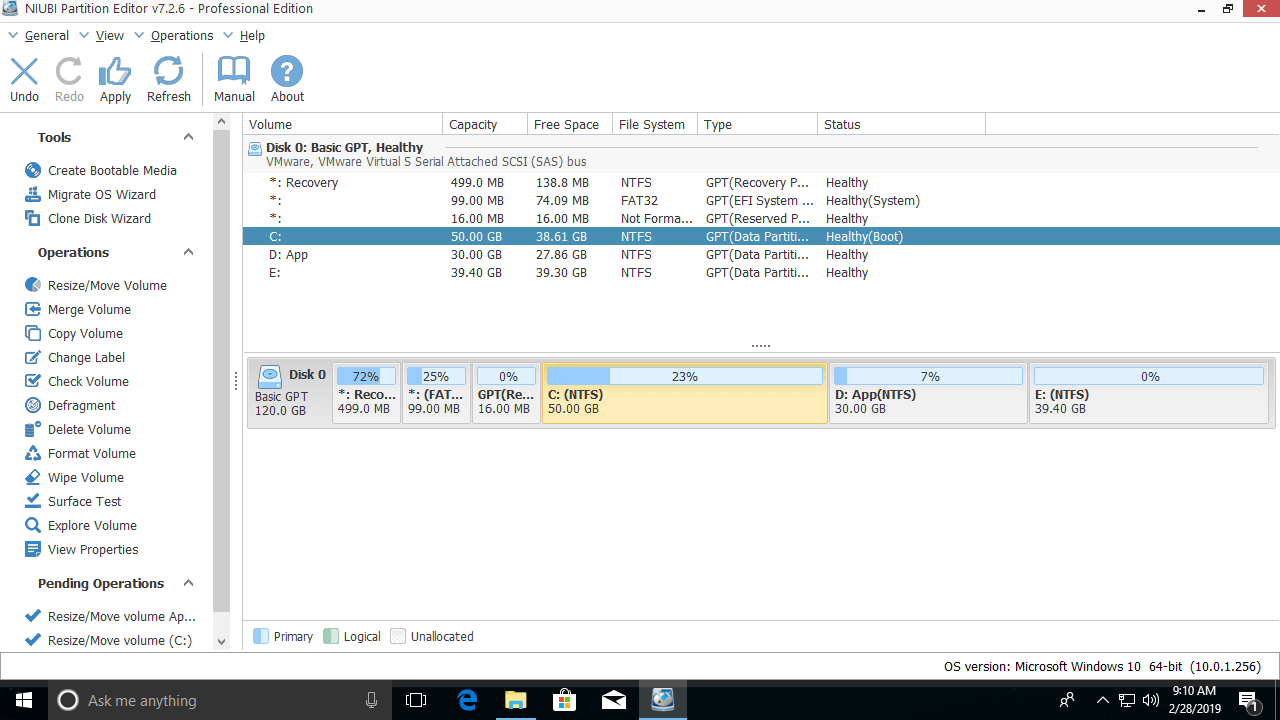
Remember to click the Apply button on the top left; otherwise, the real disk partitions will not be modified. NIUBI is designed to work in virtual mode first to avoid mistakes, so you have a chance to preview, undo, and redo the pending operations.
How to Extend a Data Partition (D:)
Unallocated space on either side can be merged into partition D, so you may shrink either the left partition C: or the right partition E:.
To shrink the C: drive:
Right-click it and select "Resize/Move Volume"; drag the right border to the left in the pop-up window.

To shrink the E: drive:
Right-click it and select "Resize/Move Volume"; drag the left border to the right in the pop-up window.

After getting unallocated space on either side, right-click D and select "Resize/Move Volume" again; drag the border to the other side to merge this unallocated space.
If you want to extend a partition by shrinking any non-adjacent partition (for example, shrinking E to expand partition C, or shrinking F to expand partition D), there is an additional step to move the unallocated space before merging it into this partition.
Extend a Partition to Another Disk
Some people have a special issue where there is no other partition on the same disk, or not enough free space in all other partitions. In this case, no software can extend a partition with free or unallocated space on another separate hard disk. However, NIUBI Partition Editor has a "Clone Disk Wizard" feature to help you clone this disk to a larger one; when cloning, you can extend the C: drive and other partitions with the extra disk space.
Besides shrinking and extending partitions in Windows 10/11, NIUBI Partition Editor helps you perform many other disk partition management operations.
 © 2009 - NIUBI Technology All Rights Reserved. |