
When the C: drive is full in a Windows 10 computer, you can add free space to the C: drive from D or other partitions on the same disk. This allows you to fix this issue quickly without reinstalling the operating system and programs. To do this, there are two choices: using the Windows native Disk Management tool or third-party disk partition software. This article introduces how to add free space to the C: drive in a Windows 10/11 computer using 2 kinds of free tools.
Add More Space to the C Drive in Windows 10/11 Without Software
Some people prefer to use Windows built-in tools, thinking they have the best compatibility. But in fact, Disk Management is not the best tool if you want to add disk space to the C: drive from other volumes. The reasons will be explained in the next section. First, let's see how Disk Management works.
Two points you should know before following the steps below:
- The adjacent partition D must be deleted; back up or transfer all files in D to another partition before deleting it.
- As with the C: drive, D must be a primary partition.
Steps to add space to the C: drive in Windows 10/11 without software:
- Press Windows and X together on the keyboard and then click Disk Management.
- Right-click the D: drive (the adjacent partition behind C) and then select "Delete Volume".
- Right-click the C: drive and select "Extend Volume".
- Click "Next" until "Finish" in the pop-up "Extend Volume Wizard" window.
Then, all the disk space of the D: drive will be added into partition C.
There is a "Shrink Volume" option in Disk Management, so why not shrink partition D instead of deleting it? This is because this function can only generate unallocated space on the right side of D, and the "Extend Volume" function cannot merge unallocated space into the right-adjacent (E:) or non-adjacent partition (C:).
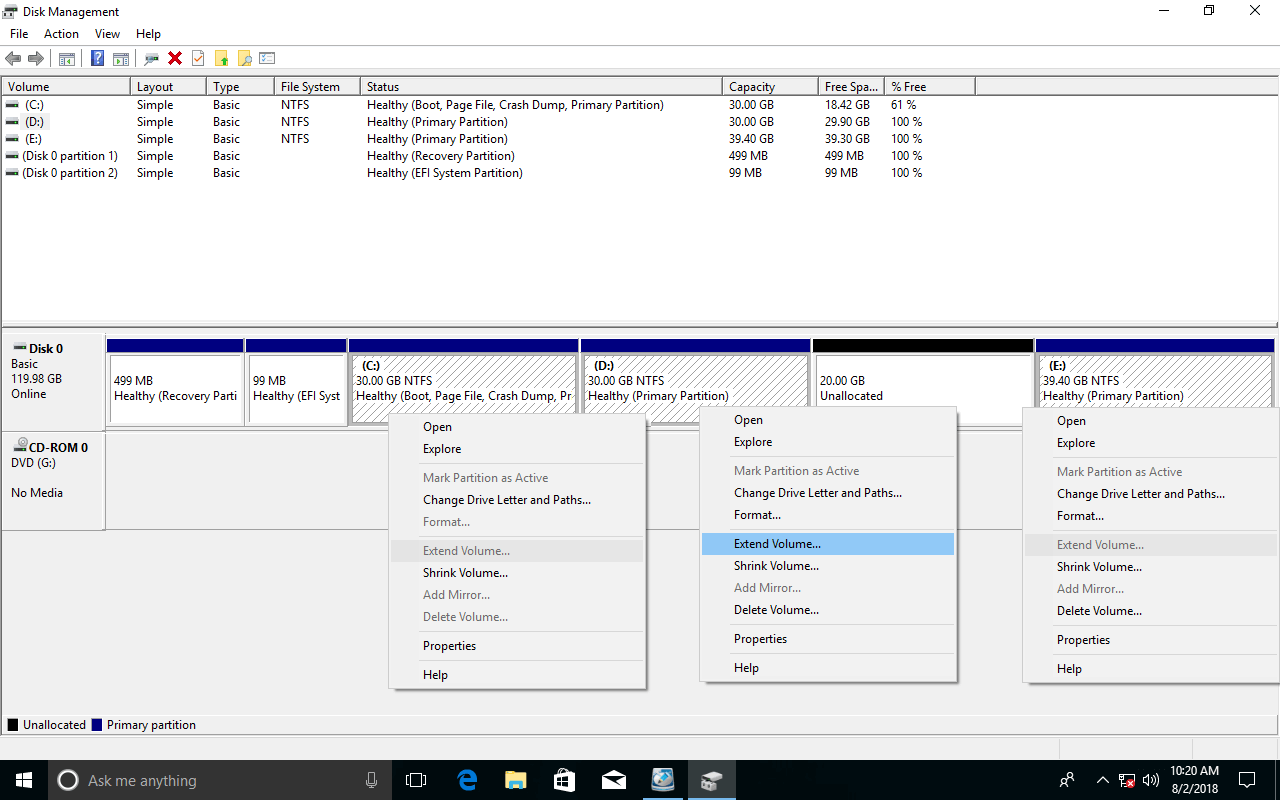
Therefore, the only way to add space to the C: drive with Disk Management is by deleting the adjacent partition on the right.
If D is a logical drive, you cannot add its disk space to the C: drive even after deleting it.
With disk partition software, you do not need to delete any partition. For Windows 11/10/8/7/Vista/XP home computer users, NIUBI Partition Editor has a free edition.
How to Add Free Space to the C Drive from D (Contiguous)
Better than Disk Management, NIUBI Partition Editor can generate unallocated space on either the left or right side when shrinking a partition. To add more space to the C: drive, you can shrink D and generate unallocated space on the left side, then the C: drive can be extended easily. The operating system, programs, and everything else remain the same as before.
Download this tool, and you will see all disk partitions with their layout and other information.
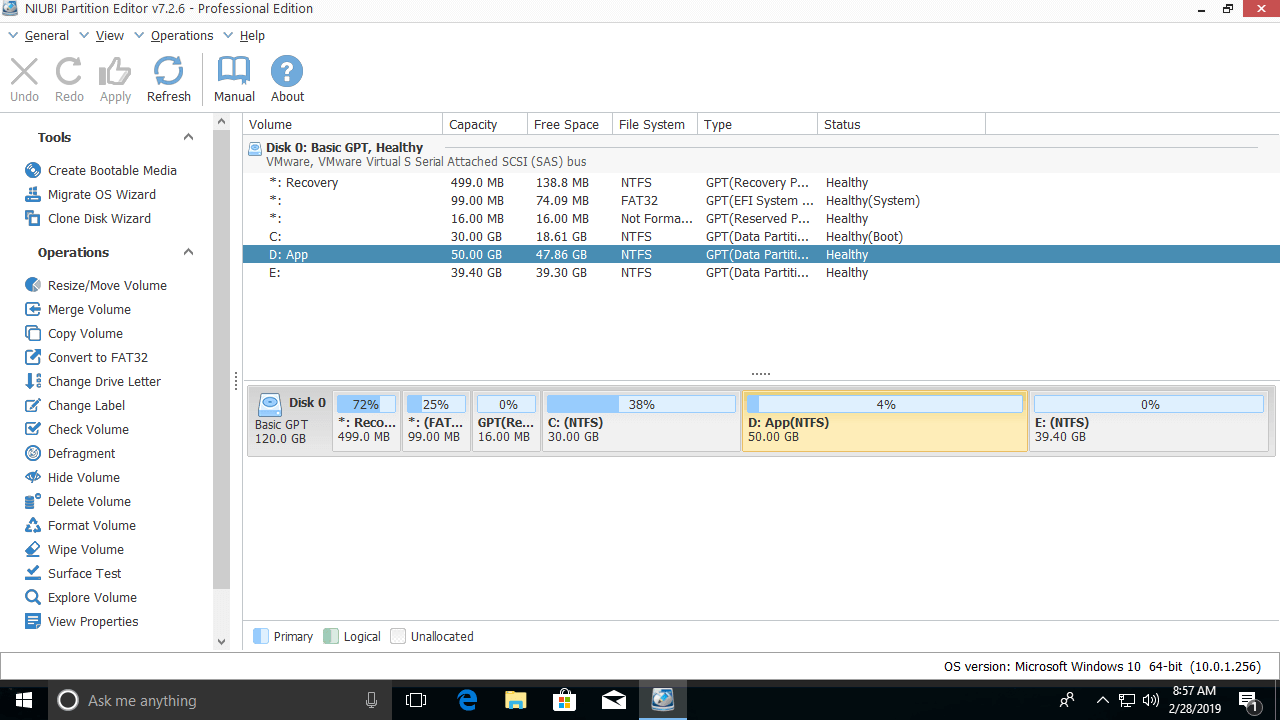
Steps to add space to the C: drive in a Windows 10/11 computer from D:
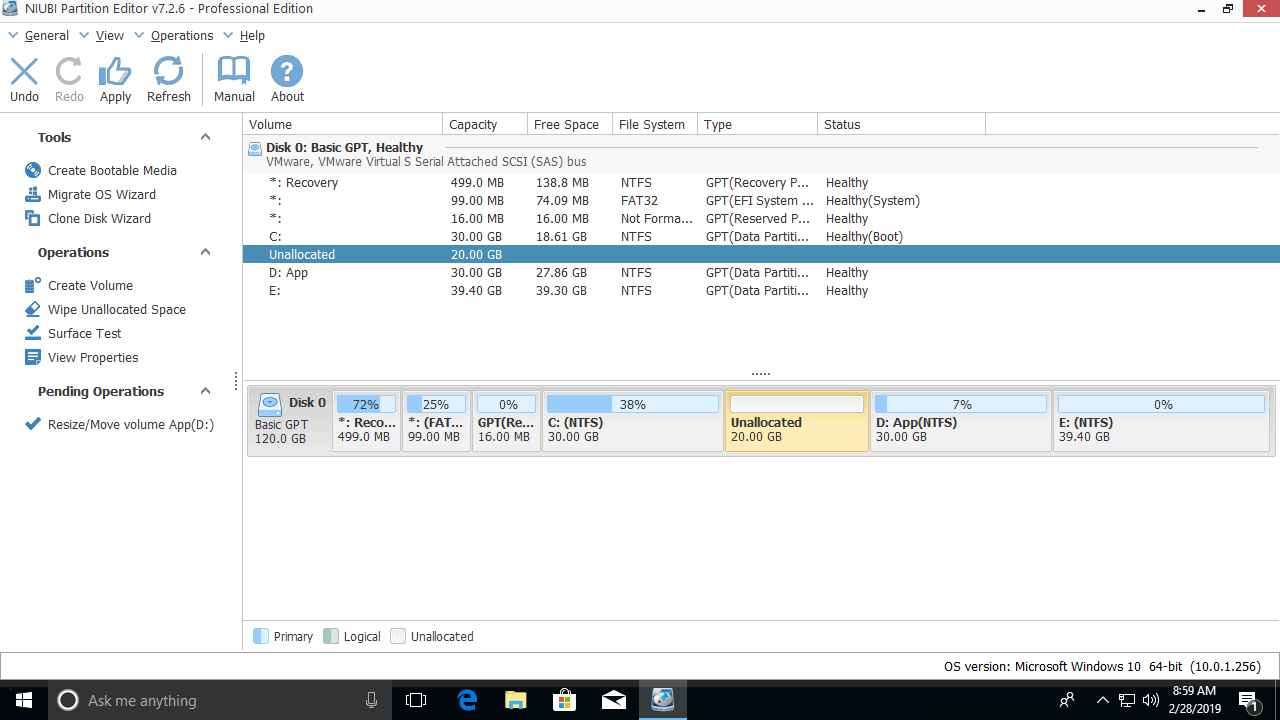
Step 1: Right-click the adjacent drive D: and select "Resize/Move Volume", then drag the left border to the right in the pop-up window.
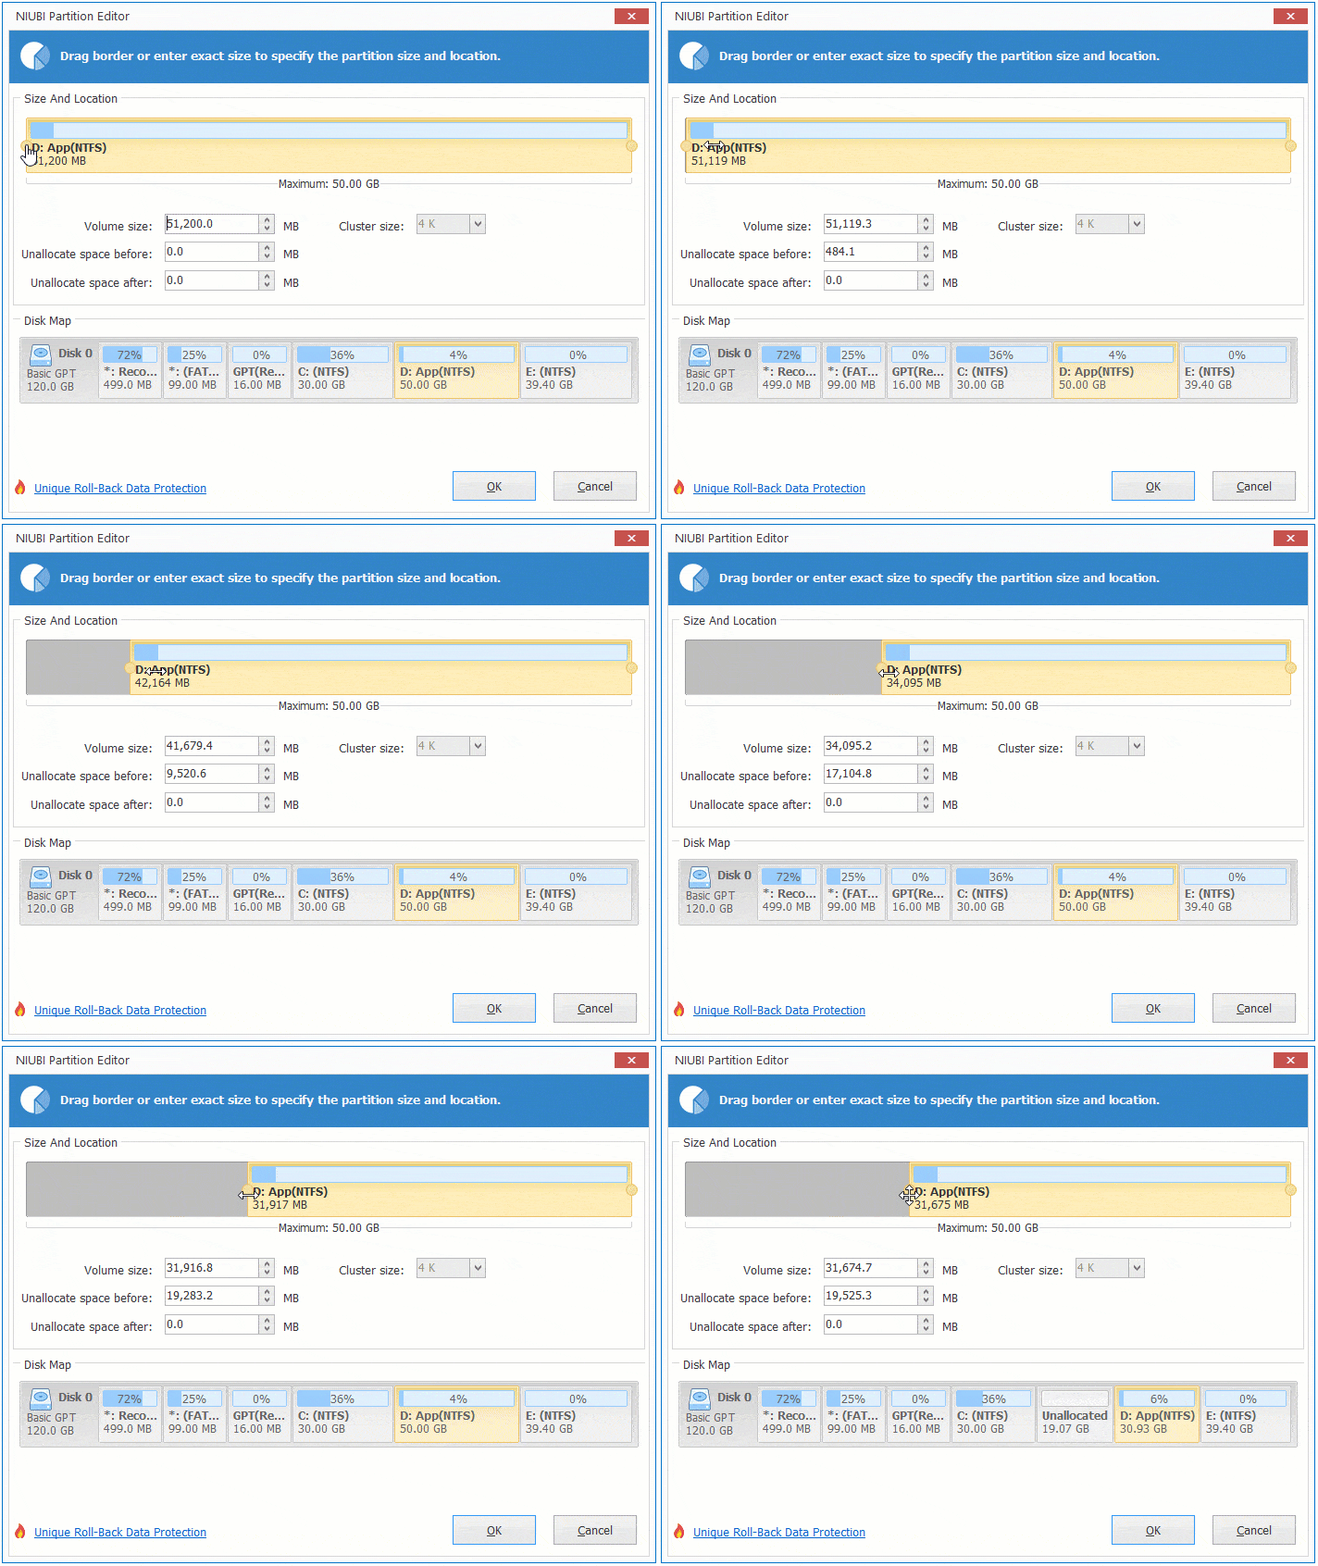
A portion of the free space will be converted into unallocated space on the left side of D.
Step 2: Right-click partition C: and select "Resize/Move Volume" again, then drag the right border to the right.
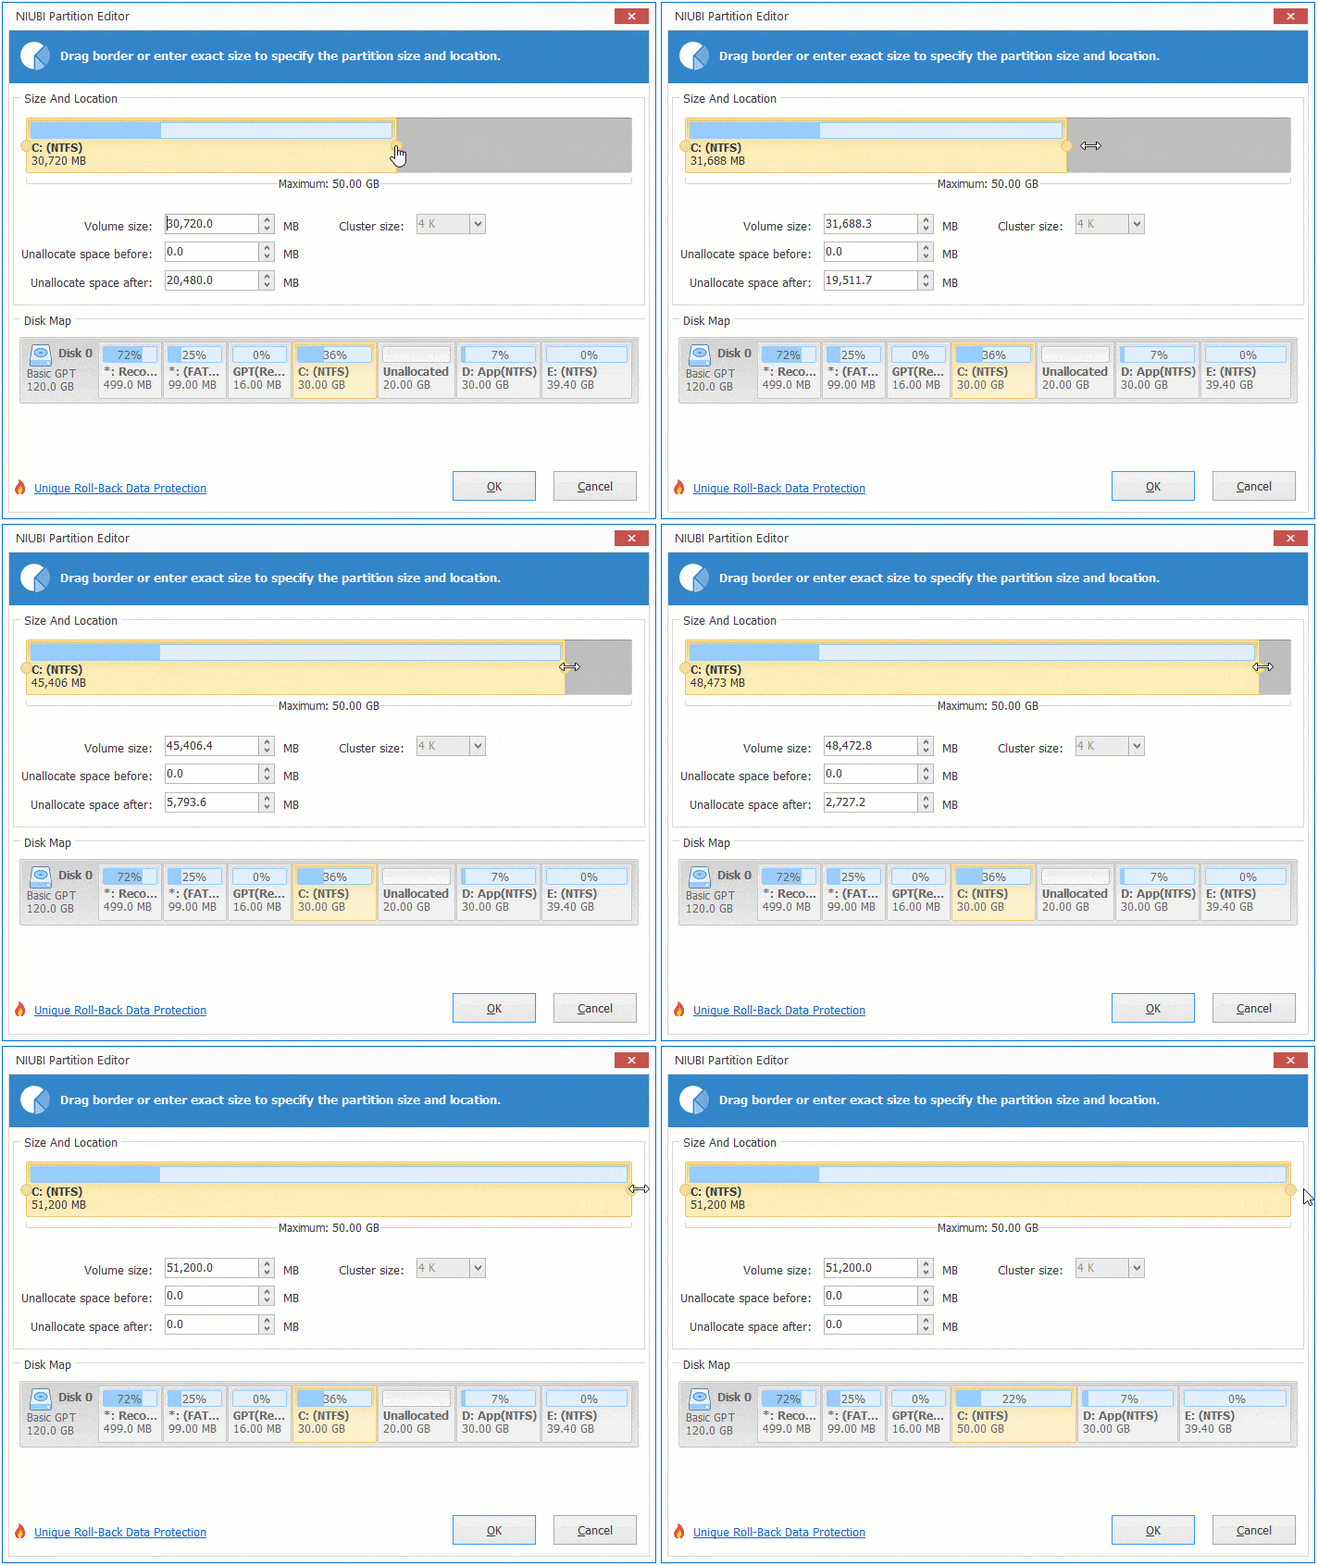
The unallocated space will be merged into the C: drive.
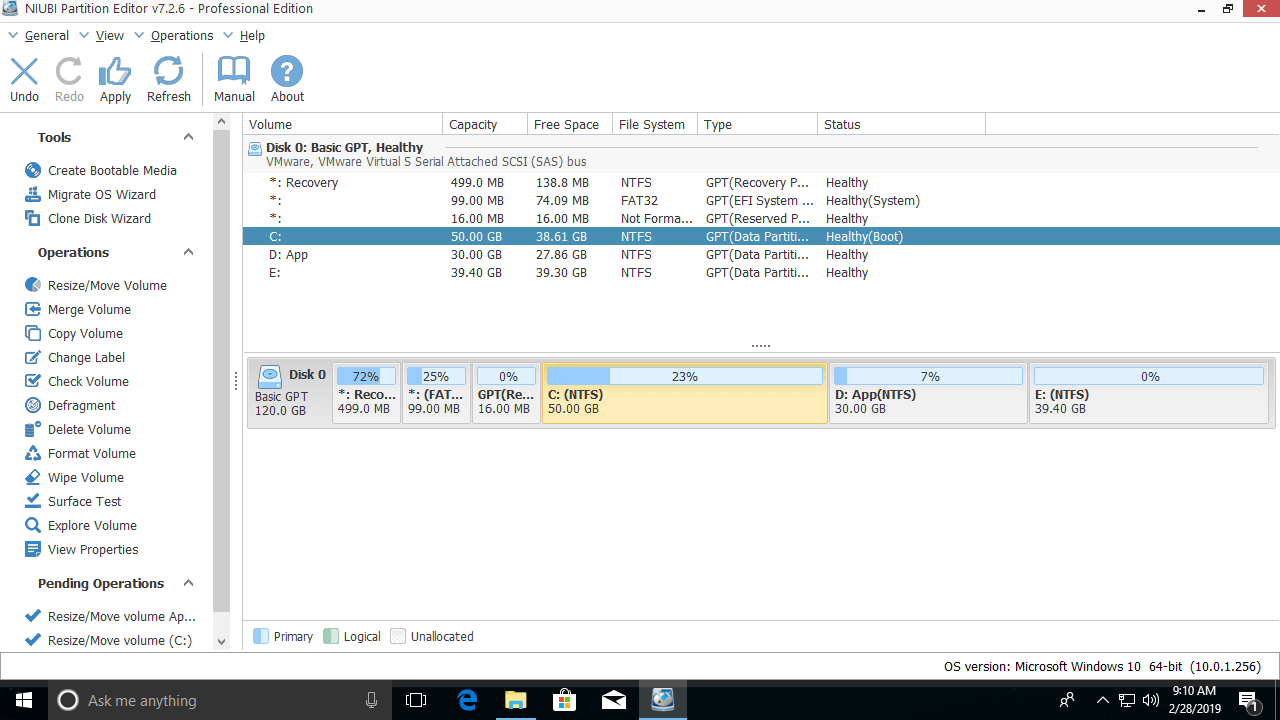
Step 3: Click "Apply" on the top left to execute. (All operations before clicking "Apply" only work in virtual mode.)
How to Add Space to the C Drive from E (Non-Adjacent)
If there is not plenty of free space in volume D, you can get it from the non-adjacent drive E. Follow Step 1 above to shrink E and generate unallocated space on the left side. There is an additional step to move the unallocated space next to the C: drive.
To do this, right-click the D: drive and select "Resize/Move Volume". In the pop-up window, drag the middle of the D: drive to the right.

If there is no other volume on the same disk, no software can add space to the C: drive from another separate disk. You can copy this disk to a larger one and extend the C: drive with the extra disk space. Besides shrinking and extending partitions, NIUBI Partition Editor helps you perform many other disk partition management operations.
 © 2009 - NIUBI Technology All Rights Reserved. |