
Most Windows computer users have to manage disk partitions. For example, if there is only a C: drive on the system disk, you may need to shrink it and create more volumes for different purposes. Conversely, if the C: drive gets full, you have to merge partitions or shrink the D: drive to extend the C: drive. To shrink a partition in a Windows 10/11 computer, you may try the native Disk Management tool or disk partition software. Disk Management has a "Shrink Volume" function, but it can only shrink NTFS partitions. Disk partition software is much easier and more powerful for shrinking a Windows 10 hard drive, but you had better run safe software. This article introduces how to shrink a volume in Windows 10/11 with both kinds of tools.
How to Shrink a Volume in Windows 10 with Disk Management
It is easy and fast to decrease partition size with Disk Management. However, it is not 100% safe, as partitions can sometimes be damaged by this native tool. Pay more attention when there are both primary and logical partitions on a disk. In addition, because of some limitations, Disk Management cannot shrink a volume in some cases.
To shrink a volume in Windows 10/11 with Disk Management:
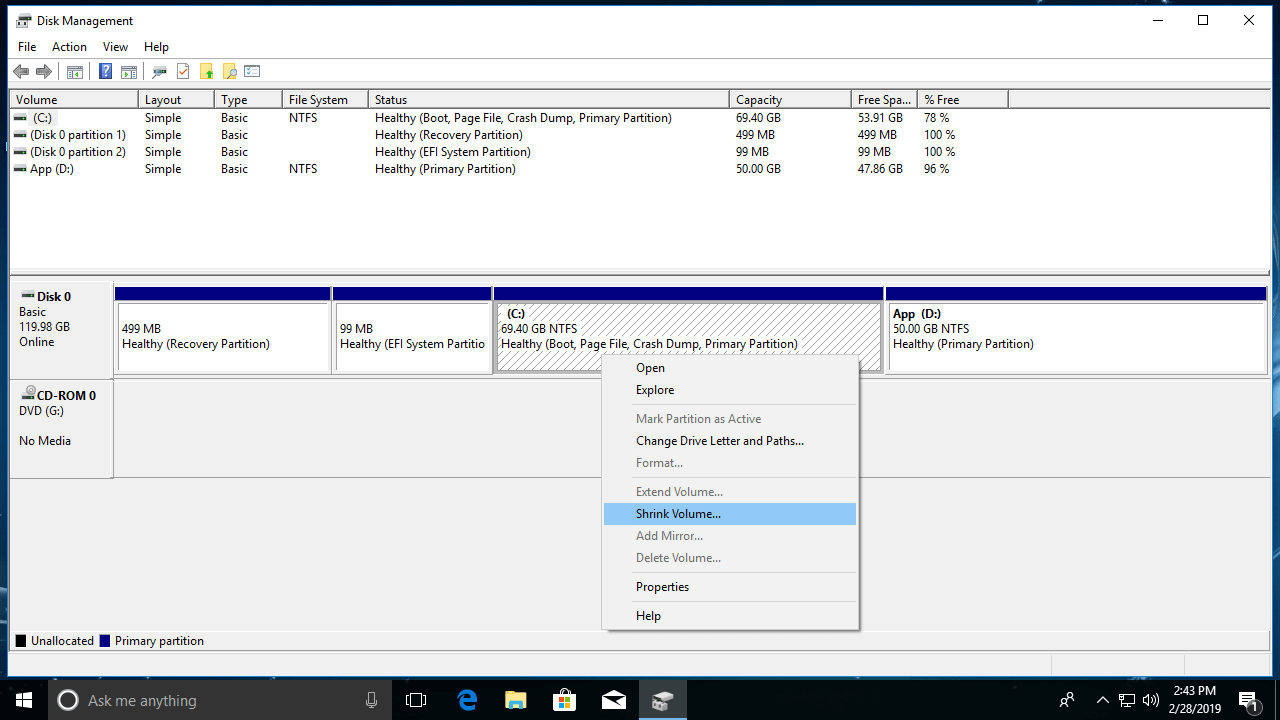
- Press Windows and X on the keyboard, and then select Disk Management.
- Right-click the partition that you want to decrease and select Shrink Volume.
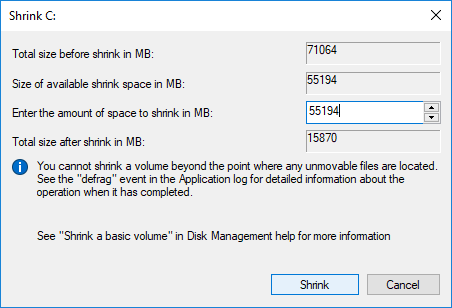
- Enter the amount of space to shrink in MB (1GB=1024MB), and then click Shrink to proceed.
If this hard disk is GPT style, the EFI and System Reserved partitions cannot be shrunk or extended by Disk Management.
Limitations of Shrinking a Windows 10 Partition with the Native Tool
The Windows built-in "Shrink Volume" function can only decrease a partition to the left and generate unallocated space on the right side. The serious issue is that this unallocated space cannot be merged into its right-adjacent partition or any non-adjacent partitions via the "Extend Volume" function. That means, if you want to shrink the C: drive to expand the D: drive, or shrink the D: drive to expand the C: or E: drive, it is impossible with Disk Management.
Other limitations include:
- Only NTFS partitions can be shrunk.
- In some special situations, you cannot shrink the C: drive even if there is enough free space.
- You can only shrink a little space if there are unmovable files located in the partition that you want to shrink.
Better Way to Shrink a Partition in Windows 10/11
Compared with the Windows 10 built-in tool, disk partition software is much more powerful. For Windows 11/10/8/7/Vista/XP home computer users, NIUBI Partition Editor has a free edition. When shrinking a partition, this tool can:
- Generate unallocated space on either the left or right side.
- Support both NTFS and FAT16/32 partitions.
- Shrink a volume to the minimum size even if there are unmovable files.
- Move unallocated space and merge it into any contiguous or non-adjacent partitions on the disk.
How to shrink a volume in Windows 10/11 with the free partition manager:
Download NIUBI Partition Editor, right-click the D: drive and select "Resize/Move Volume"; drag either border to the other side, then it will be shrunk.
If you drag the left border to the right in the pop-up window,
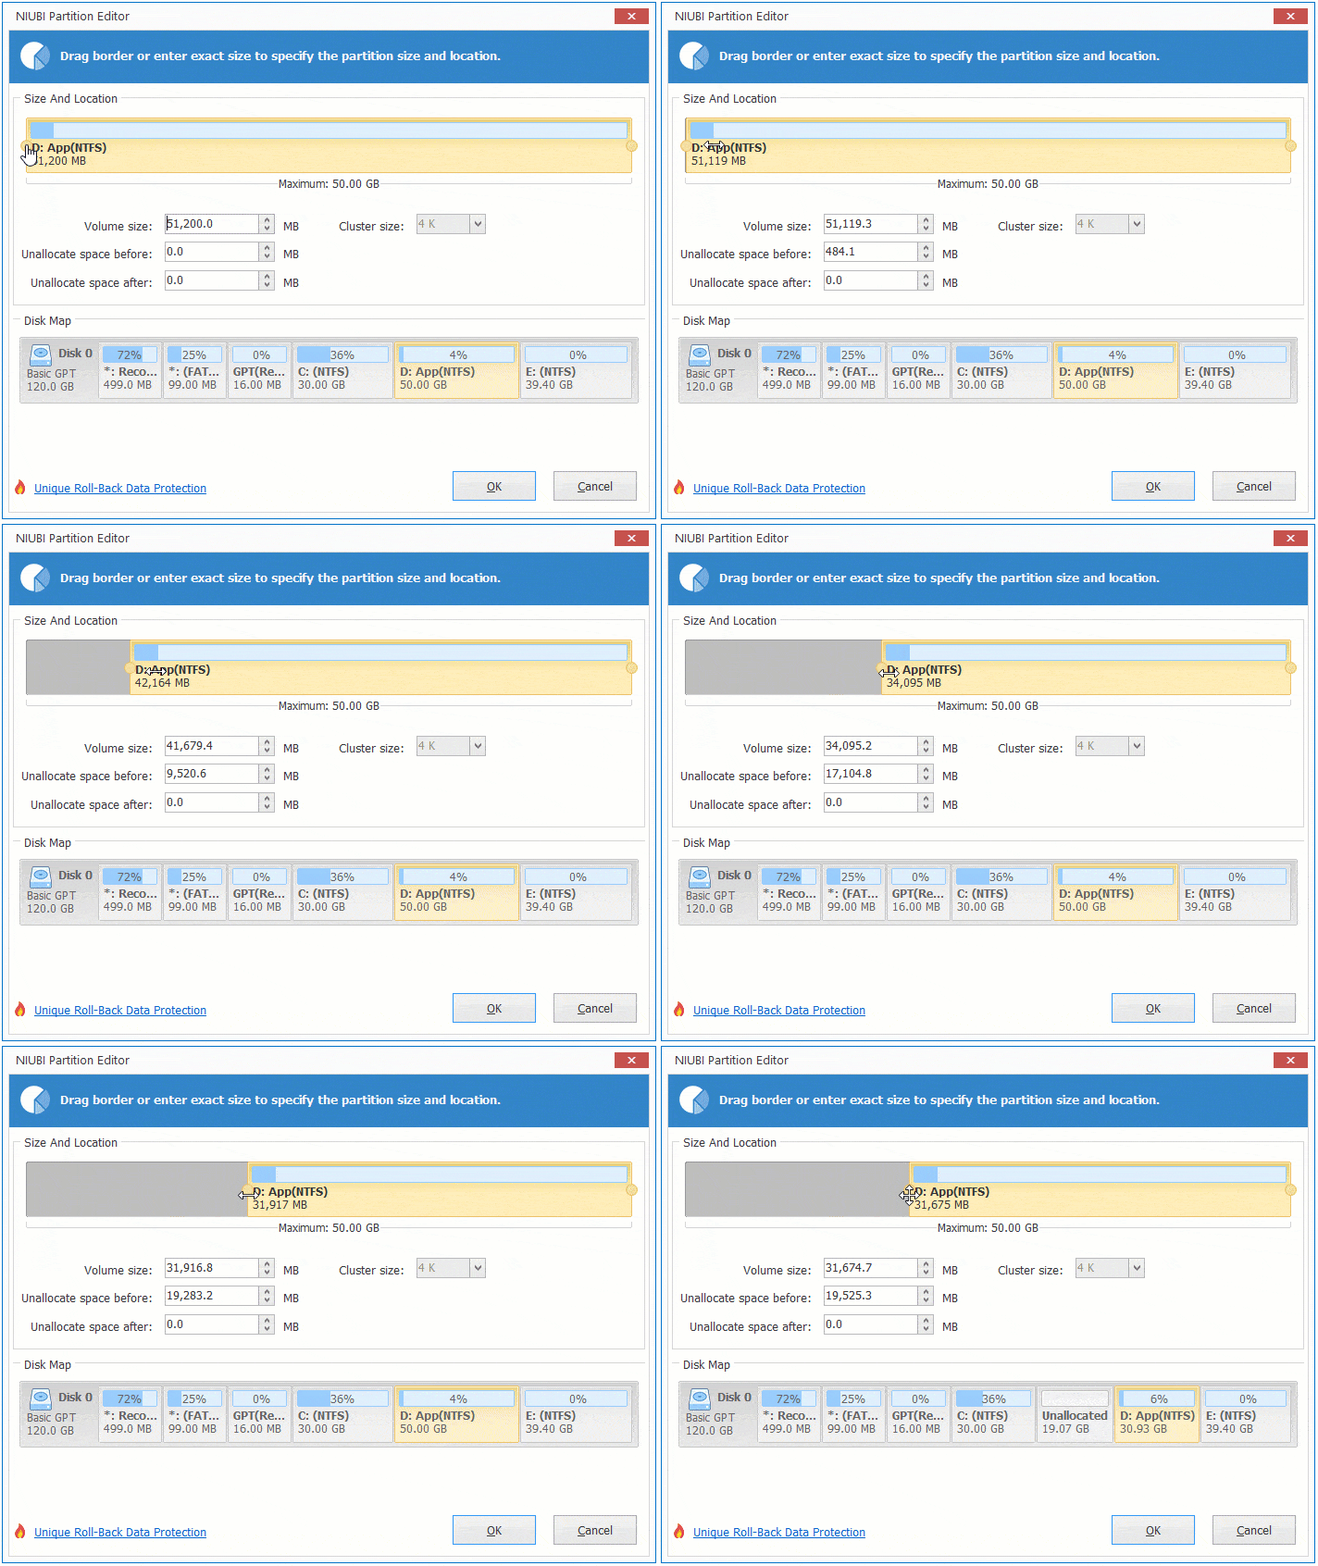
Unallocated space will be generated on the left side.
If you drag the right border to the left in the pop-up window,

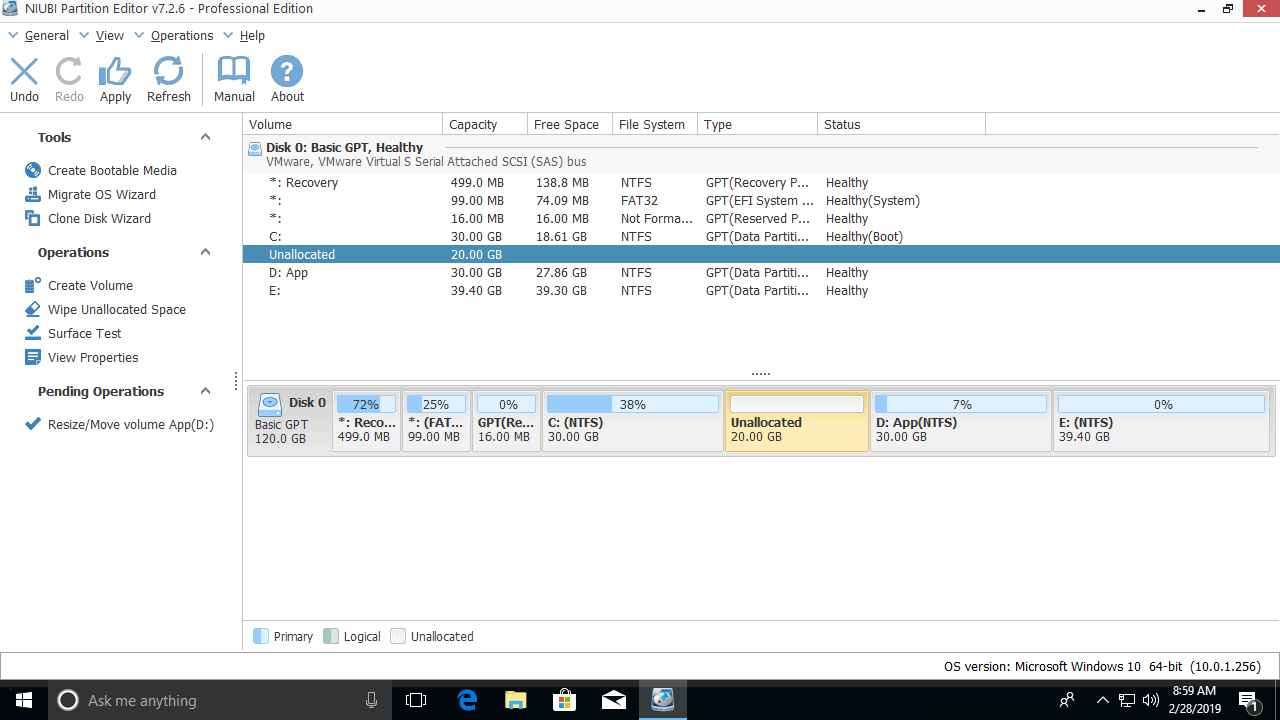
Unallocated space will be generated on the right side.
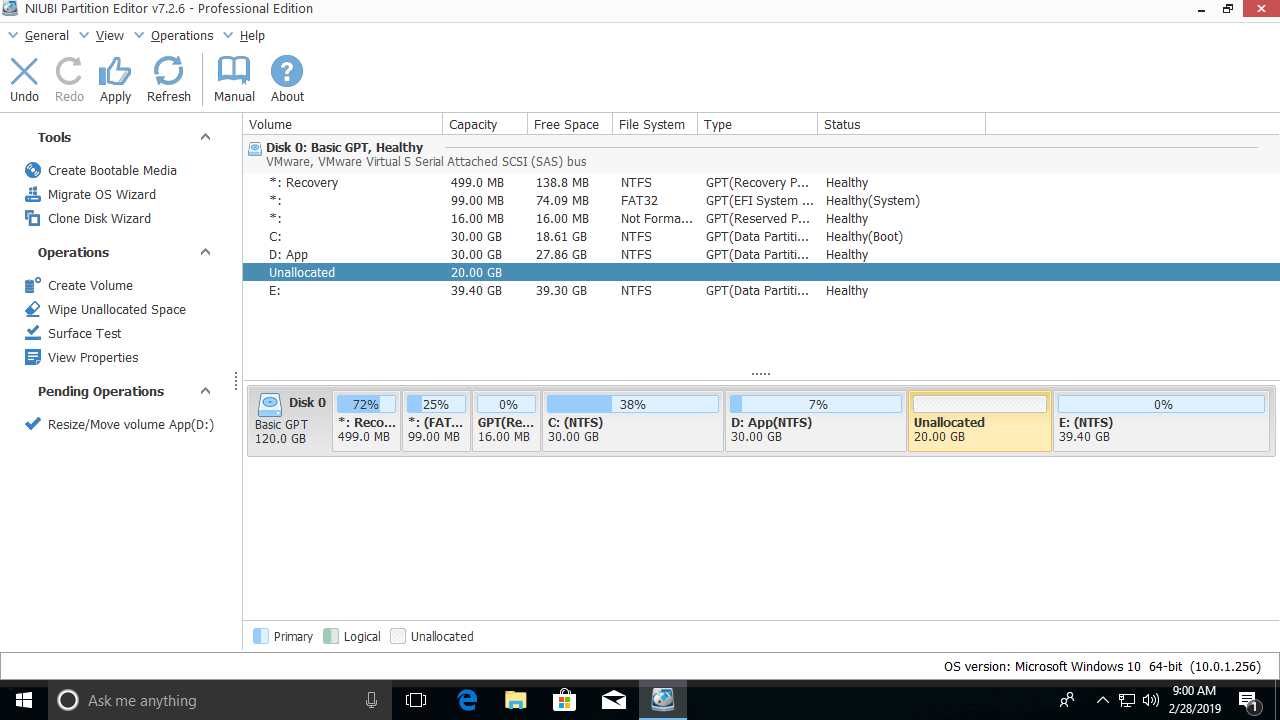
If you want to create a new partition, right-click the unallocated space and select "Create Volume".
If you want to expand the C: or E: drive, right-click it and select "Resize/Move Volume" again, then drag the border to merge the unallocated space.
Besides shrinking partitions in Windows 11/10/8/7/Vista/XP, NIUBI Partition Editor helps you extend, merge, copy, convert, defrag, wipe, check, hide, and scan partitions, etc.
 © 2009 - NIUBI Technology All Rights Reserved. |