
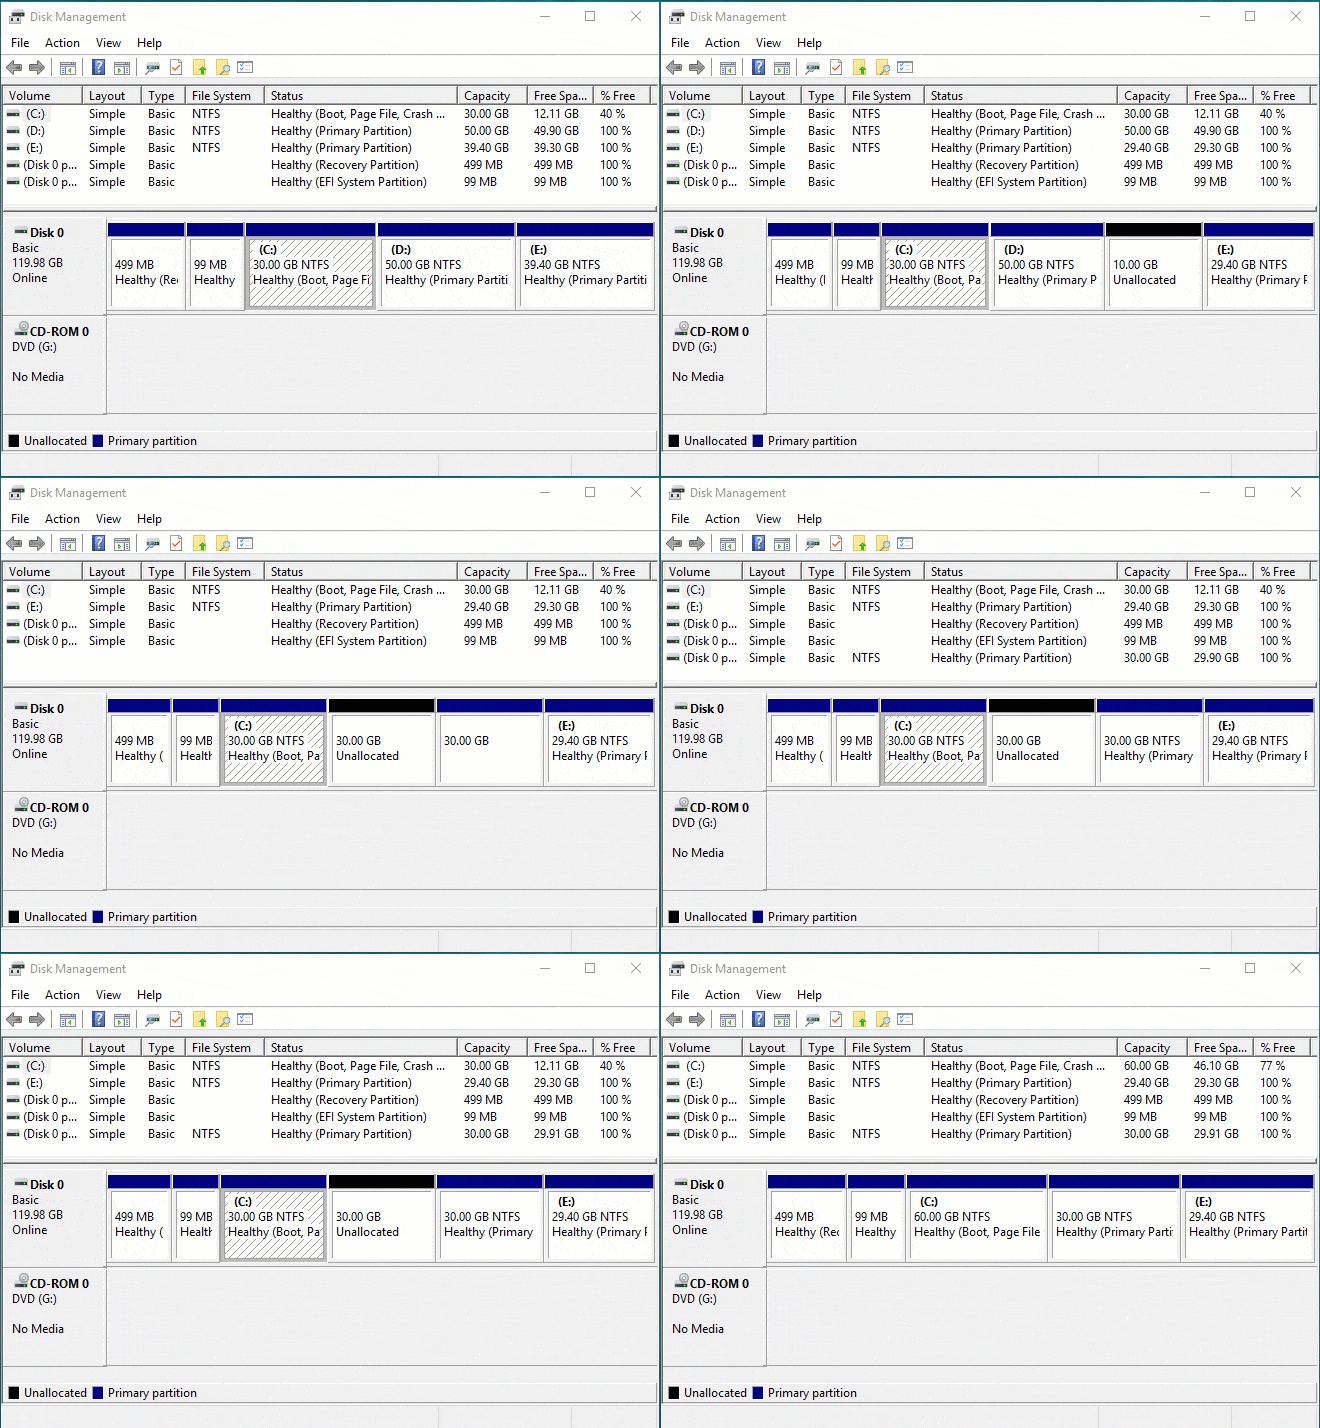
All disk partitions are allocated while installing the Windows operating system, but some drives may become full, especially the system C: drive and the drives for backups, videos, and projects. For data volumes, it is easy to solve this problem by transferring files or changing the output path, but for the system C: drive, you cannot do this. The Windows 10 native Disk Management has Shrink Volume and Extend Volume functions to decrease and increase partition size, but it cannot extend a drive by shrinking another one. It is useless in most cases.
To change the partition size in Windows 10/11, disk partition software is much more powerful. Among such software, NIUBI Partition Editor features Hot Clone, 1-Second Rollback, Virtual Mode, and Cancel-at-Will technologies to protect your system and data intact. Any free space in a volume can be transferred to another on the same disk. To do this, you just need to drag and drop on the disk map. This article introduces how to increase partition space in Windows 10 without data loss.
Increase Partition Size of C: from D: or E:
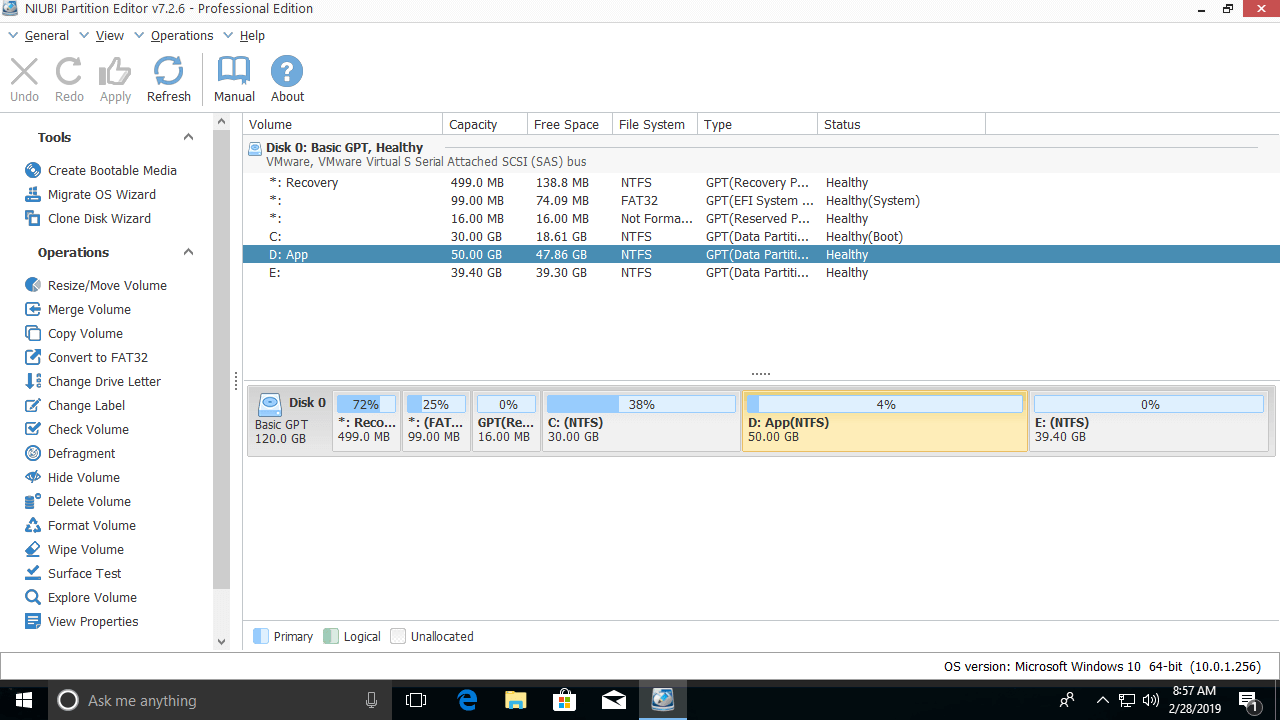
Download NIUBI Partition Editor, and you will see the disk partitions with their structure and other information. There are 3 partitions: C:, D:, and E: on Disk 0. D: is adjacent and on the right side of the C: drive. E: is non-adjacent to the C: drive.
How to increase partition C: from D::
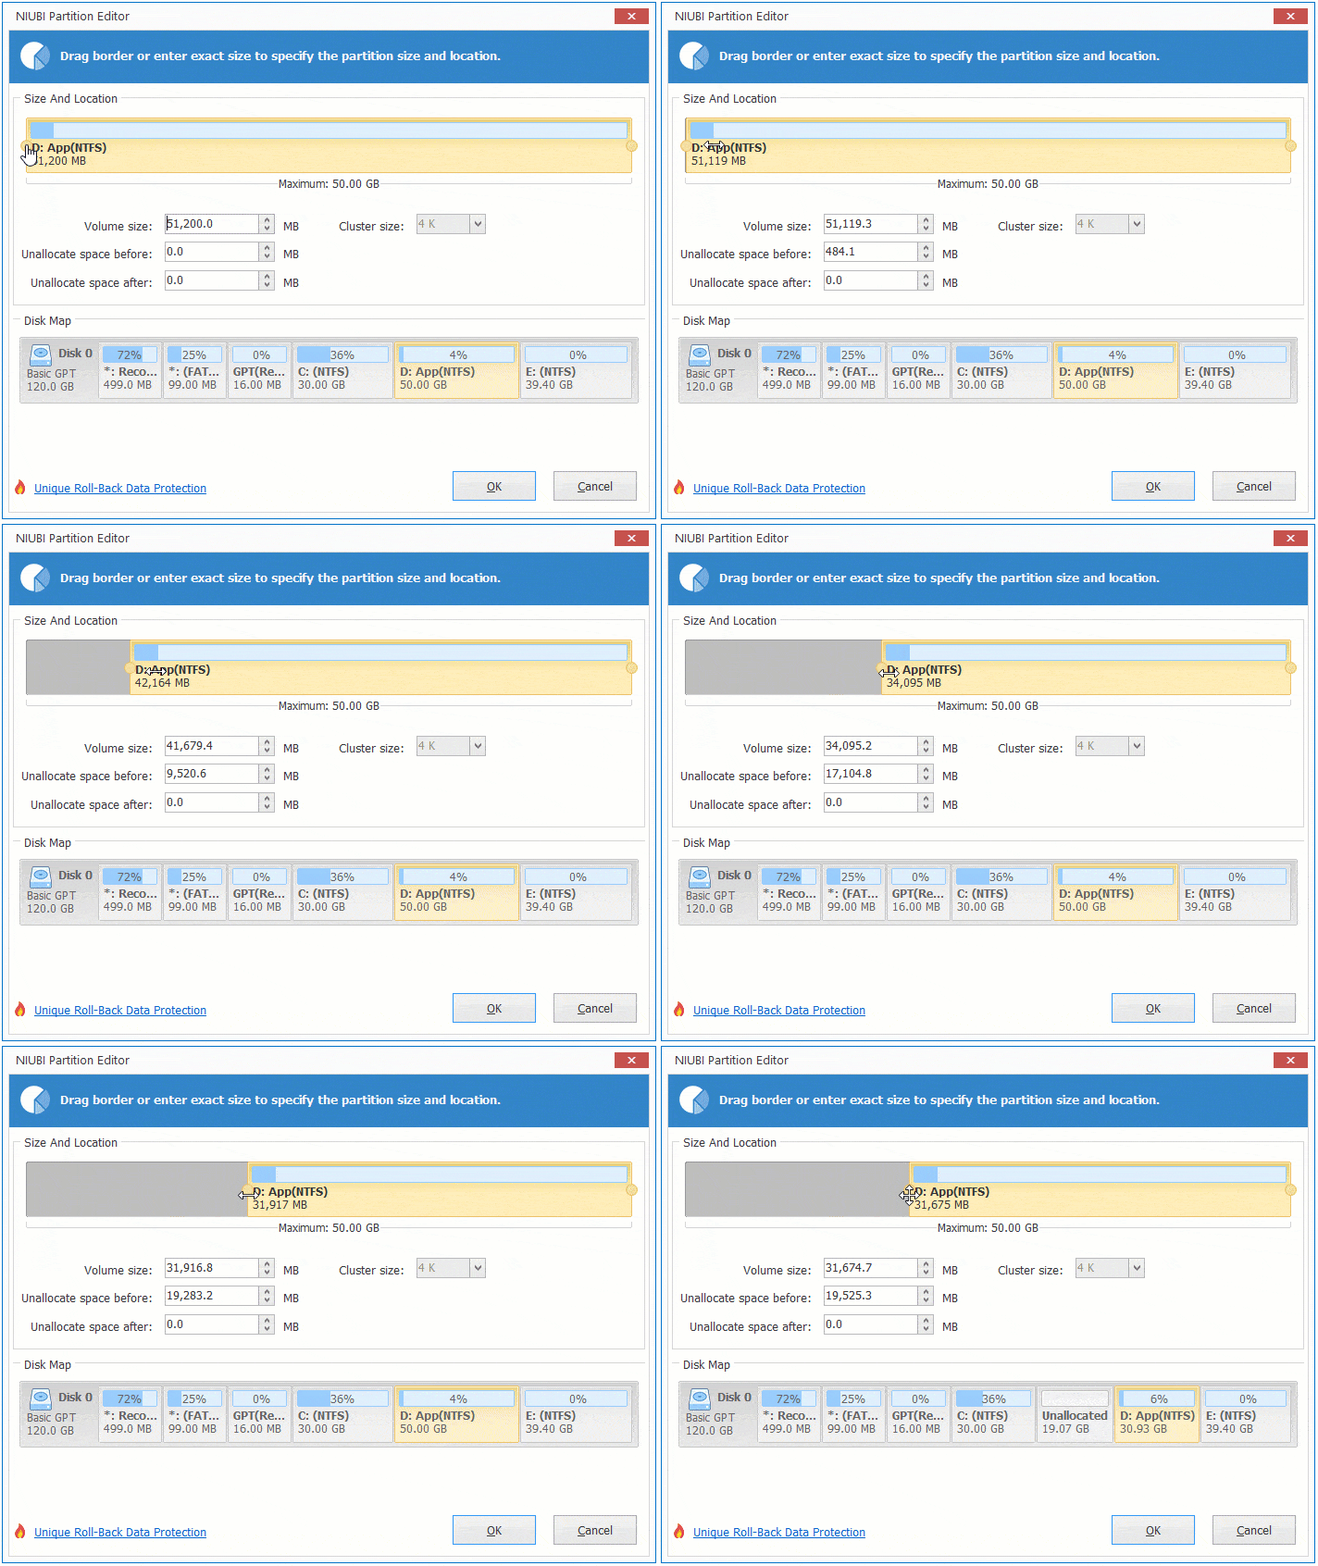
Step 1: Right-click the D: drive and select "Resize/Move Volume"; drag the left border to the right in the pop-up window.
Then a portion of the free space in the D: drive is converted to unallocated space on the left side.
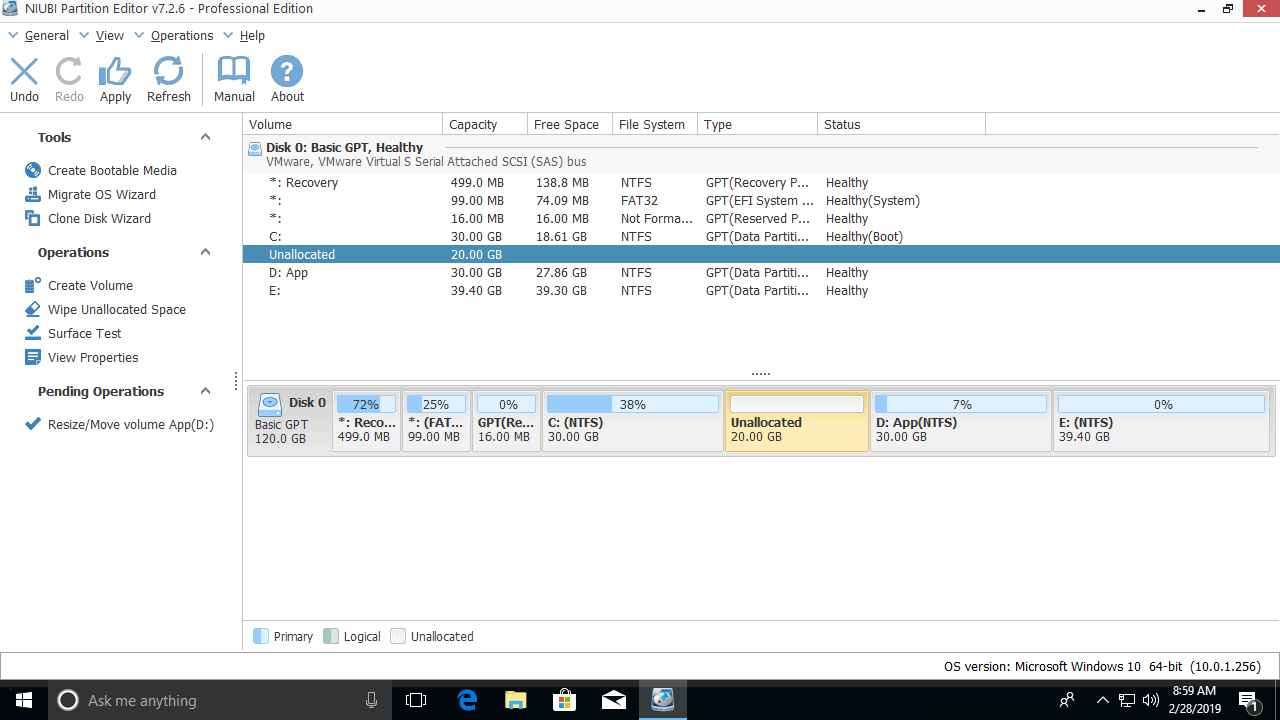
Step 2: Right-click the C: drive and select "Resize/Move Volume" again; drag the right border to the right to merge this unallocated space.
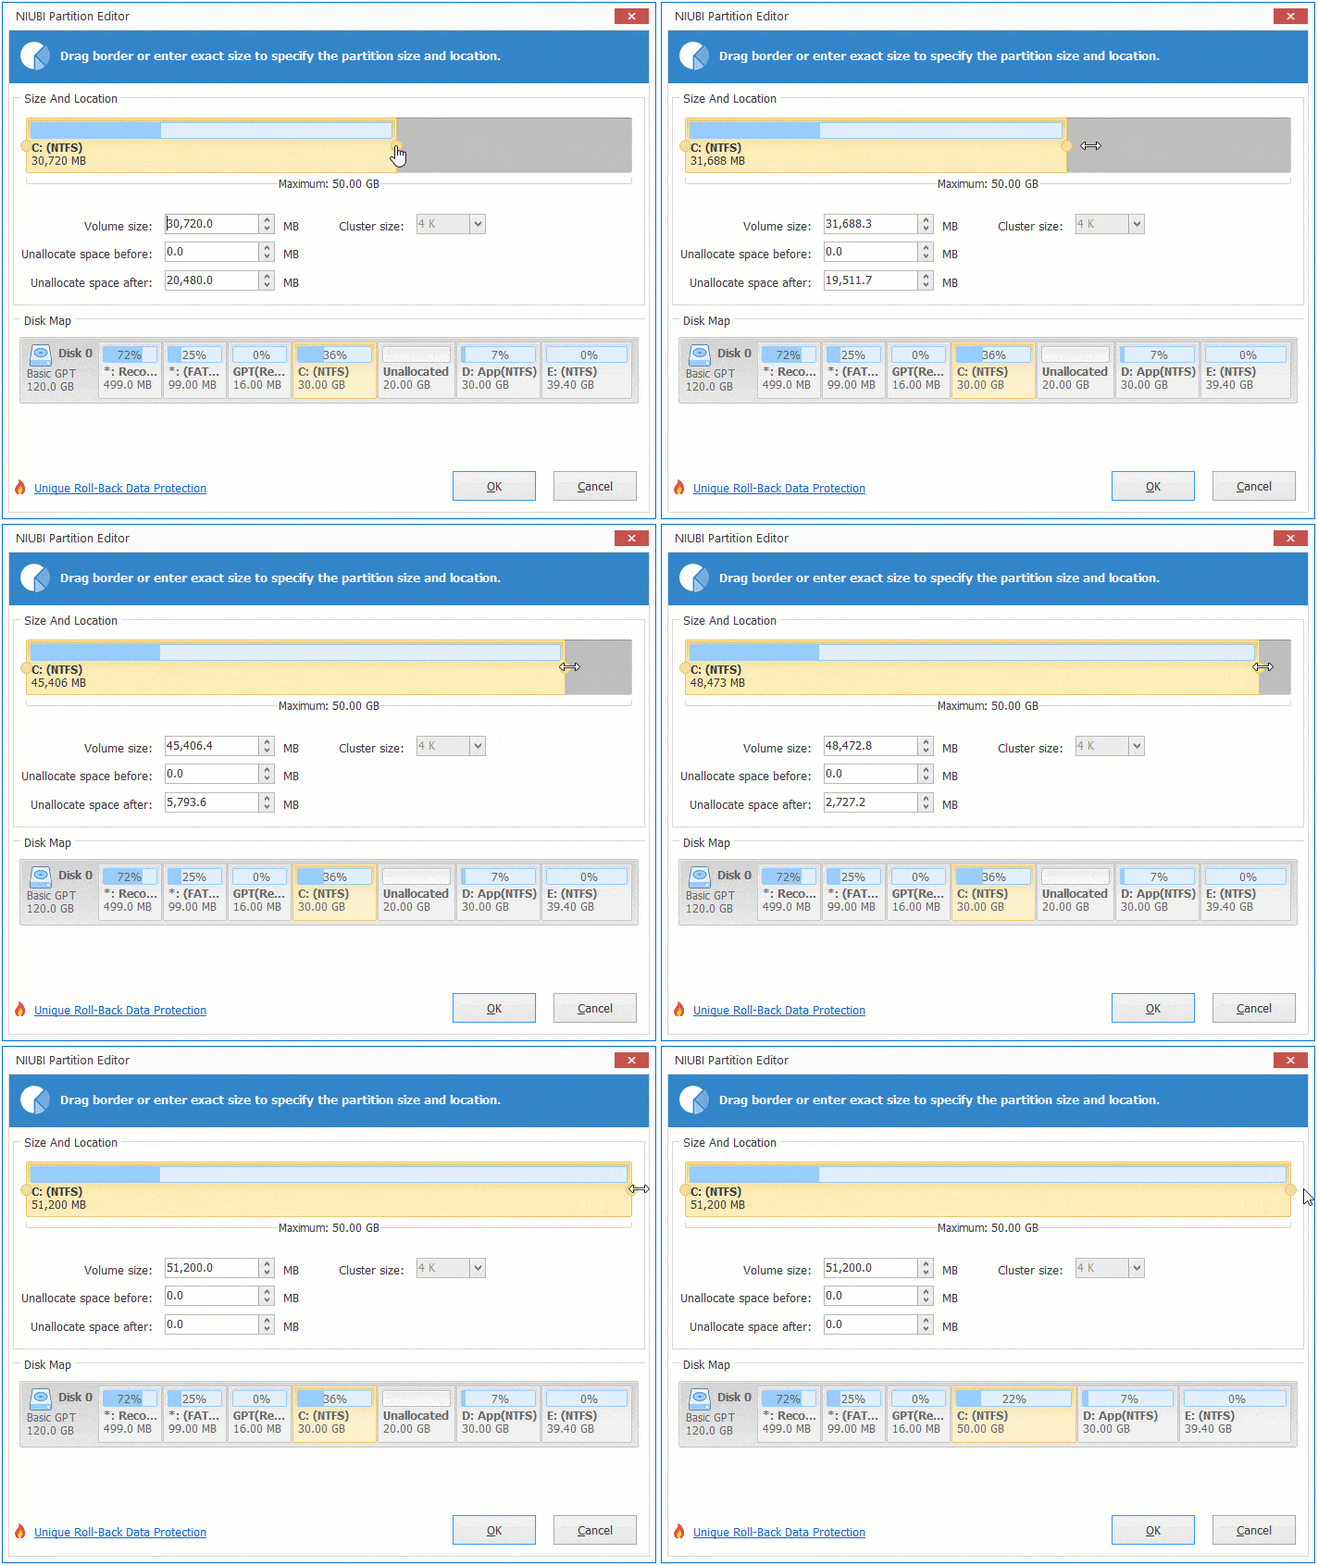
Then the size of the C: drive is increased to 50GB.
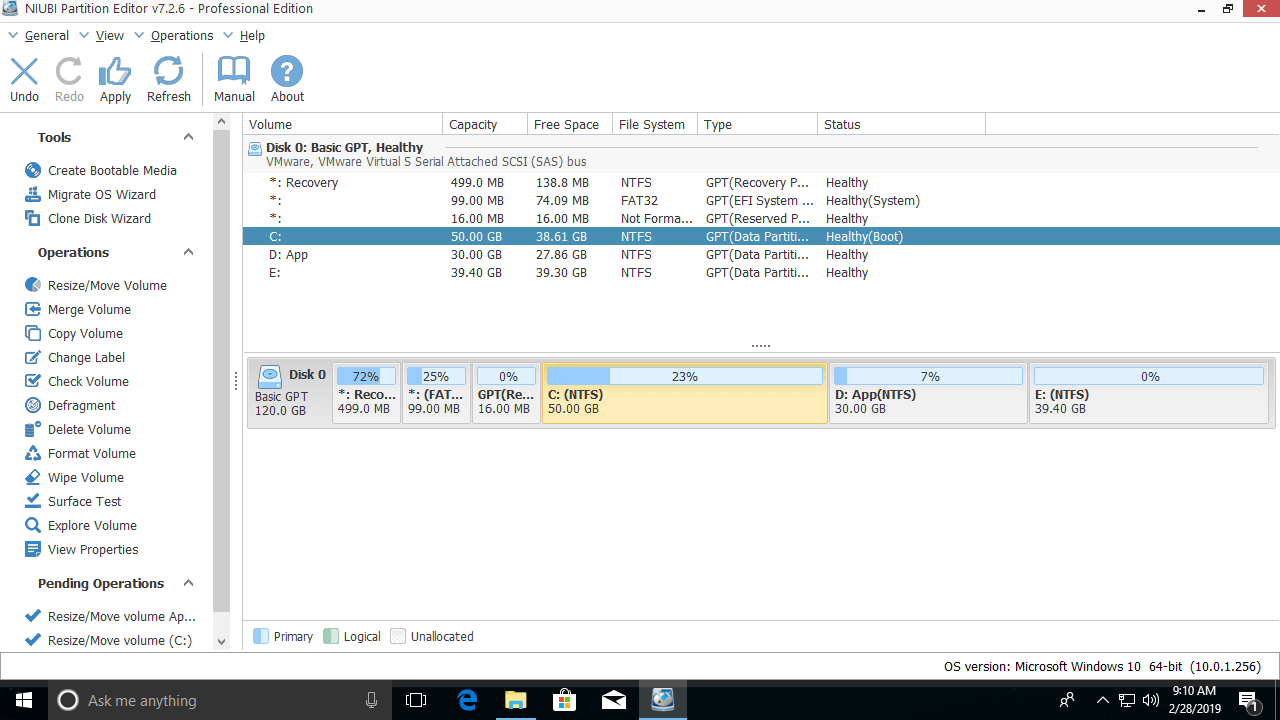
How to increase partition C: from E::
It is similar; follow STEP 1 to shrink the non-adjacent partition (E:) and generate unallocated space on the left side. Before merging the unallocated space into the C: drive, there is an additional step to move the unallocated space next to the C: drive.
To do this, right-click partition D: and select "Resize/Move Volume"; drag the middle of the D: drive to the right in the pop-up window.
This software works in virtual mode to avoid mistakes; to change real disk partitions, you should click Apply on the top left to confirm and execute.

Increase Volume Size of D: from C:
In some computers, there is plenty of free space in the system partition C:, but volume D runs out of space. To increase the D: drive space, follow the steps:
Step 1: Right-click the C: drive and select "Resize/Move Volume"; drag the right border to the left in the pop-up window.

Then unallocated space will be generated on the right side of the C: drive.
Step 2: Right-click the D: drive and select "Resize/Move Volume" again; drag the left border to the left.

Then the unallocated space will be merged into the D: drive.
Increase Partition Space of E: from D:
Follow STEP 1 to shrink the D: drive and generate unallocated space on the right side, and then follow STEP 2 to merge the unallocated space into partition E:.
If the partitions are not in sequence (for example, C, E, D, or C, E, F on a disk), the steps are similar.
In short: right-click a volume and run "Resize/Move Volume"; drag the border to the other side, and then you can shrink this partition or extend it by merging the adjacent unallocated space. Drag the middle of the partition to the other side, and then you can swap its position with the adjacent unallocated space.
Watch the video on how to decrease and increase partition size in Windows 10:
Increase Partition Space from Another Disk
In some computers, the C: drive is full and there is not plenty of free space in the D: drive or other partitions on the same disk. Some people wonder whether it is possible to increase the C: drive size from another disk. No partitioning software can do this because a hard disk is a physical unit and its size is fixed. A 256GB disk cannot be decreased to 236GB or increased to 276GB. In this case, you can copy this disk (not a single C: drive) to a larger one with NIUBI Partition Editor. The C: drive and other partitions can be extended with the extra disk space.
 © 2009 - NIUBI Technology All Rights Reserved. |