
As with previous versions, Windows 10 has a native Disk Management tool. Besides the basic ability to create, delete, and format partitions, it can help you resize a disk partition without losing data. However, the advanced Extend Volume function can only extend a partition under restricted conditions; that means not all partitions can be extended. This article introduces how to extend a volume in Windows 10 using Disk Management and the alternative method when it cannot help you.
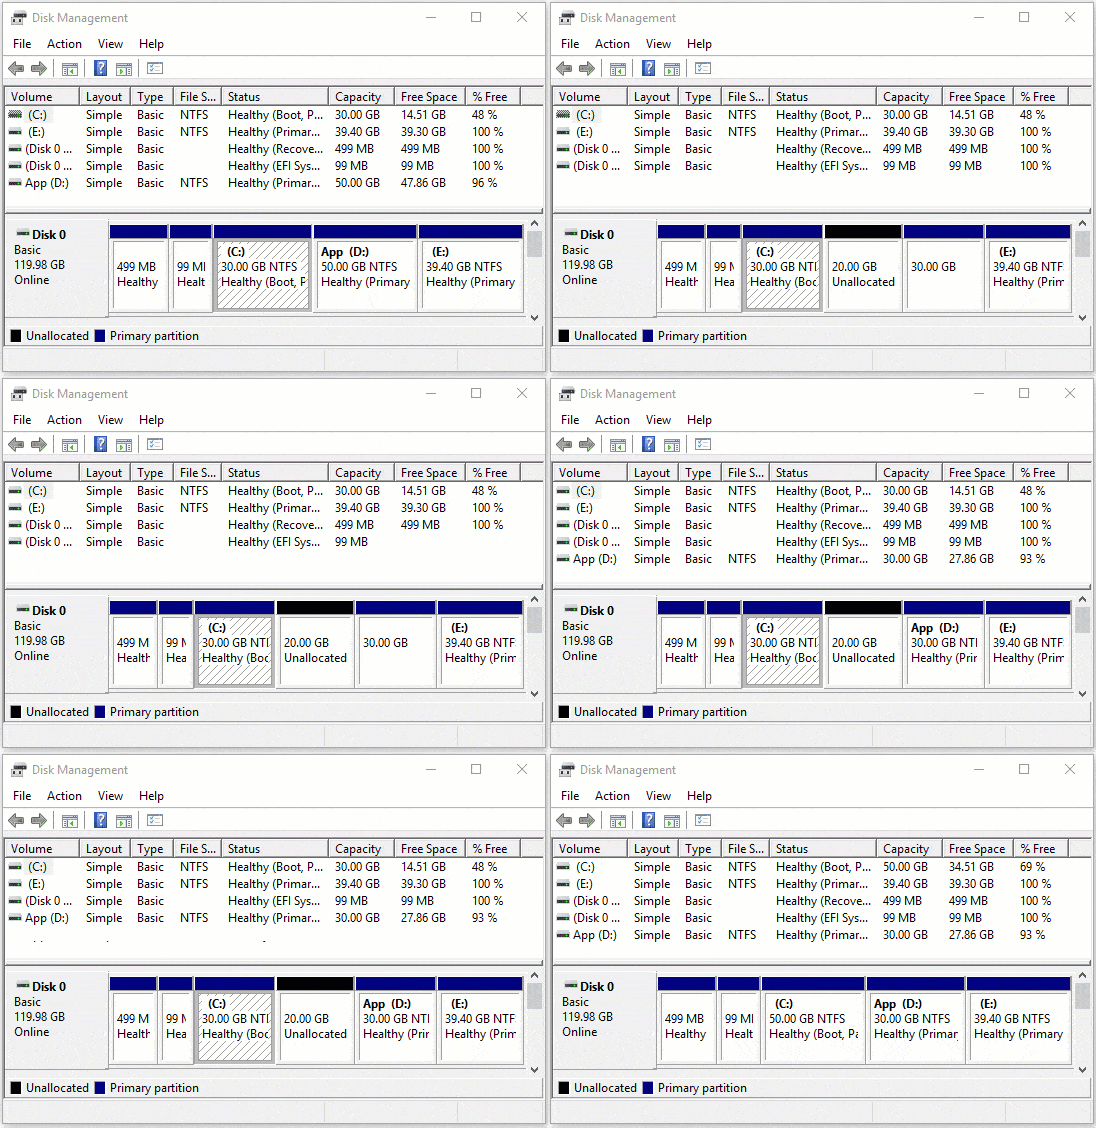
How to Extend a Partition with Disk Management in Windows 10
Basic preconditions to extend a hard drive with Disk Management:
- The partition that you want to extend must be formatted with the NTFS file system.
- There must be adjacent unallocated space on the right side.
If your disk partition configuration meets the requirements, follow the steps below:
Step 1: Press Windows and X on the keyboard, then select Disk Management from the list.
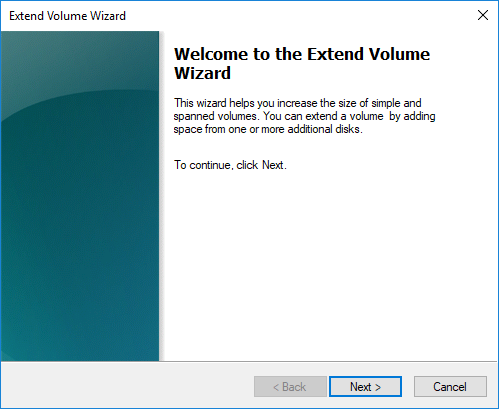
Step 2: Right-click this partition and select Extend Volume, then the Extend Volume Wizard will be launched; click Next to continue.
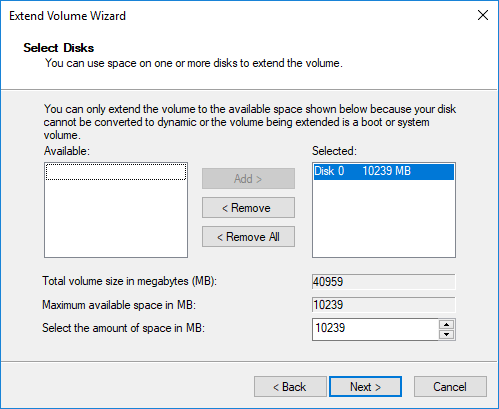
Step 3: Simply click Next to use the selected space by default, or select the available disk and amount of space manually.
In a short while, this partition will be extended.
Windows 10 Disk Management Cannot Extend Volume
The built-in Disk Management tool is easy and fast, but it is useless in most cases because the only way to enable Extend Volume is by deleting the adjacent partition on the right. It is unable to extend a drive by shrinking another one.
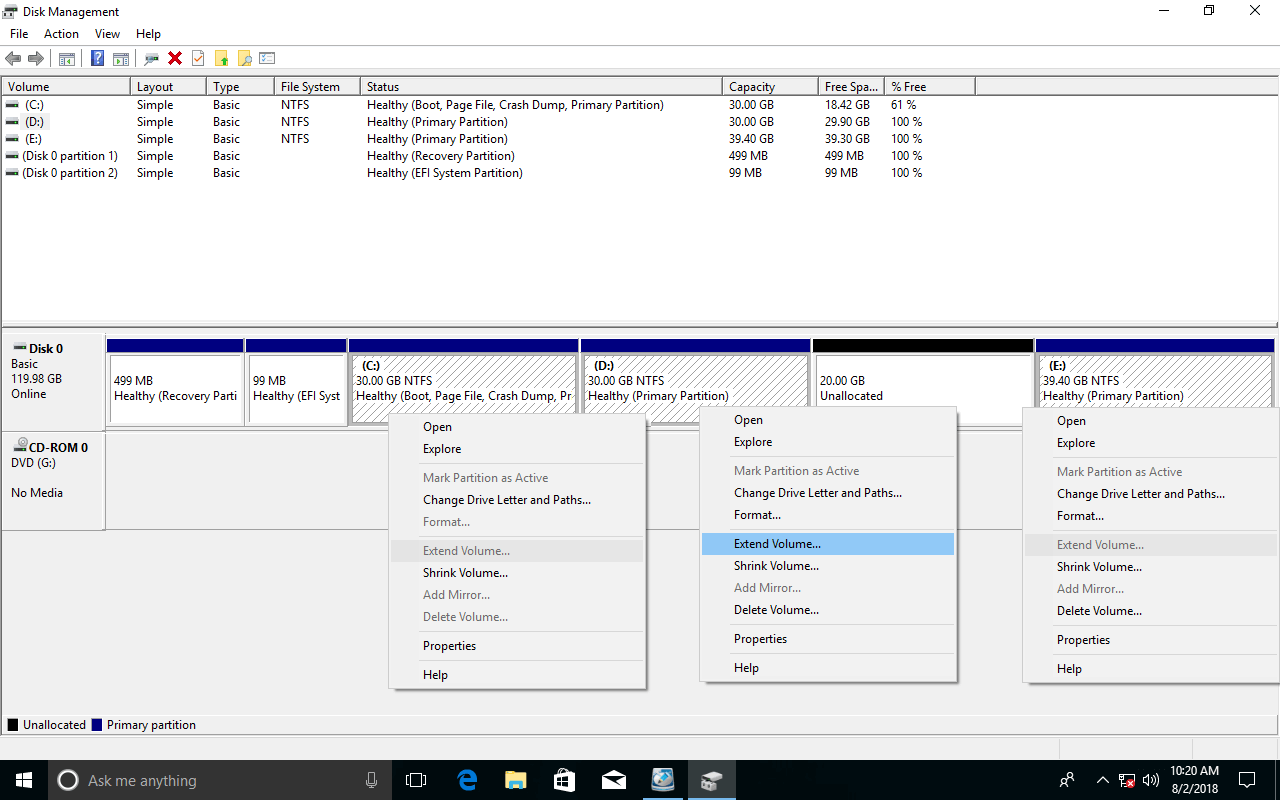
As you can see, Extend Volume is disabled for both the C: and E: drives after shrinking D.
Disk Management cannot resize a hard drive when the start position should be changed. This is the reason why Shrink Volume cannot generate unallocated space on the left side, and why Extend Volume cannot merge unallocated space into the right volume or any non-adjacent volumes.
In the following situations, Disk Management still cannot extend a partition even if there is adjacent unallocated space on the right side:
- This partition is formatted as FAT32.
- This partition is logical, and the adjacent unallocated space is generated by deleting a primary partition.
If you installed programs on the D: drive, or there is no other place to transfer all files in D, you cannot delete it to enable Extend Volume for the C: drive. That means the only way to extend a partition with Windows 10 Disk Management cannot be used.
Alternative Method to Extend a Disk Partition
With professional partition software such as NIUBI Partition Editor, there are no such limitations; you just need to drag and drop on the disk map to shrink and extend partitions.
Download this program and you will see the initial disk partition size and other parameters.
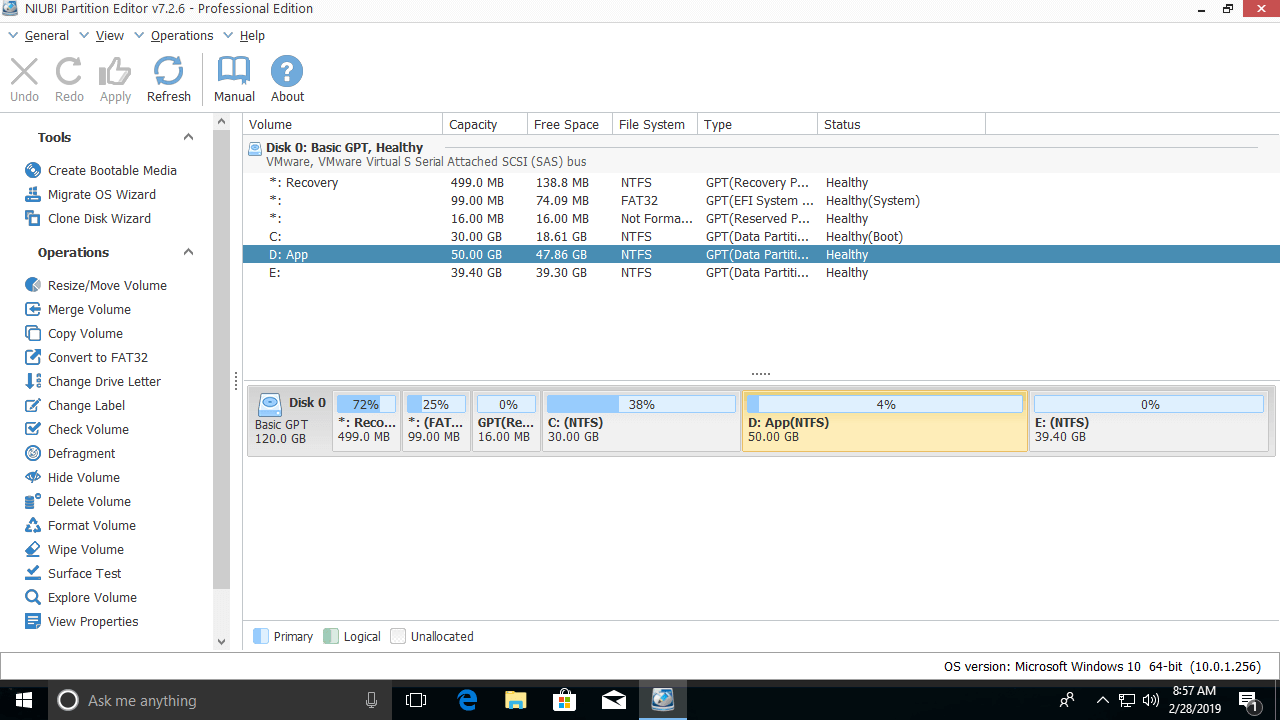
For example, how to shrink volume D and expand C:
Step 1: Right-click the D: drive and select "Resize/Move Volume"; drag the left border to the right in the pop-up window.
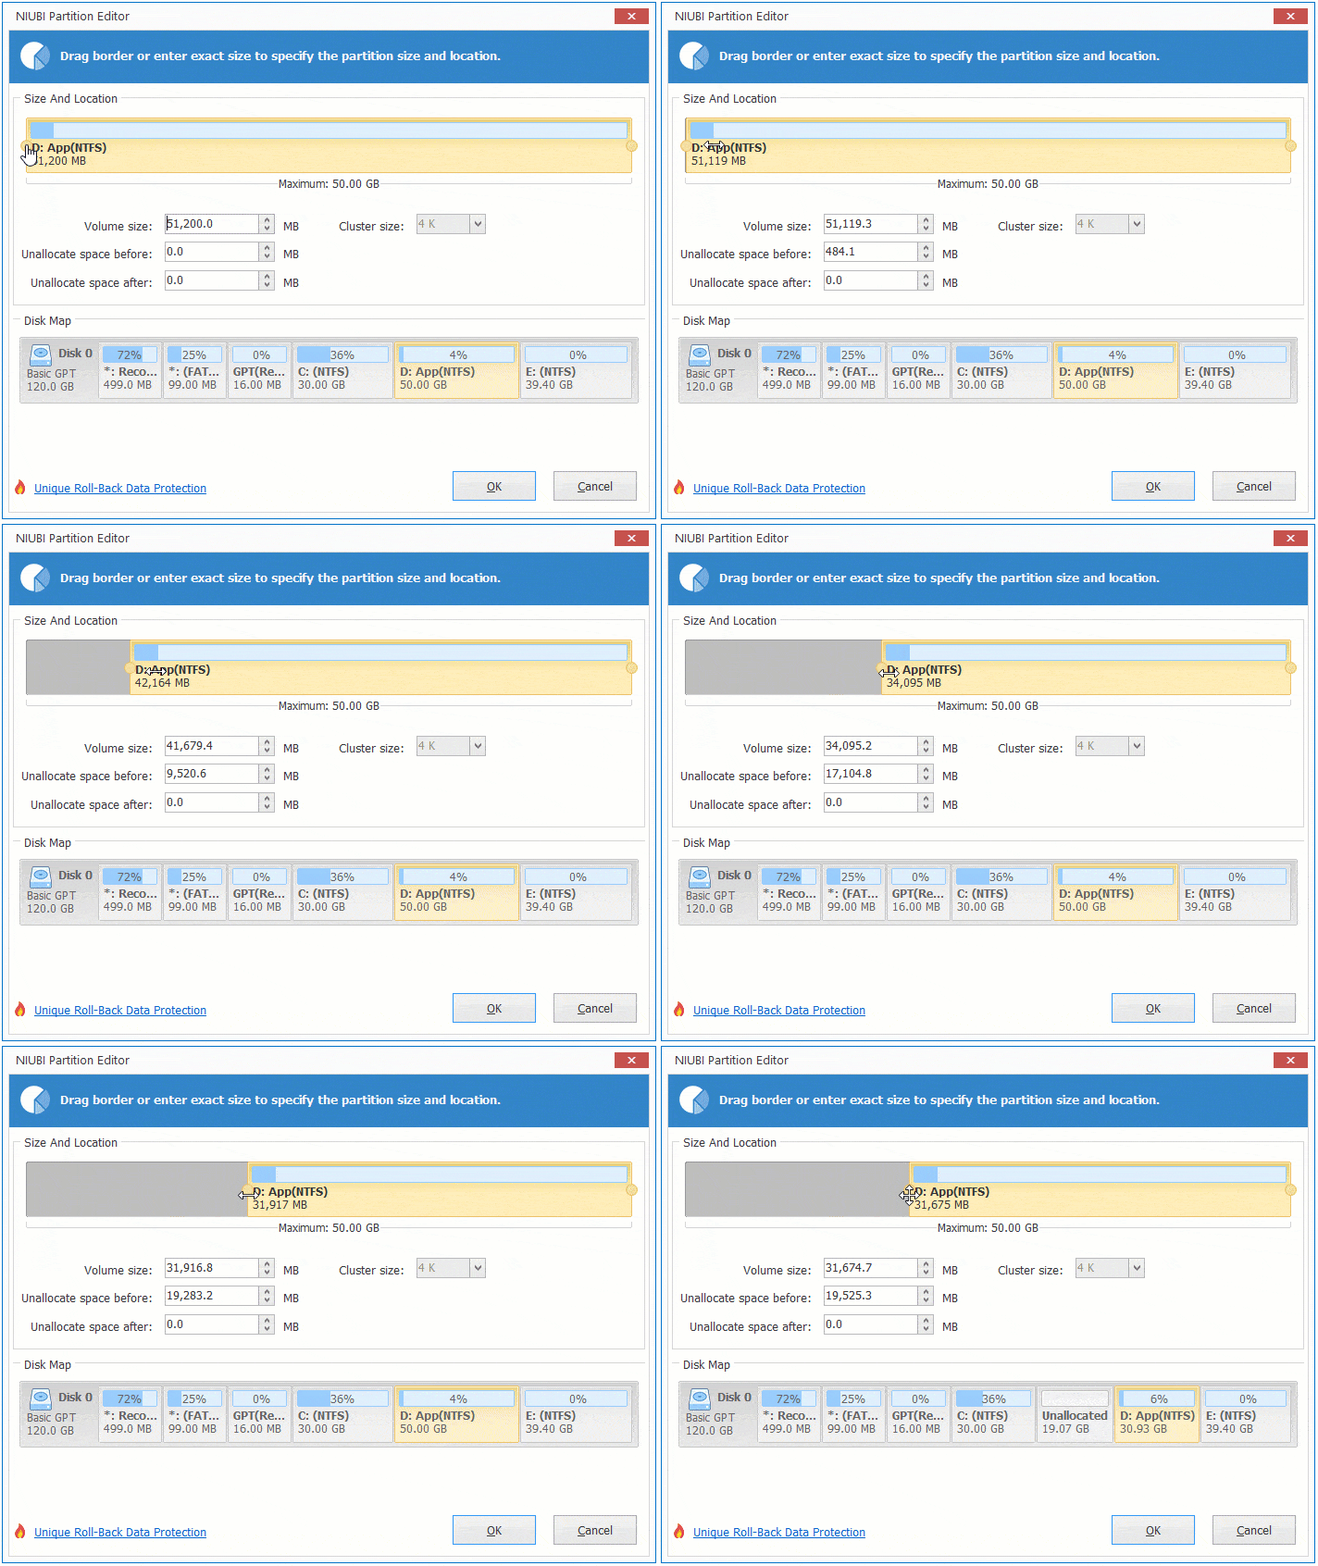
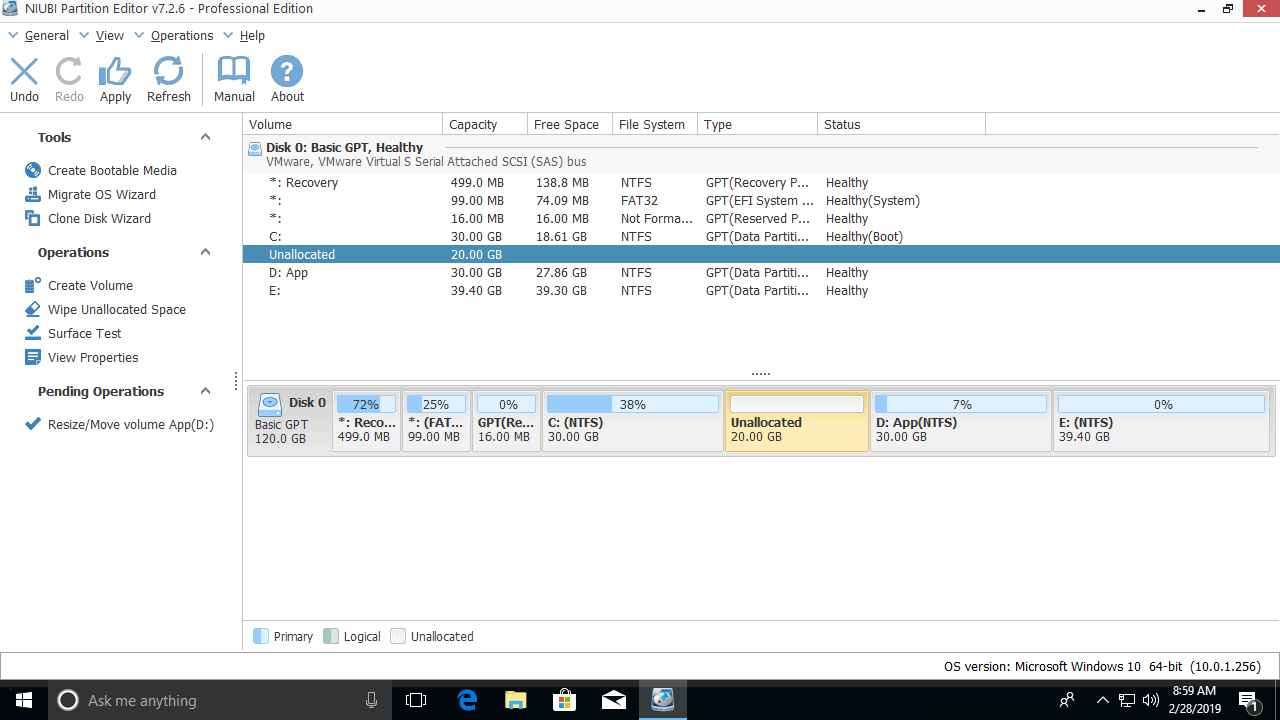
A portion of the free space in the D: drive is converted to unallocated space on the left side.
Step 2: Right-click partition C: and select "Resize/Move Volume" again; drag the right border to the right.
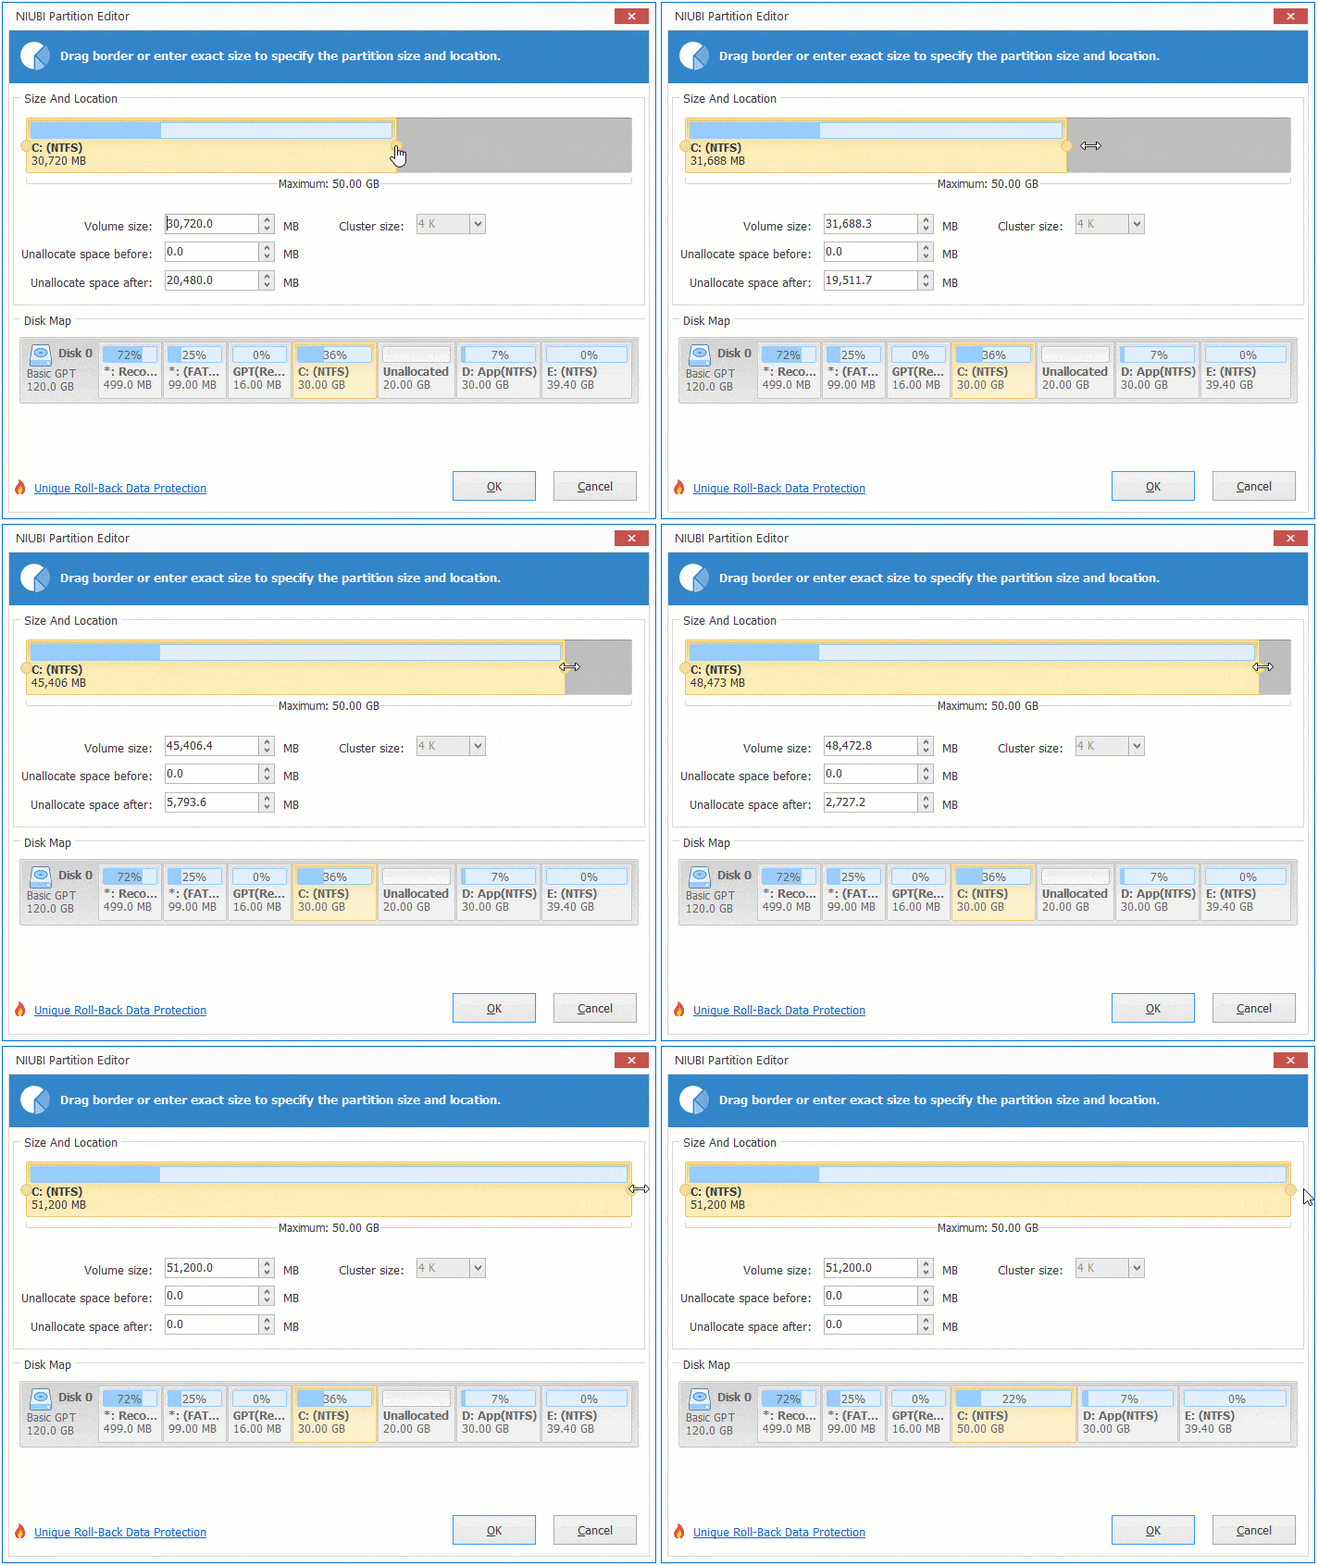
The unallocated space is merged into the C: drive.
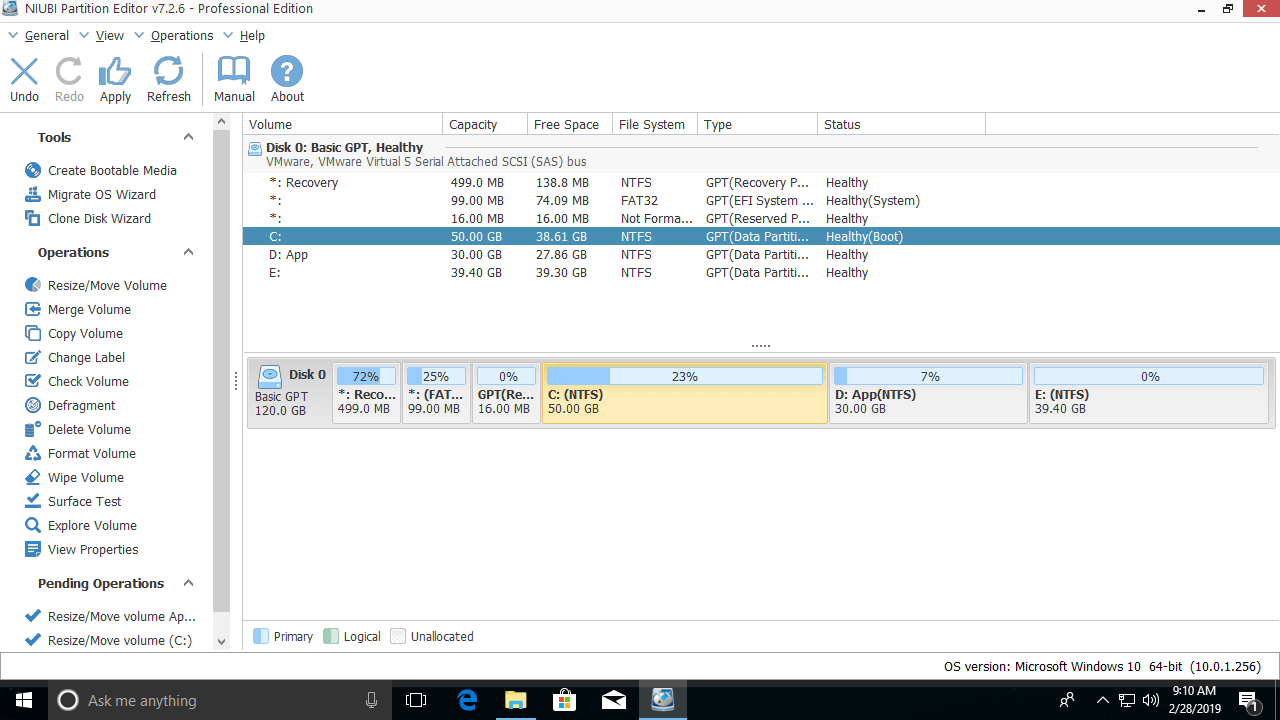
This software is designed to work in virtual mode before clicking Apply on the top left.
If you have shrunk the D: drive with Disk Management, you can move it to the right, then the unallocated space will be next to the C: drive. To do this, right-click D and select "Resize/Move Volume"; drag the middle of the D: drive to the right in the pop-up window:

Then follow Step 2 above to extend the C: drive.
In short, drag the border to the other side, and then you can shrink a partition or extend a partition by merging the adjacent unallocated space. Drag the middle of the partition to the other side, and then you can swap its position with the adjacent unallocated space.
However, no partitioning software can extend a partition to another separate disk. If there is not enough free space in other volumes on the same disk, you can clone it to a larger disk with NIUBI Partition Editor, and then extend the partition with the extra disk space.
 © 2009 - NIUBI Technology All Rights Reserved. |