
Sometimes you need to shrink the C: drive partition. For example, you forget to create or edit partitions when installing Windows, so the C: drive occupies all the disk space. In that case, you need to shrink the C: drive to release free space. If the D: drive is running out of space, you may shrink the C: drive to extend it. If you want to upgrade Windows, you need to decrease the C: drive to extend the system reserved partition.
To shrink the C: drive in Windows 7/8/10, there is the Shrink Volume function in Disk Management, but many users report that they cannot shrink the C: drive with this native tool. This article explains the reasons why Disk Management is unable to shrink the C: drive in Windows 10/8/7 and how to solve this problem easily.
Why You Cannot Shrink the C Drive in Windows 10/8/7 with Disk Management
There are 3 common reasons why you cannot shrink the C: drive in Windows 10/8/7 using the Disk Management tool.
Reason 1. Inconsistent Available Space
When shrinking a partition with the "Shrink Volume" function, Disk Management will first calculate the used and available free space to shrink. If you do not enter an amount by yourself, the maximum available space is used by default. On a test computer, the available amount of space is 150264MB.
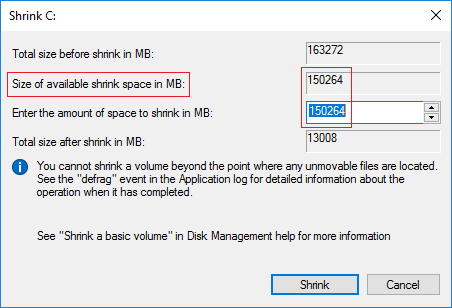
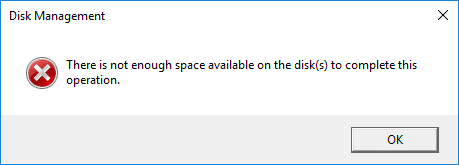
As we know, many types of files are continuously written to the C: drive, so the available space may be less than 150264MB when clicking the "Shrink" button. That means you cannot shrink the C: drive with the original calculated maximum space. If you do this, you may receive the error message "There is not enough space available on the disk(s) to complete this operation."
Reason 2. Unmovable Files
It is easy to fix the issue caused by reason 1, but if you encounter the second issue, you need professional disk partition software.
On another test computer, after shrinking the C: drive to a smaller size without issue, Disk Management shows 0 available space and the Shrink button is greyed out when attempting to do it again. As you can see, there is still 7.53GB of free space in the C: drive, but Disk Management does not allow shrinking it.
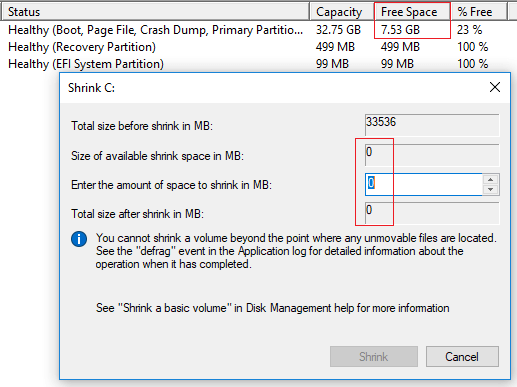
Have you noticed the tip in the middle "You cannot shrink a volume beyond the point where any unmovable files are located"? What does it mean?
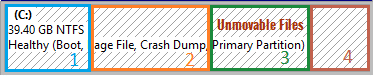
For example, the C: drive is made up of 4 blocks. If the unmovable files are located in block 3, you cannot shrink the C: drive to block 2 or 1, although there is free space there. The unmovable files include the Paging file, Hibernation file, and other large files.
Reason 3. File System Error
All files in a partition are managed and organized by a file system. In a Windows computer, NTFS and FAT32 are the most common file systems, but both could be corrupted for several reasons. In some computers, users do not find any differences in daily usage, but there could be a big issue if they shrink and extend this partition. When shrinking the C: drive (and other partitions), Disk Management also detects if there is anything wrong with the file system. If so, the Shrink button will also be greyed out.
What to Do If You Are Unable to Shrink the C Drive in Windows 10/8/7
If you cannot shrink the C: drive in your Windows 10/8/7 computer, follow the corresponding solution according to your own disk partition configuration.
Solution 1: Enter a Smaller Amount
If you received the error "not enough space available" when shrinking the C: drive, run Shrink Volume again, do not use the default maximum space, and enter a smaller amount by yourself.
Solution 2: Run Third-Party Software
If you are unable to shrink the C: drive in Windows 10/8/7 because of unmovable files, run third-party software such as NIUBI Partition Editor. It is able to move these unmovable files, so it can shrink the partition to the minimum size if you want. It has a free edition for Windows 11/10/8/7/Vista/XP home computer users. Better than Disk Management, NIUBI can generate unallocated space on either the left or right side when shrinking a partition.
In most Windows computers, the C: drive is formatted with the NTFS file system. If it is FAT32 for some reasons, you must run third-party software, too, because Windows Disk Management only supports NTFS partitions.
Download NIUBI Partition Editor, and you will see all disk partition info and layout on the right; available operations are listed on the left and via right-click.
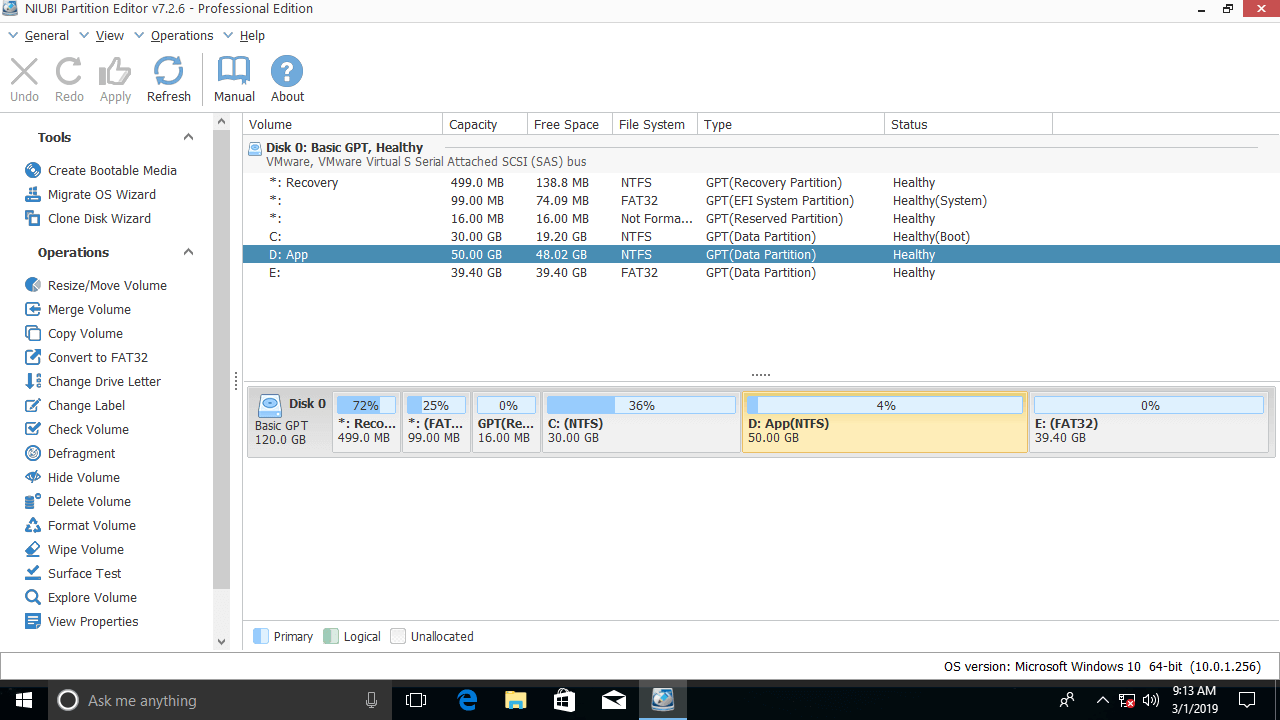
Right-click the C: drive and select "Resize/Move Volume"; you have two options in the pop-up window:
① If you drag the left border to the right

Then, you can shrink the C: drive and generate unallocated space on the left side.
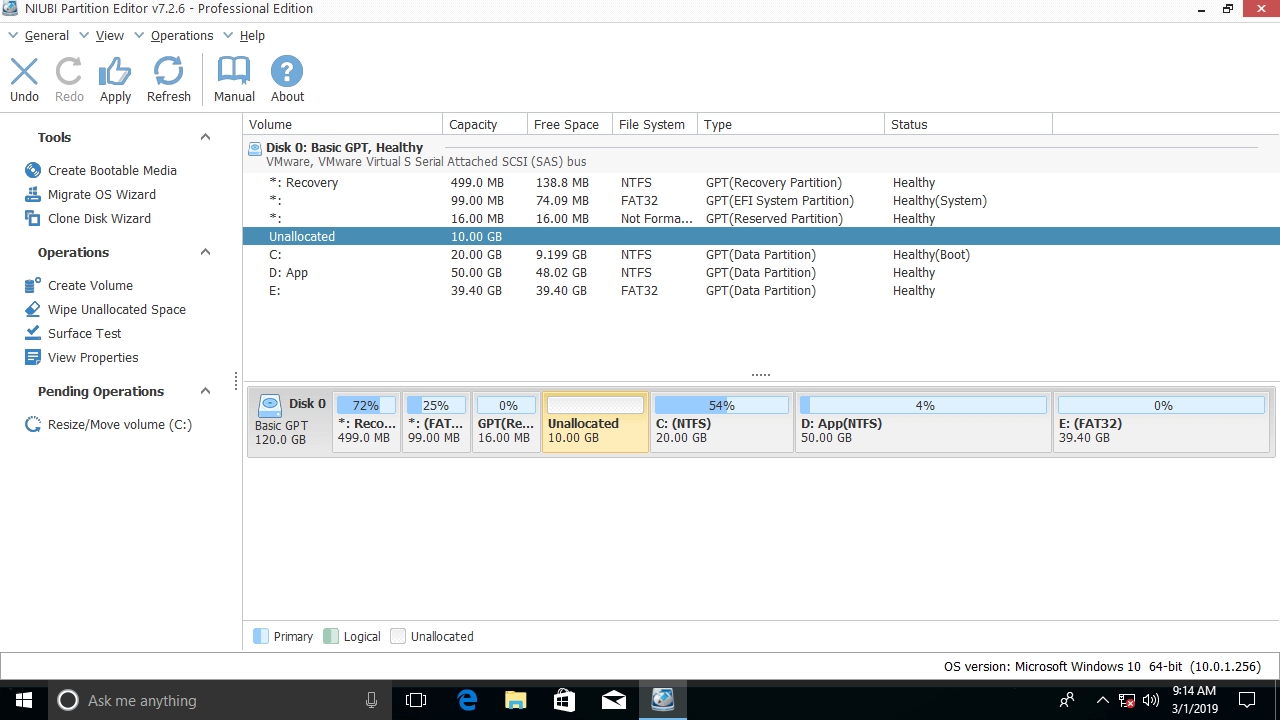
② If you drag the right border to the left

Then, you can shrink the C: drive and generate unallocated space on the right side.
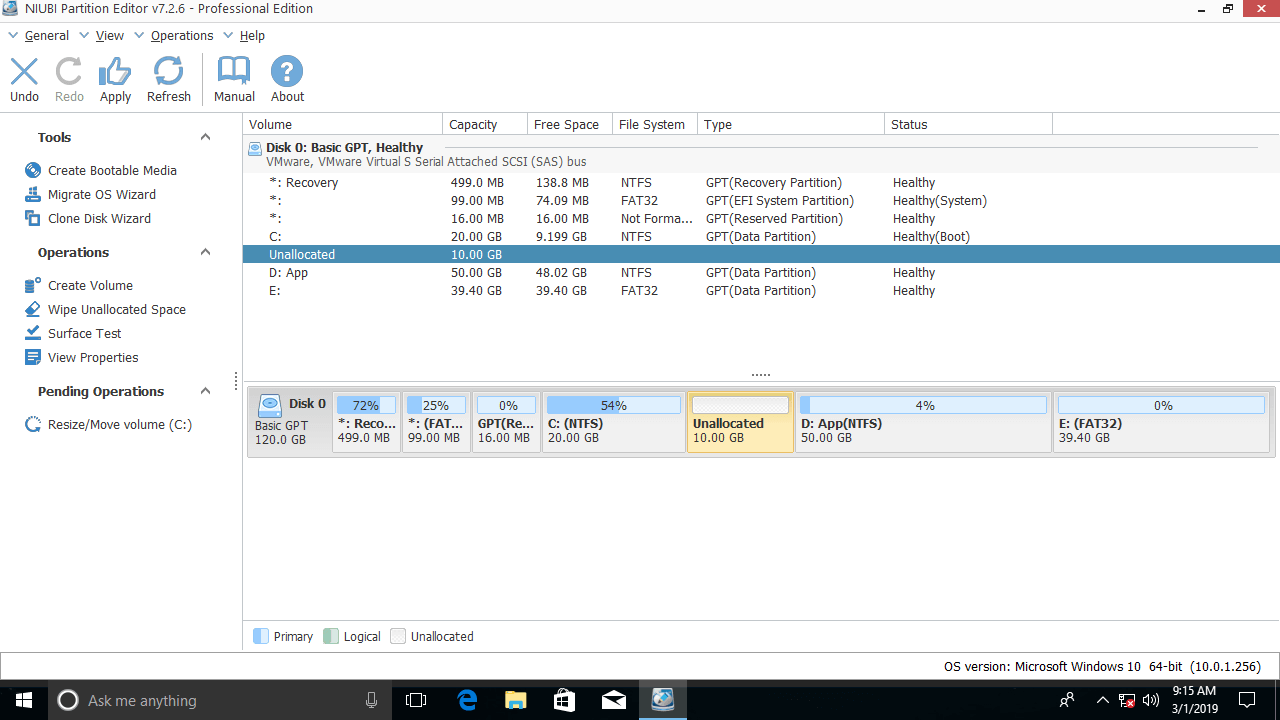
Follow the steps if you want to shrink C to expand the system reserved partition, or shrink C to expand the D: drive.
Solution 3: Fix File System Errors
If you cannot shrink the C: drive partition in Windows 10/8/7 because of a file system error, follow the steps below to repair the file system.
- Click the Windows icon or Start menu, type cmd, and you will see a result; right-click the cmd and select Run as Administrator.
- In the command window, type chkdsk C:/v/f and press Enter.
- It will report that this partition cannot be locked and ask you if you want to schedule this task; type Y and press Enter.
- Restart your computer and shrink the C: drive again with Disk Management or NIUBI Partition Editor.
Besides shrinking and extending partitions, NIUBI Partition Editor helps you move, merge, copy, convert, defrag, hide, wipe partitions, scan bad sectors, and much more.
 © 2009 - NIUBI Technology All Rights Reserved. |