
Many Windows 10 computers have two hard disks, one SSD for the operating system and programs, and the other a traditional disk for data storage. An SSD is effective for faster Windows booting and program loading. However, an SSD is still expensive, so the size is not large. The C: drive is very likely running out of space, so many Windows 10 users make the C: drive larger, which causes the D: drive to get full in a short time if they install many programs. This article introduces how to extend partition D in Windows 10 without starting over.
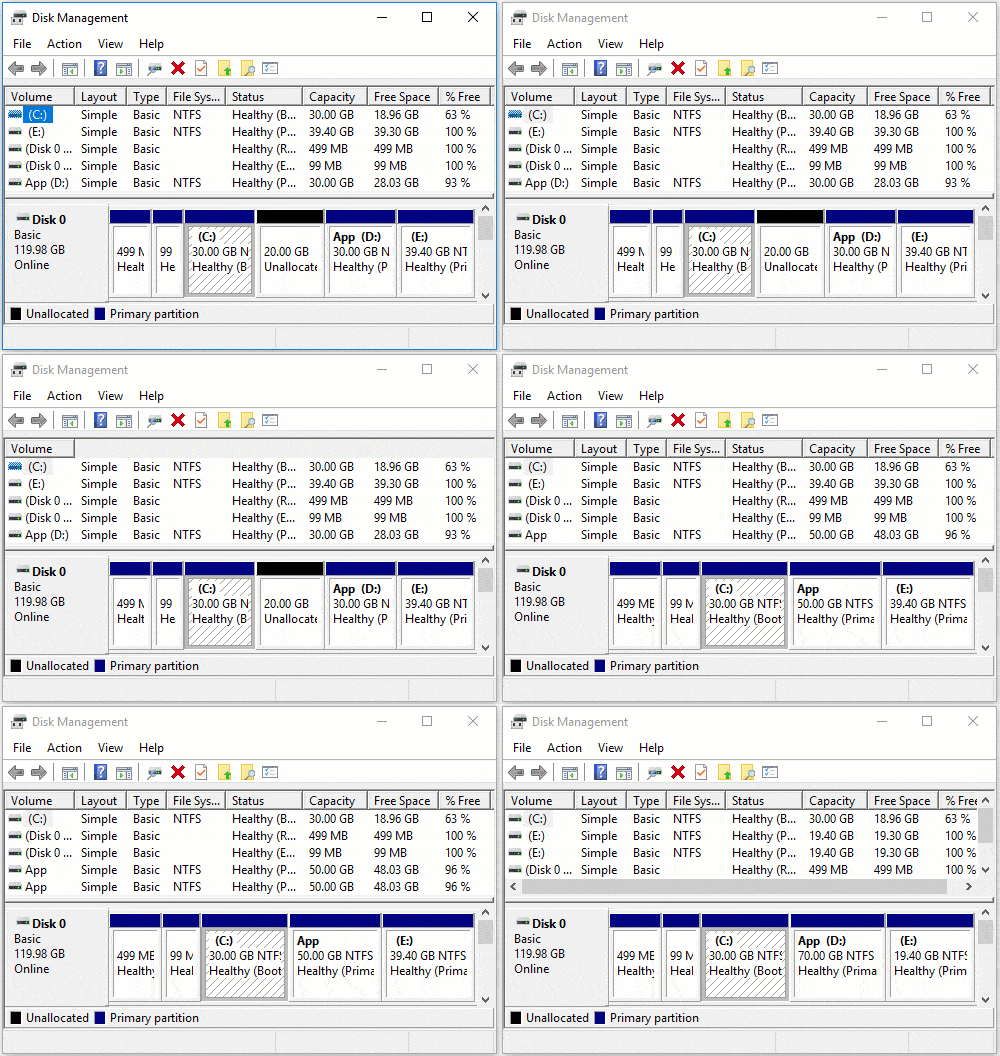
Extend the D Drive with Windows 10 Disk Management
Besides basic operations to create, delete, and format partitions, Disk Management can shrink and extend allocated partitions without losing data. But to extend the D: drive with this built-in tool, there are two preconditions:
- There must be another volume (E:) on its right side.
- You can transfer all files in this volume (E:) to another place.
Steps to extend volume D via Windows 10 Disk Management:
- Press Windows and X on the keyboard and then select Disk Management.
- Right-click drive E and select Delete Volume.
- Right-click drive D and select Extend Volume.
- Click Next until you reach Finish in the pop-up Extend Volume Wizard window.
If you cannot delete volume E, or want to shrink another volume instead, you have to run a third-party partition tool. This is because, after shrinking the C and E volumes with the Shrink Volume function, Extend Volume cannot add the unallocated space to the D: drive.
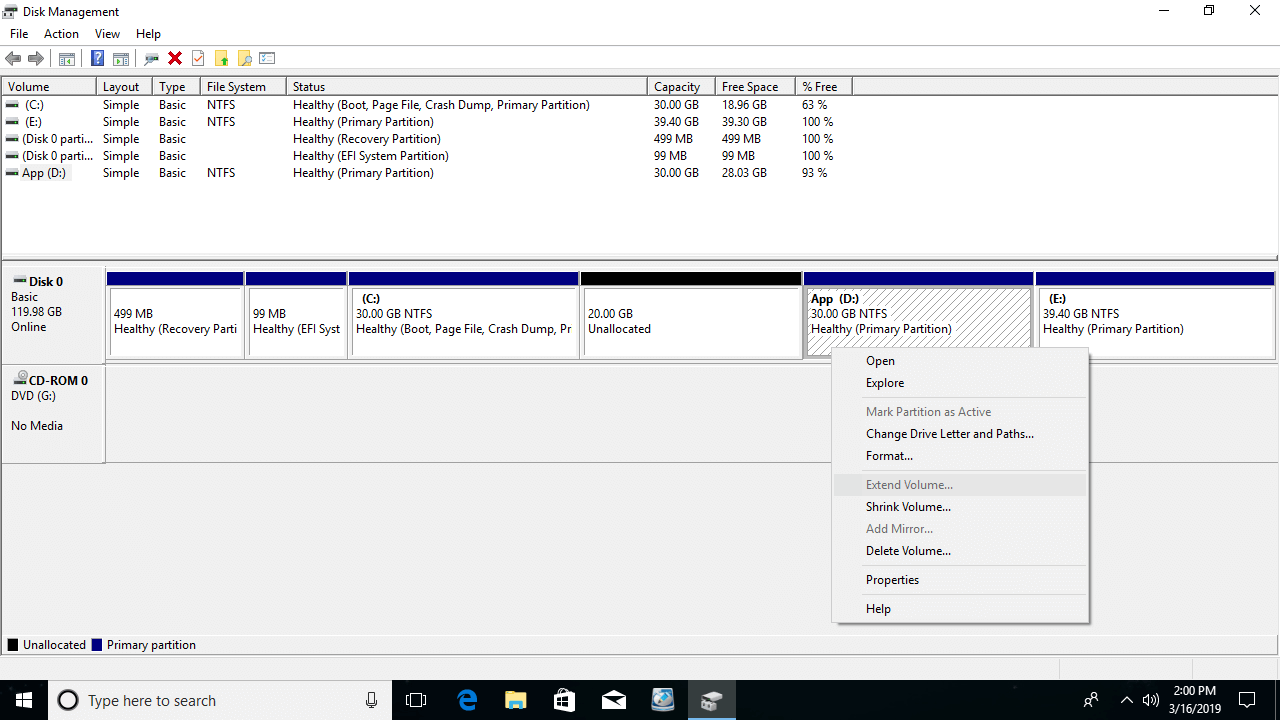
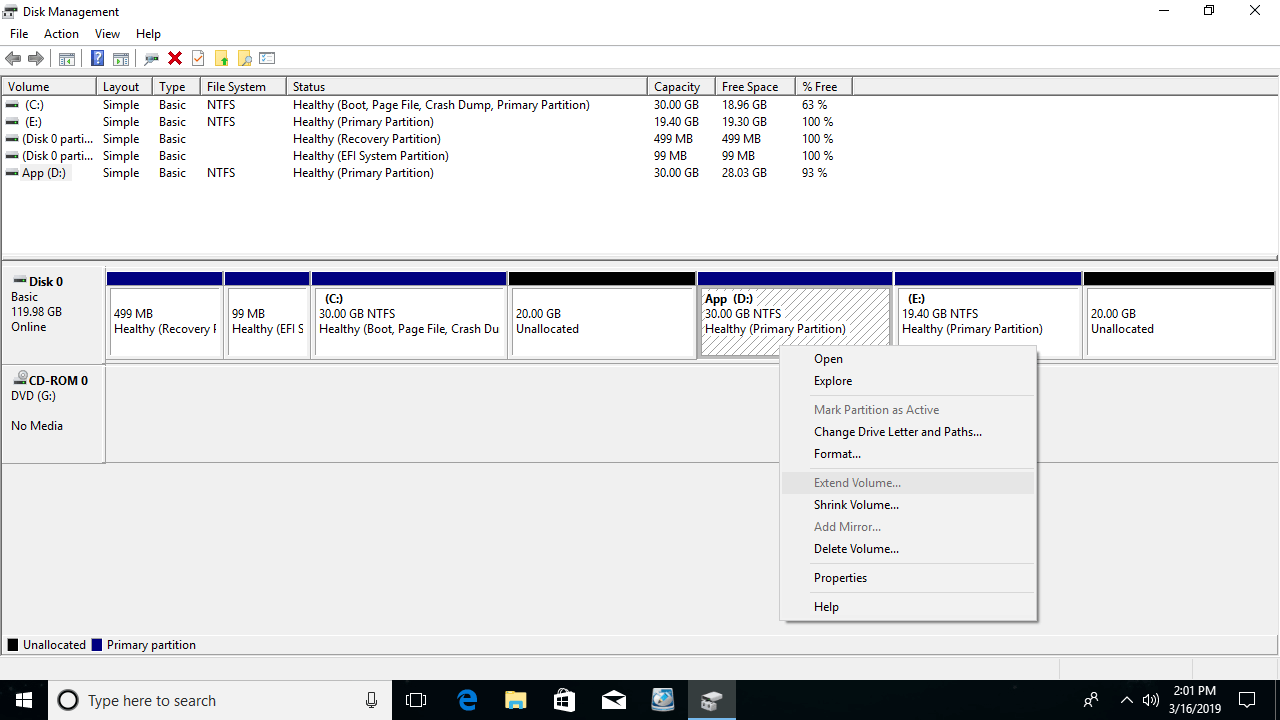
Extend Volume can only extend a partition when there is adjacent unallocated space on its right side.
How to Extend Volume D by Shrinking C
There are many disk partition software options that can help resize partitions, but you had better back up and select a reliable tool, because there is a potential data loss and/or system damage risk. For this task, NIUBI Partition Editor is highly recommended.
It provides unique 1-Second Rollback technology to ensure everything remains intact. If any software or hardware issues occur while resizing the hard drive, it is able to automatically revert the disk partitions to their previous state instantly. It works in virtual mode before clicking Apply to modify the real disk partitions. Unique Cancel-at-Will technology helps safely cancel incorrect but ongoing operations at any point before completion. It is also much faster than other tools.
Steps to extend the D: drive from C in Windows 10:
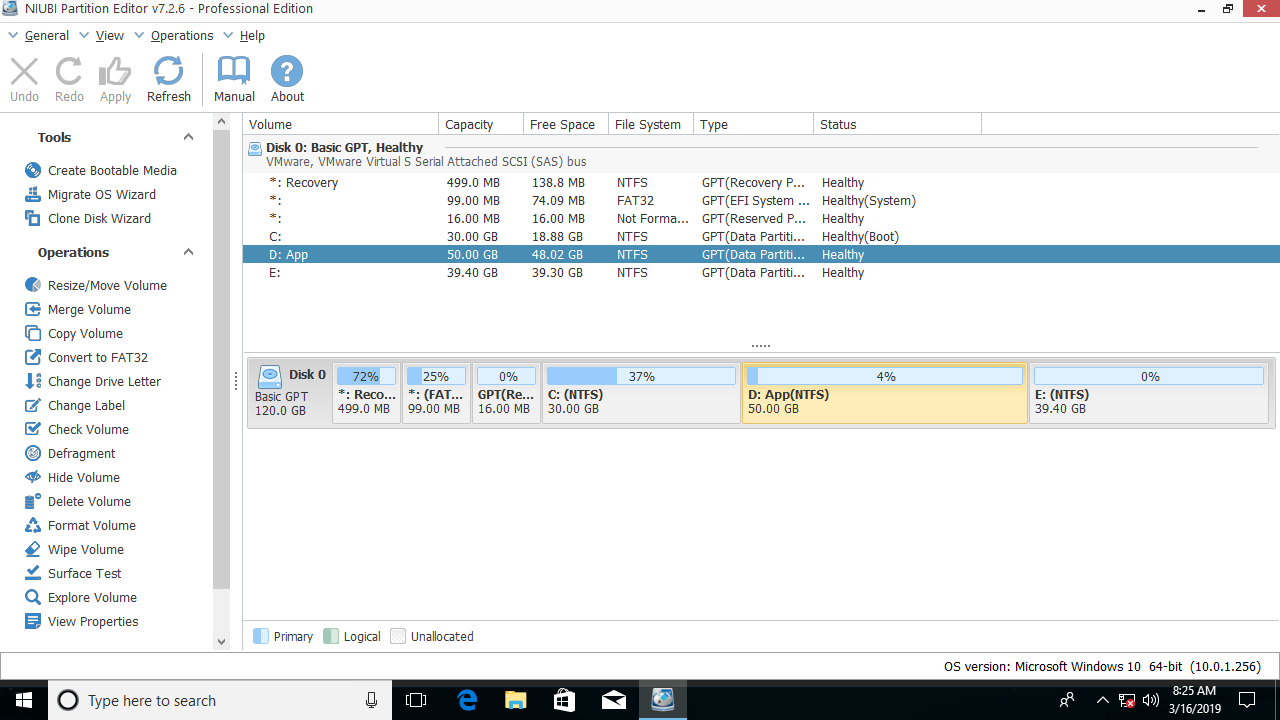
Step 1: Right-click the C: drive and select "Resize/Move Volume", then drag the right border to the left in the pop-up window. (or enter an amount in "Unallocated space after")

20GB of unused space is taken from C and converted to unallocated space on the right side.
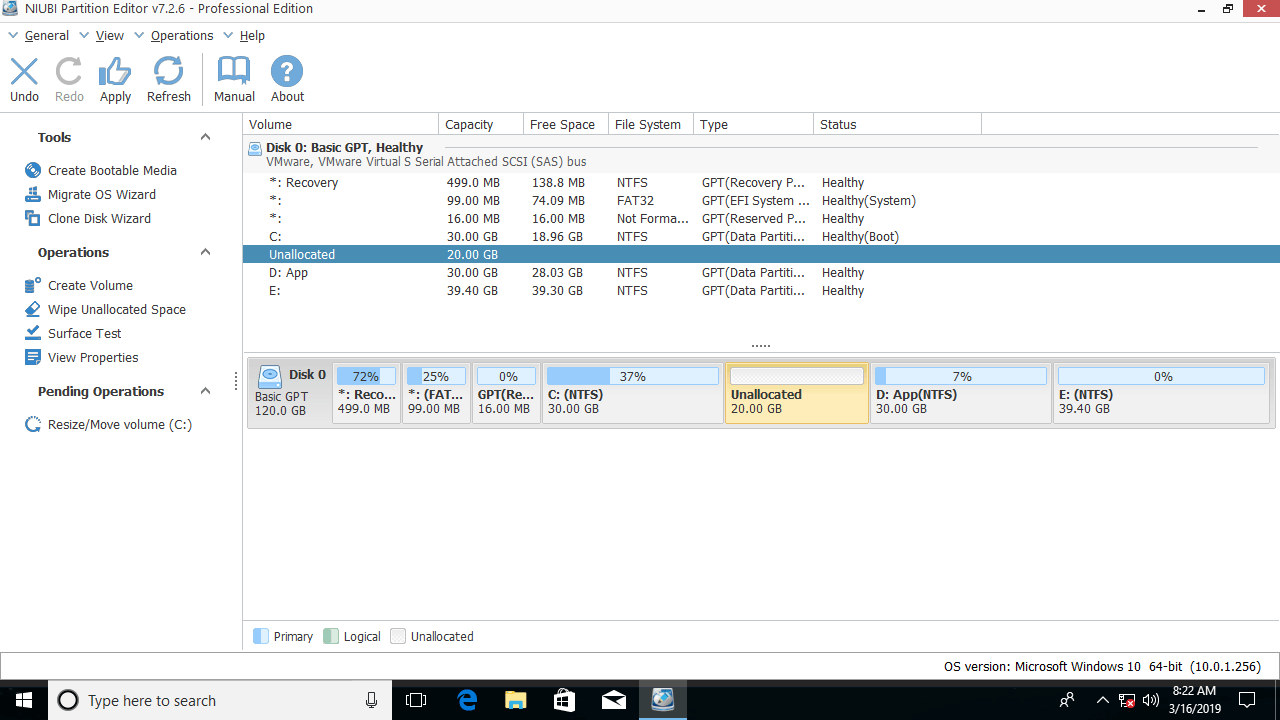
Step 2: Right-click the D: drive and select "Resize/Move Volume" again, then drag the left border to the left to merge the unallocated space.

The D: drive is extended from 30GB to 50GB.
How to Extend Partition D by Shrinking E
If there is another data volume (such as E:) on the same disk, you had better shrink this volume instead of the system partition C. To do this:
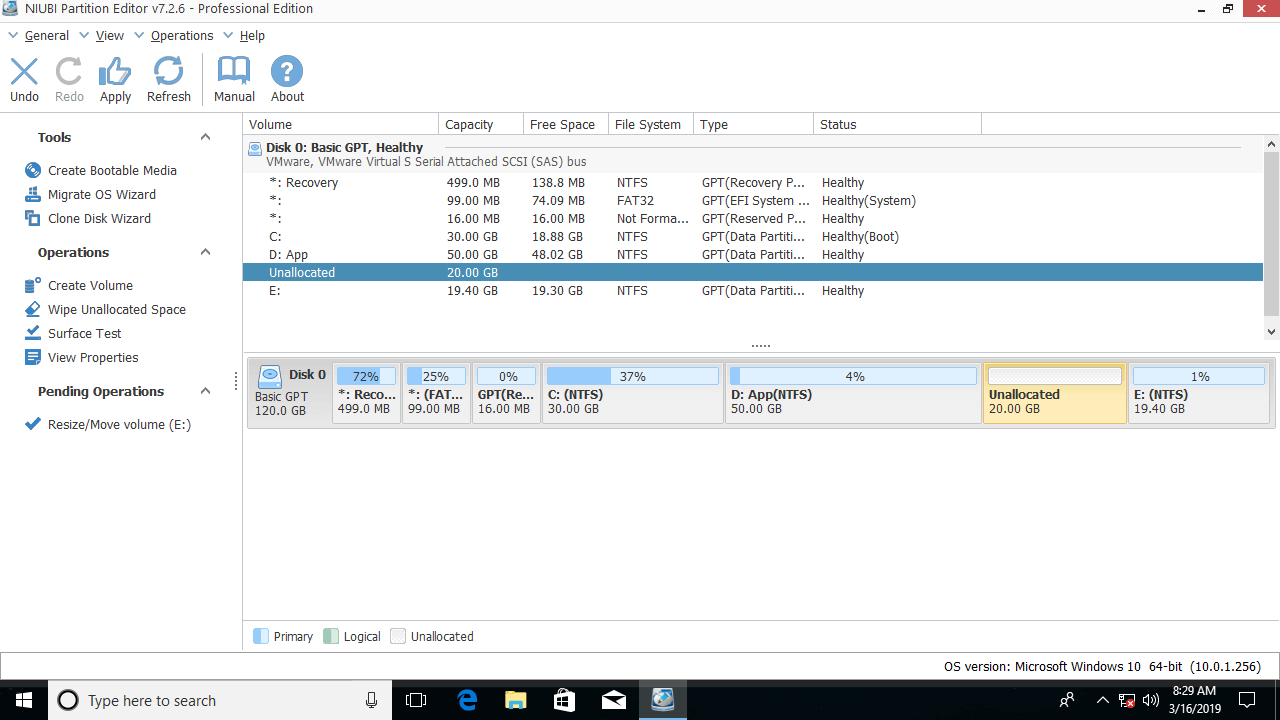
Step 1: Right-click the E: drive and select "Resize/Move Volume", then drag the left border to the right to shrink it.

20GB of unallocated space is generated on the left side of E.
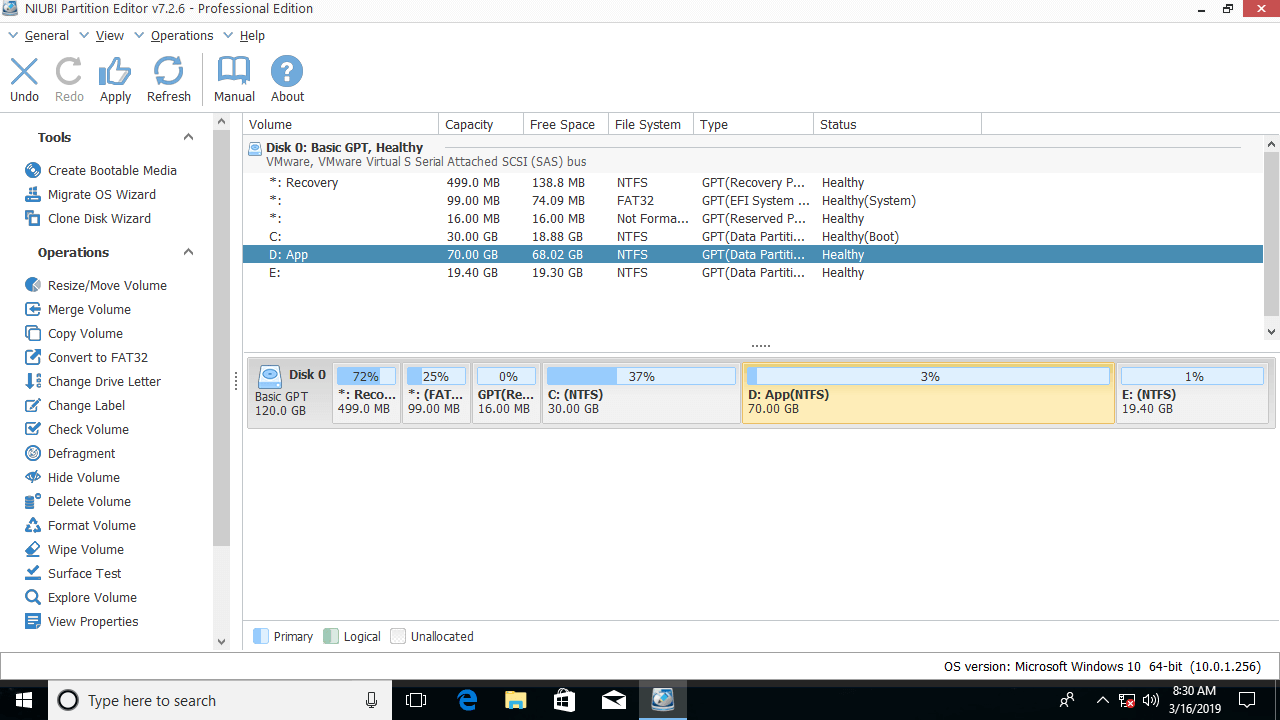
Step 2: Right-click the D: drive and select "Resize/Move Volume" again, then drag the right border to the right to merge the unallocated space.

The D: drive is extended from 50GB to 70GB.
How to Expand the D Drive with Another Disk
No partitioning software can extend a volume by taking free or unallocated space from another separate hard disk. If you cannot get free space from other volumes on the same disk, you can extend the D: drive by cloning it to another disk with NIUBI Partition Editor. There are two options:
- Clone the entire disk to a larger one, and then extend partition D (and C) with the extra disk space. Finally, boot from the larger disk.
- Clone partition D to another disk, change the drive letter of the original D: drive to F or another letter, and then change the drive letter of the target partition to D.
No matter how your disk partitions are configured, there is a solution for you to extend the D: drive in Windows 10.
 © 2009 - NIUBI Technology All Rights Reserved. |