
This article introduces how to resize hard drives on Windows 10 (32 & 64 bit). Run a free partition editor to adjust hard drive sizes without losing data.

Resize Hard Drive With Windows 10 Disk Management
Besides creating, deleting, and formatting partitions, the native Windows 10 Disk Management has the ability to change partition sizes without losing data. The Shrink Volume function can decrease partition sizes and generate Unallocated space. Extend Volume can increase partition sizes by merging the contiguous Unallocated space on its right.
How to shrink a hard drive partition:
- Press the Windows and X keys on the keyboard, and then select Disk Management.
- Right-click the partition to be shrunk and select Shrink Volume.
- Click Shrink to proceed with the default maximum space, or enter an amount in MB (1024MB=1GB) first.
If this disk is GPT style, the EFI and System Reserved partitions cannot be resized with Disk Management.
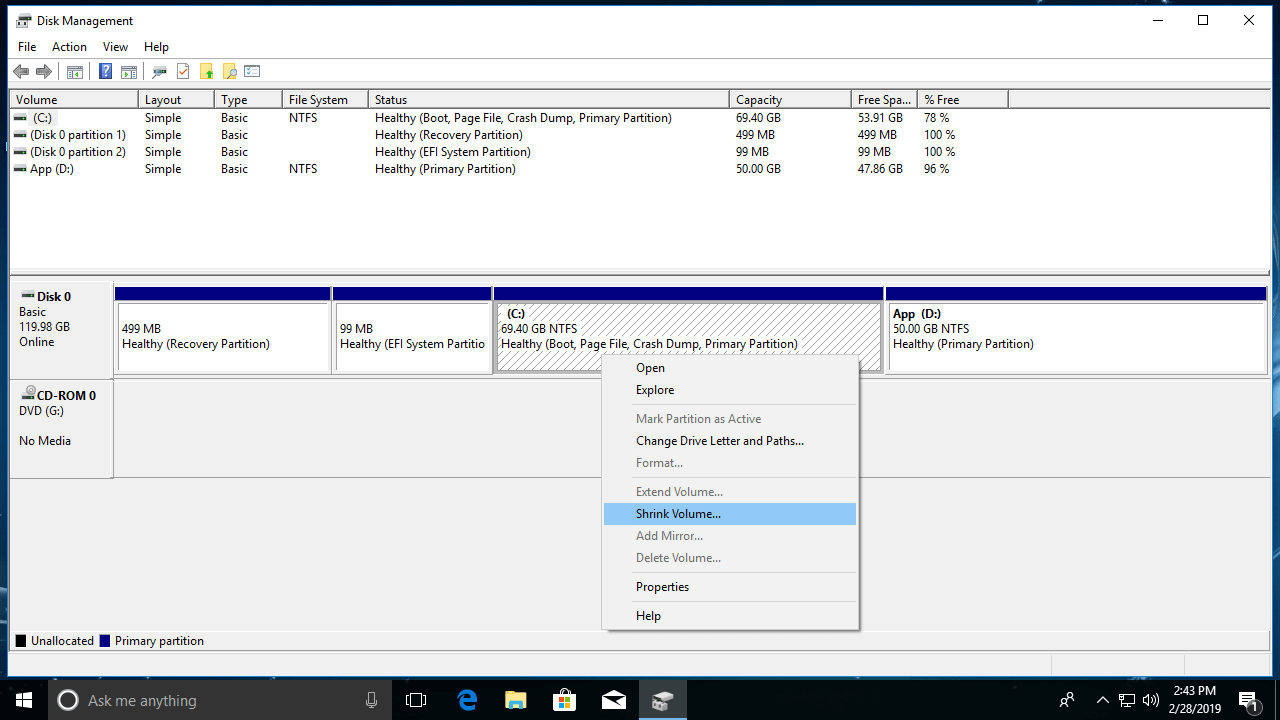
To extend a hard drive partition:
There must be contiguous Unallocated space on the right side of the drive to be expanded. Otherwise, this method is invalid.
- Right-click this partition and select Extend Volume.
- Simply click Next until Finish in the pop-up Extend Volume Wizard window.
If there is a large amount of Unallocated space, part of the space can be added to this partition by entering an amount manually.
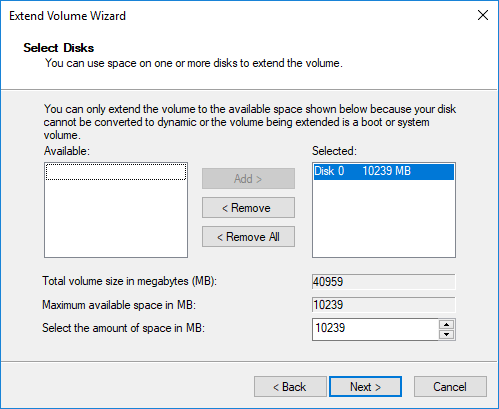
Limitations of Resizing Hard Drives With the Built-in Tool
Many users report that Extend Volume is always grayed out even after shrinking another partition. This occurs because Disk Management has serious limitations when resizing hard drive partitions, including:
- Only partitions formatted as NTFS or without a file system (RAW) can be shrunk and extended.
- Unallocated space can only be generated on the right side when shrinking a partition.
- Extend Volume can expand a drive only when there is contiguous Unallocated space on its right.
- Unallocated space cannot be merged into the right or any non-adjacent partitions.
- To extend a non-adjacent partition, Unallocated space must be moved to either side of it, but Disk Management lacks this capability.
Windows has another native tool - Diskpart, which runs via the command prompt, but it shares the same limitations as Disk Management.
Adjust Hard Drive Size With a Free Partition Editor
To resize hard drive volumes on Windows 10, third-party software is much more powerful. NIUBI Partition Editor provides a free edition for home computers running Windows 10, 8, 7, Vista, and XP (32 & 64 bit). Unlike other free software, NIUBI is 100% free without any bundled plugins.
Compared with Disk Management, NIUBI PE offers several advantages:
- Both NTFS and FAT16/32 partitions are supported for shrinking and extending.
- Unallocated space can be generated on either side when shrinking a partition.
- Unallocated space can be merged directly into either adjacent partition.
- Unallocated space can be moved and then merged into any non-adjacent partitions.
- Two contiguous partitions can be merged directly.
Compared with other tools, NIUBI Partition Editor features Hot Clone, Virtual Mode, Cancel-at-Will, and 1-Second Rollback technologies to protect your system and data. Furthermore, it is much faster because of its advanced file-moving algorithm.
Download the software, and all disk partitions will be displayed in the main window upon launching.
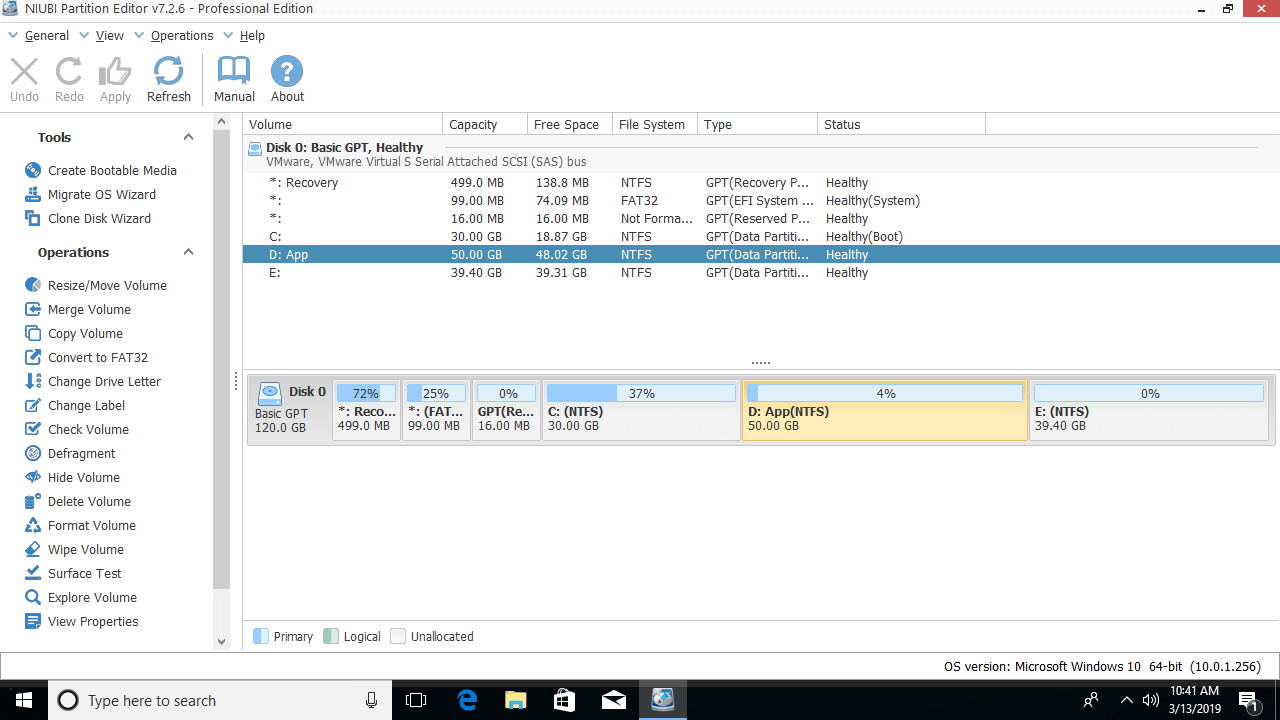
How to shrink a hard drive partition with NIUBI:
Right-click a volume (such as D:) and select "Resize/Move Volume", then drag either border towards the other side in the pop-up window.
Option 1: Drag the left border to the right
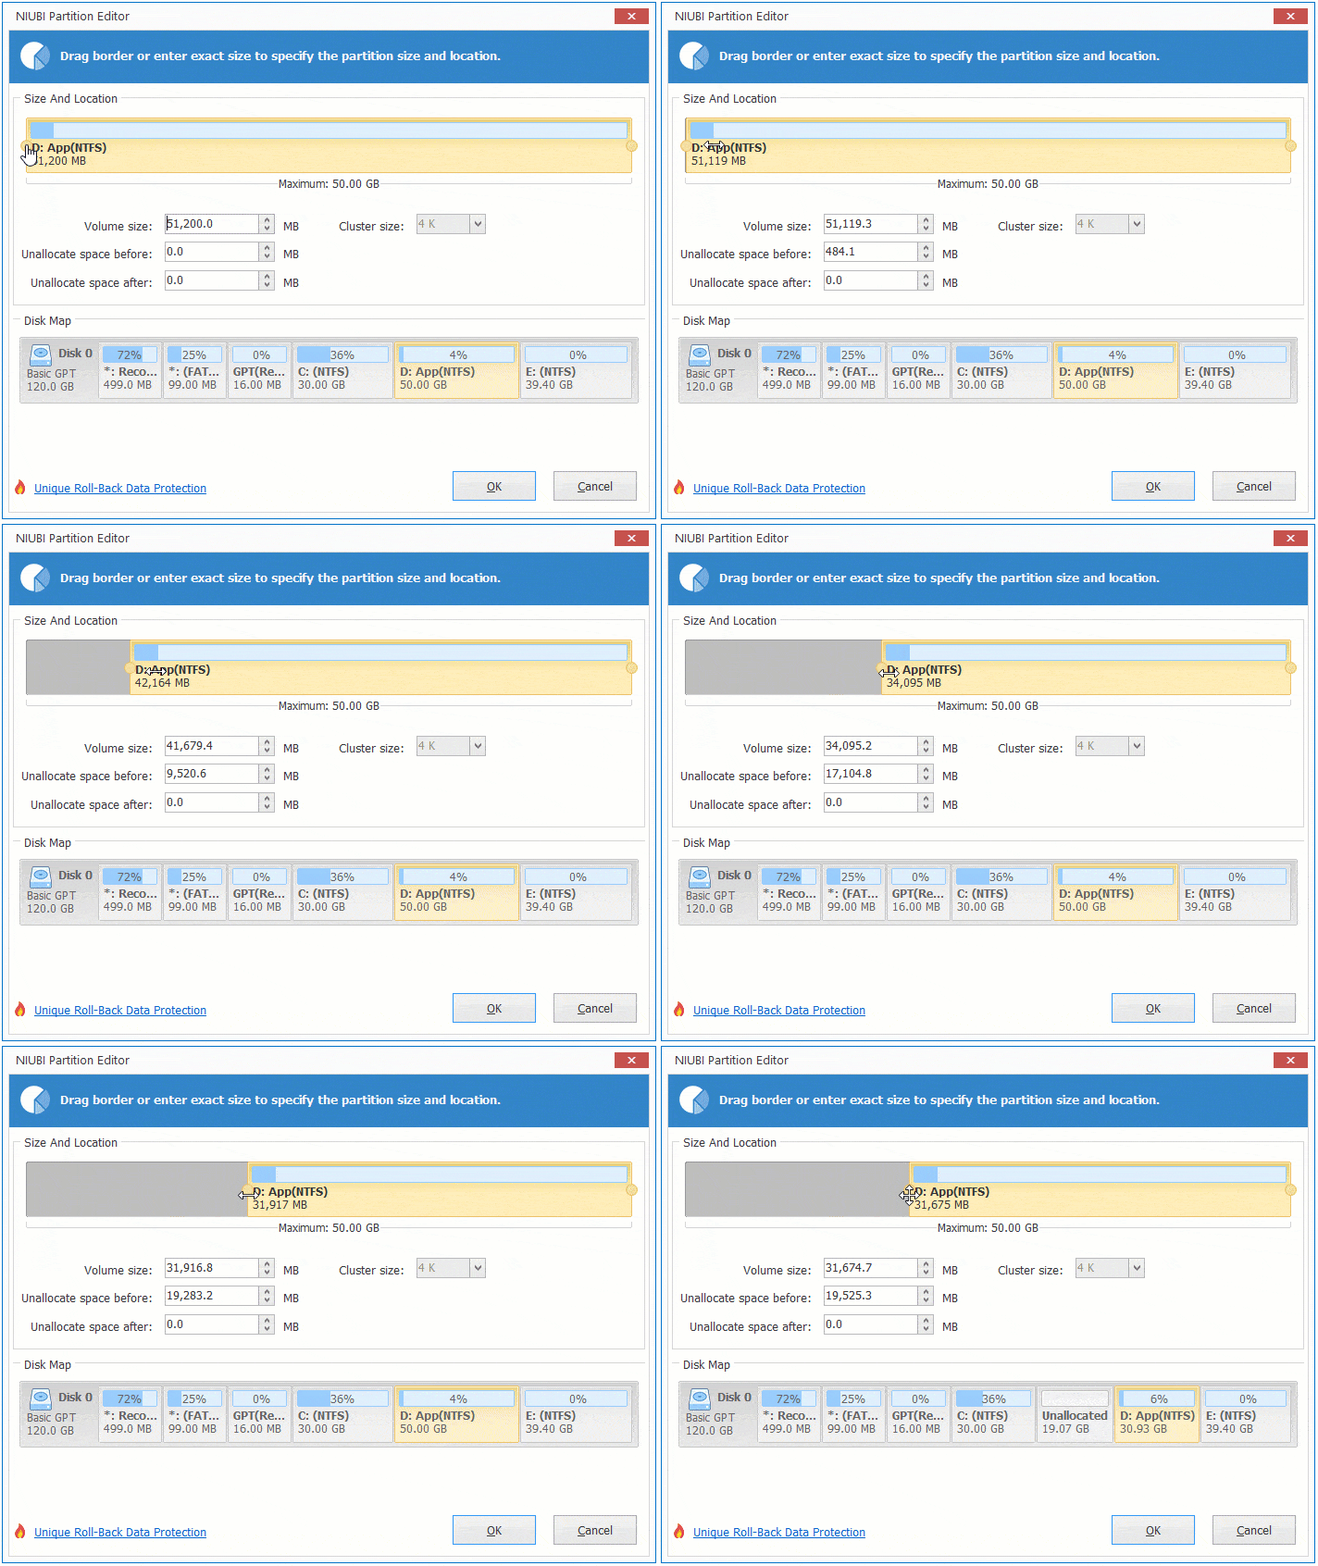
Then Unallocated space is generated on the left side.
Option 2: Drag the right border to the left

Then Unallocated space is generated on the right side.
How to extend a hard drive partition with NIUBI:
Right-click drive C or E and select "Resize/Move Volume" again, then drag the border towards the other side to merge the Unallocated space.
Option 1: Drag the right border to the right
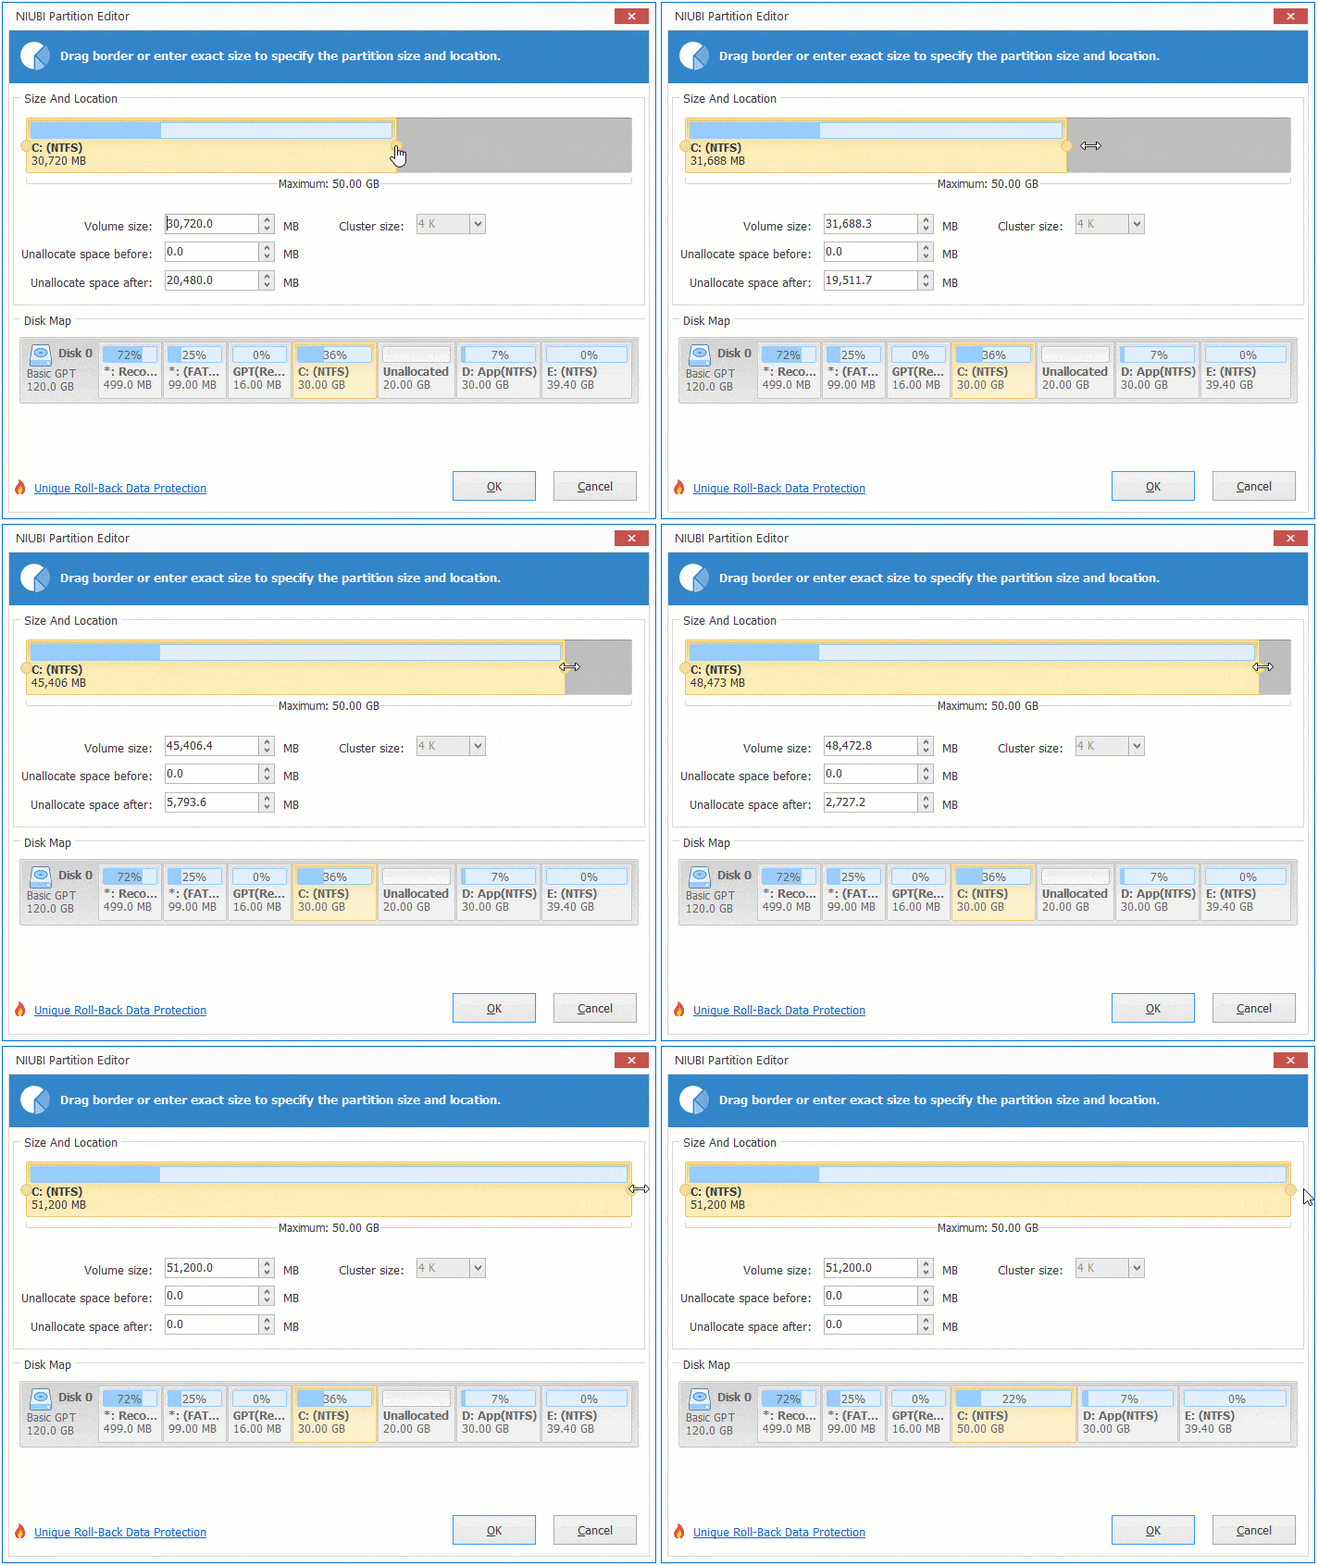
Then the C drive will be extended.
Option 2: Drag the left border to the left

Then the E drive will be extended.
To shrink drive E to expand C, first shrink E to generate Unallocated space on the left side, then there is an additional step to move the Unallocated space to the left side before adding it into the C drive.
Right-click drive D and select "Resize/Move Volume", then drag the middle of this partition to the right in the pop-up window.

Using this method, a drive can be shrunk to extend another one, regardless of whether it is adjacent or not. If there are no other volumes on the same hard disk, no software can resize a hard drive using disk space from another disk; however, NIUBI Partition Editor can clone this disk to a larger one. During the cloning process, partitions can be extended with the extra disk space.
 © 2009 - NIUBI Technology All Rights Reserved. |