
It is a common operation to change partition sizes after running a desktop or laptop for a period of time. There are many reasons that lead to resizing a disk partition in Windows 10, such as: the C: or D: drive was created too large, so you need to shrink it to create more partitions. The system partition C: is running out of space, so you need to resize it with a data volume. This article introduces how to resize a partition on Windows 10 without losing programs or any data.

Resize a Partition with Windows 10 Disk Management
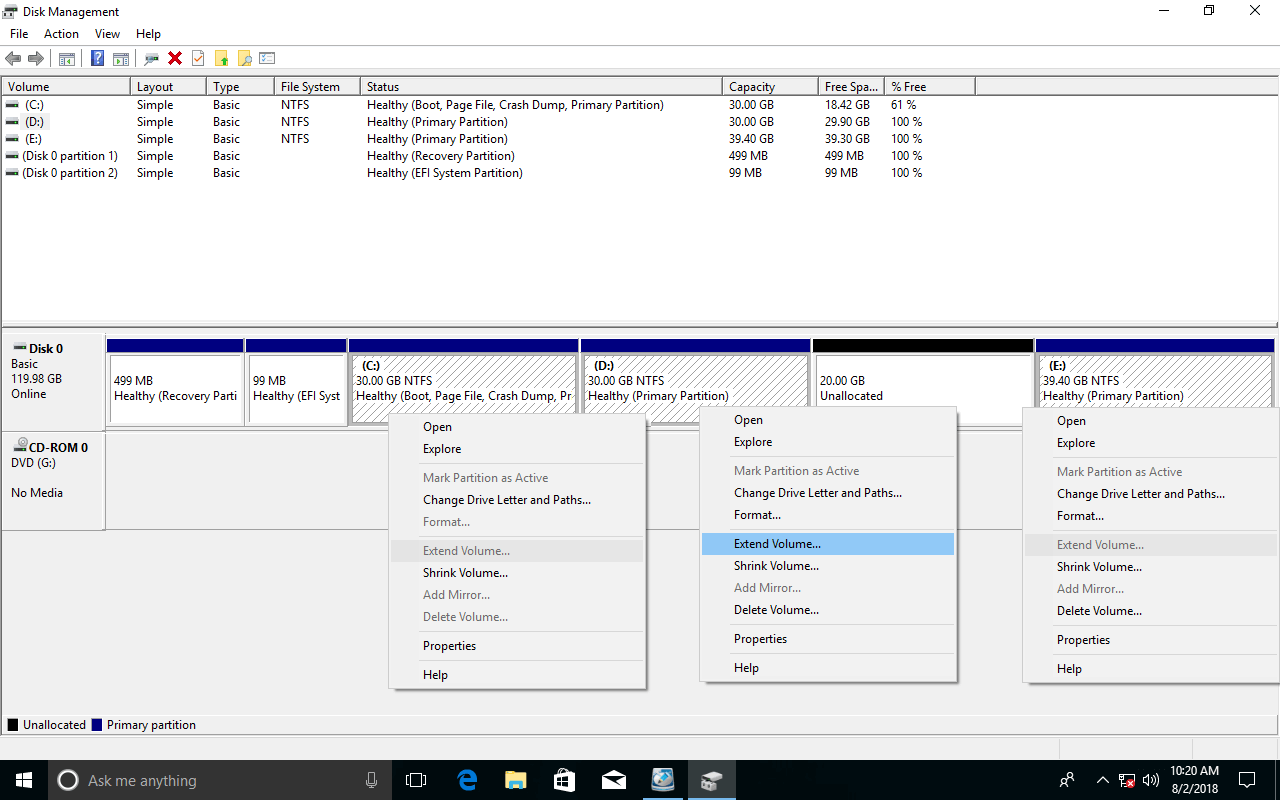
Microsoft provides a native Disk Management tool to help resize a partition on Windows 10 (32 and 64 bit). Shrink Volume can reduce a partition and generate unallocated space on the right side. Extend Volume can expand a partition by merging contiguous unallocated space.
It is very easy and fast to resize a volume with this tool; press Windows and X on your keyboard, and then you will see Disk Management.
To shrink a partition:
- Right-click it and select Shrink Volume.
- Enter an amount in MB (1024MB=1GB).
- Click Shrink to proceed.
To extend a partition:
- Right-click it and select Extend Volume.
- Click Next in the pop-up window.
- Click Next to use the default settings or enter an amount manually.
- Click Finish to proceed.
However, as the screenshot above shows, you cannot extend the C: or E: drive after shrinking D. This is because this unallocated space is non-adjacent to C and is on the left side of E, so Extend Volume is greyed out for these two volumes.
Windows 10 Disk Management cannot shrink or extend FAT32 partitions. In fact, only NTFS and RAW partitions are supported. Check all the reasons why you cannot extend a volume via Disk Management.
How to Resize the System Partition C in Windows 10
If you just want to shrink the C: drive to create a new volume, it is much easier and you will not encounter any issues in most cases, but there are still several points you should know:
- You can only shrink a little space if there are unmovable files located there.
- If the free space changes before you click Shrink, you may receive the error "not enough space available".
- You cannot shrink the C: drive to expand D or other volumes.
You had better run a professional partition tool to resize a partition in Windows 10.
Here is how to resize a disk partition with NIUBI Partition Editor, which is the safest and fastest tool. Download it, and you will see all disk partition info on the right and available operations on the left.
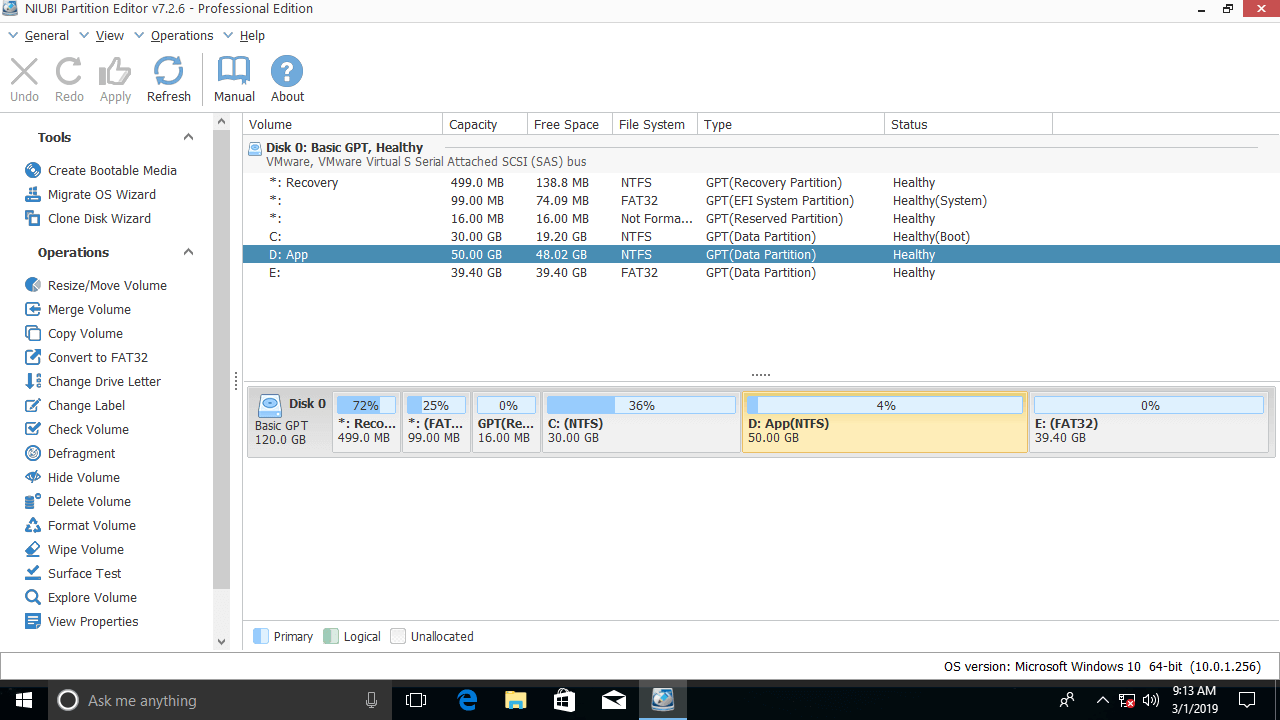
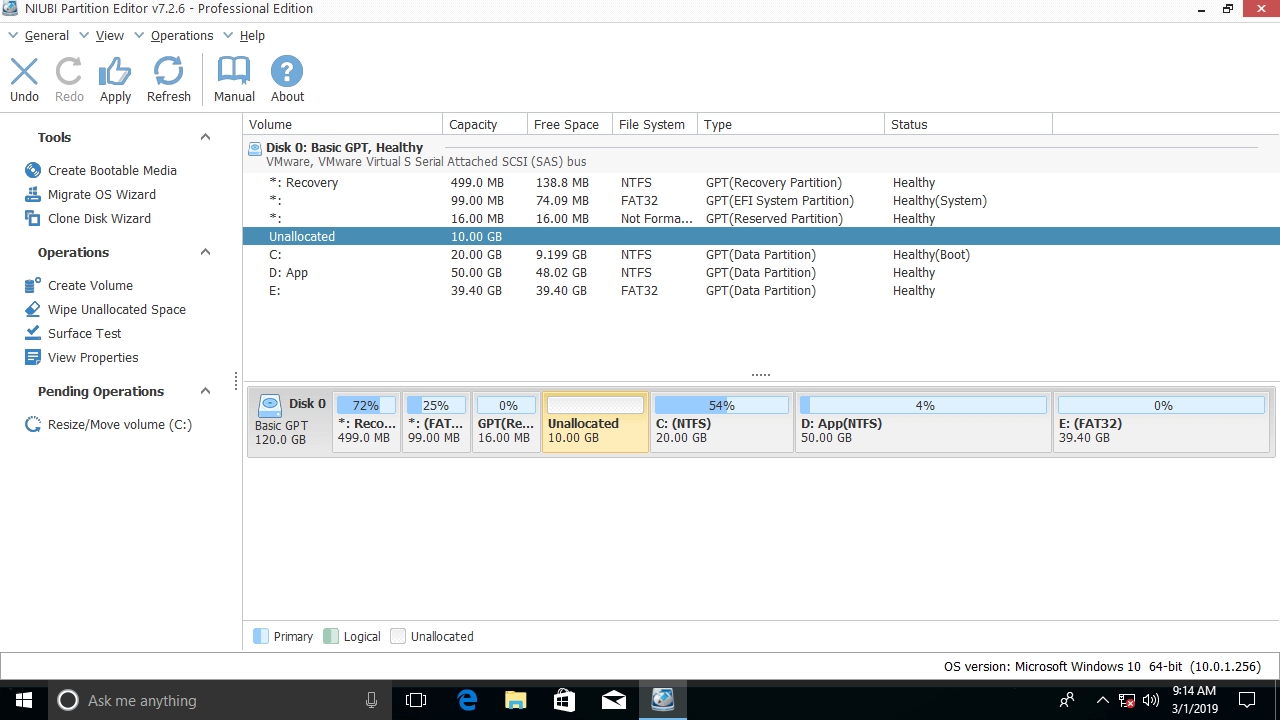
Right-click the C: drive and select "Resize/Move Volume"; if you drag the left border to the right in the pop-up window:

Unallocated space is generated on the left side of the C: drive.
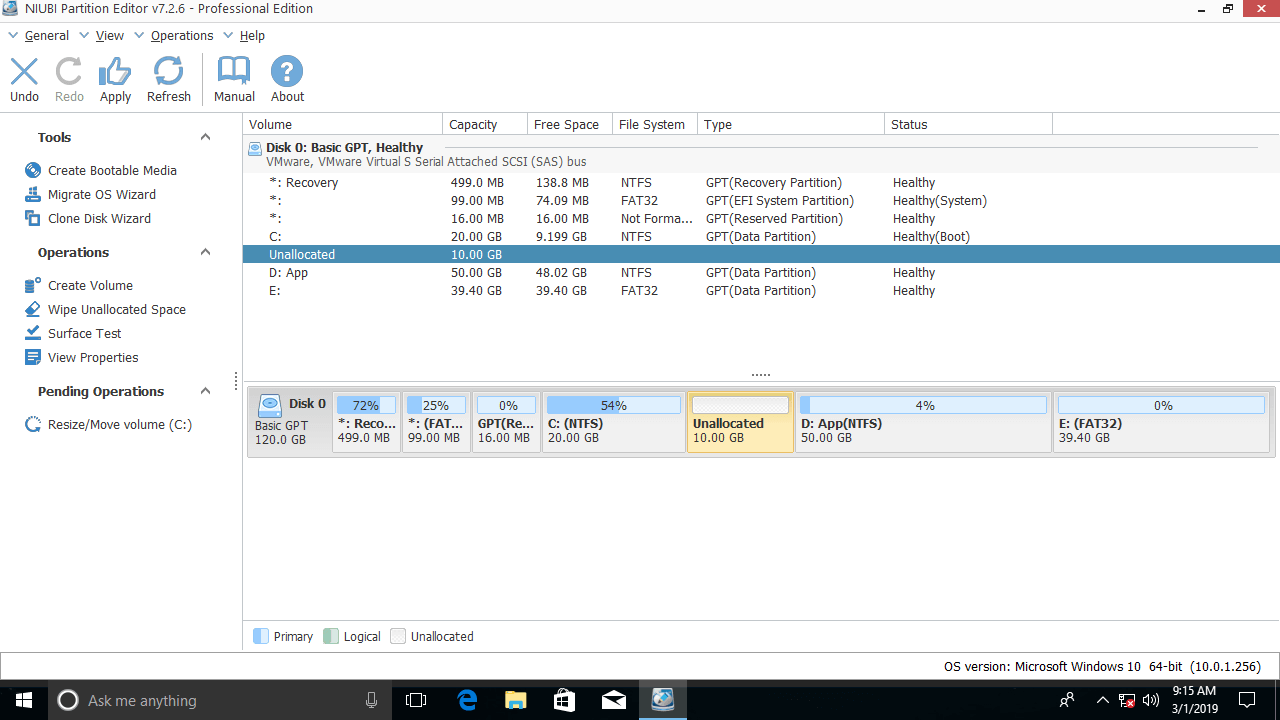
If you drag the right border to the left in the pop-up window:

Unallocated space is generated on the right side of the C: drive.
How to Resize a Data Volume (D:) in Windows 10
Similarly, you can resize partition D to a smaller size. If you want to create new partitions, right-click the unallocated space and select "Create Volume".
If you want to extend the C: drive, generate unallocated space on the left side of D when shrinking.
Then, right-click C and select "Resize/Move Volume" again, and drag the right border to the right to merge the unallocated space.
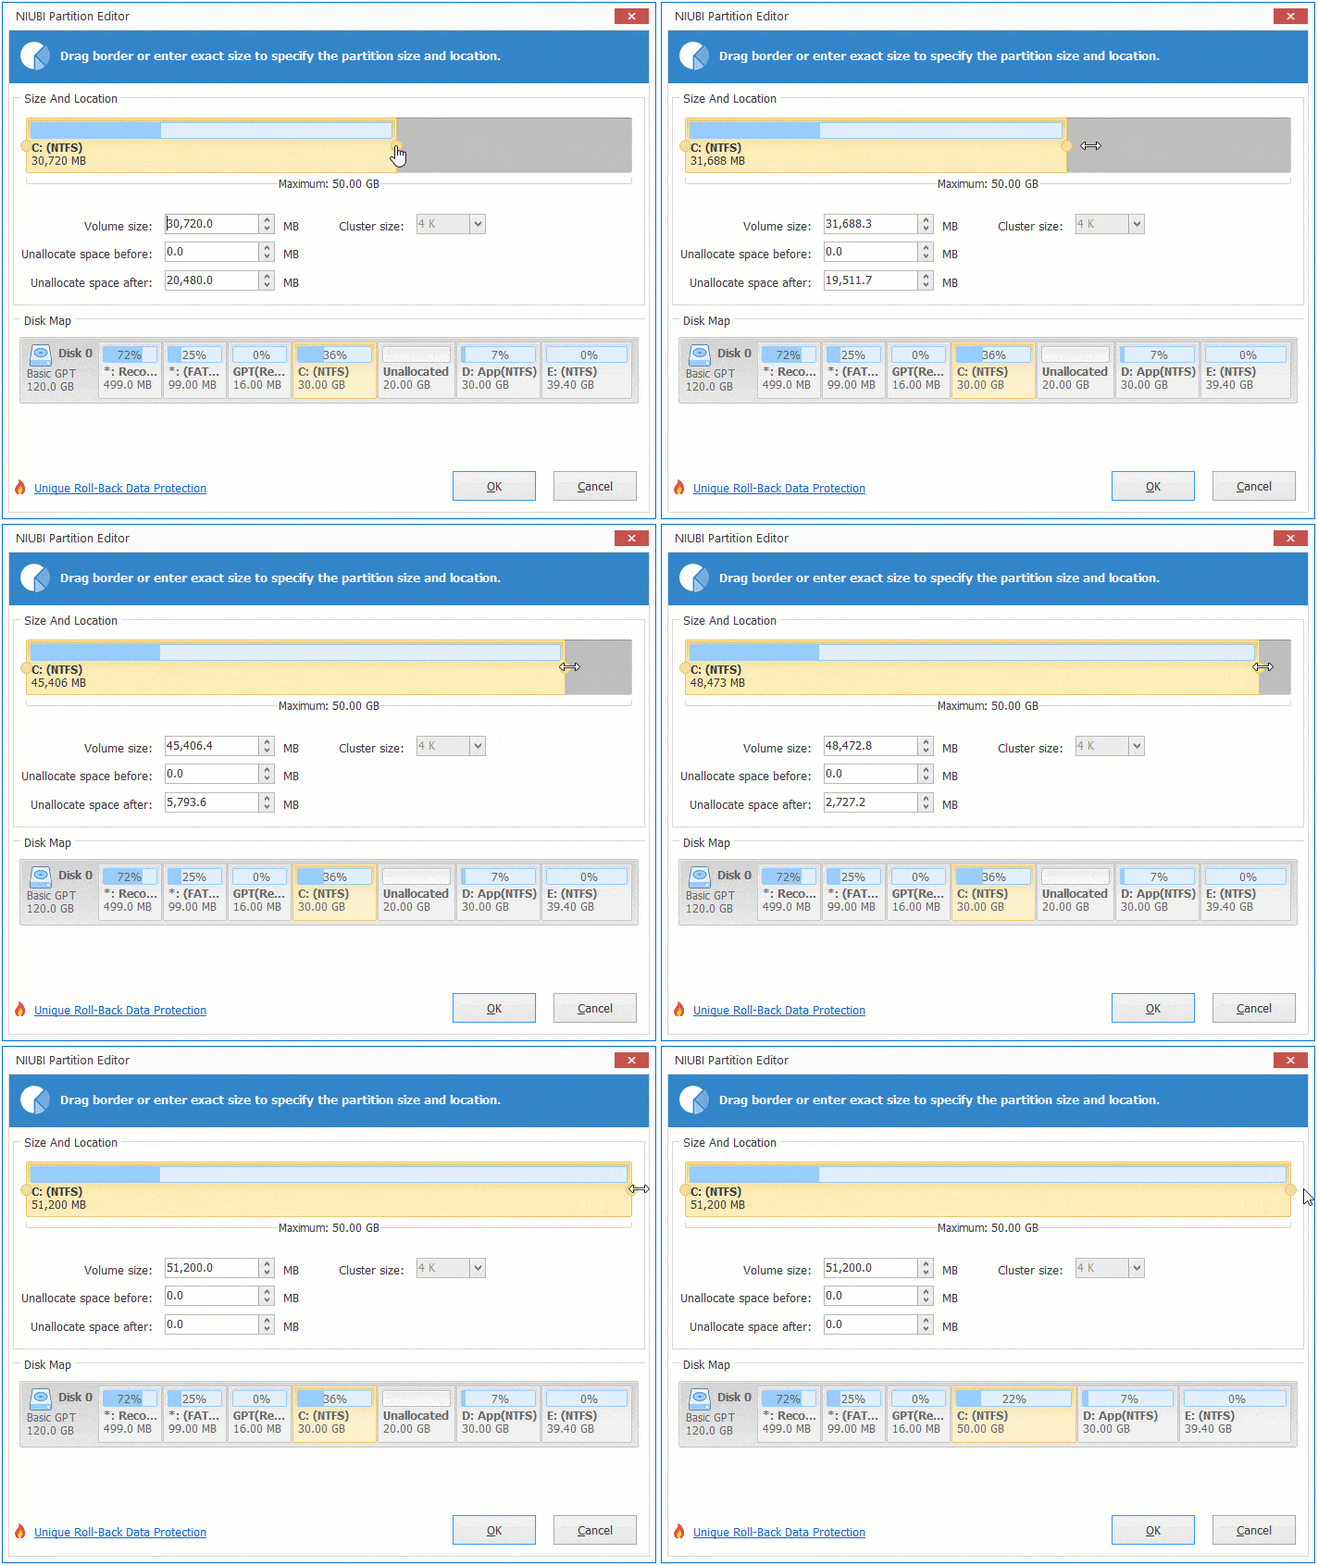
If you want to extend the E: drive, generate unallocated space on the right side of D when shrinking.
Then, right-click E, select "Resize/Move Volume" again, and drag the left border to the left to merge the unallocated space.

If you want to shrink E to expand the C: volume, you need an additional step to move the unallocated space from the right side of D to the left.
To do this, right-click D and select "Resize/Move Volume", then drag the middle of the partition to the right in the pop-up window.

In Summary
To resize a disk partition in Windows 10, the native Disk Management is useless in most situations. To accomplish this task, NIUBI Partition Editor is much faster and easier. You just need to drag and drop on the disk map to shrink and extend a partition. Besides moving and resizing volume partitions, it helps you perform many other disk and partition management operations.
 © 2009 - NIUBI Technology All Rights Reserved. |