
Nowadays, many Windows 10/11 computers have at least two hard disk drives. One SSD is for the operating system and programs, and the other one is for file storage. However, because SSDs are still expensive, they are often not big enough. No matter which type of disk you use, you are very likely to encounter a disk space issue. For example:
- The system partition is created too large and there is no other partition for programs on the same disk.
- The system volume is getting full because many kinds of files are saved to it every day.
When this happens, you can resize the system partition in Windows 10/11 without starting over. To do this, you may try either the Windows built-in Disk Management or third-party software. Disk Management is easy and safe, but sometimes it cannot resize the system partition for Windows 10/11 computers.

Resize the System Partition in Windows 10/11 Without Software
Firstly, here is how to change the size of the system volume with the Windows built-in utility. To start Disk Management, there are two options:
- Press Windows and X on the keyboard and then select Disk Management from the list.
- Press Windows and R, type diskmgmt.msc and press Enter.
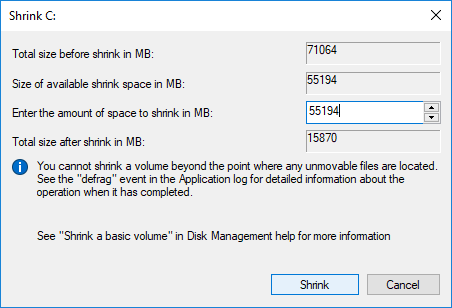
To shrink the system partition:
- Right-click it and select Shrink Volume.
- Click Shrink to use the default maximum space or enter an amount manually first.
When extending the system drive, there must be contiguous unallocated space on its right side.
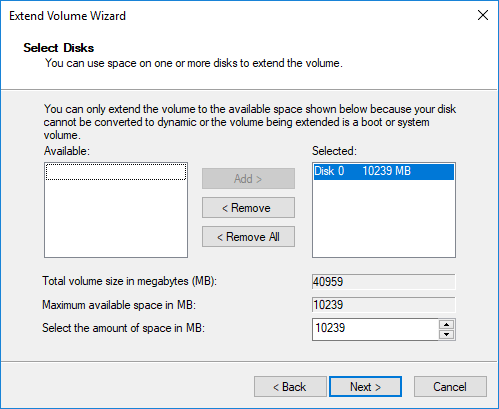
To extend the system partition:
- Right-click it and select Extend Volume.
- Simply click Next till Finish in the pop-up Extend Volume Wizard window.
Limitations to Resize the System Volume with Disk Management
When shrinking a volume:
- Only an NTFS partition is supported.
- You can only shrink a little space if there are unmovable files located in this partition.
- If there is a file system error or due to some special reasons, you cannot shrink a volume even if there is free space in it.
- You can only generate unallocated space on the right side of this volume.
When extending a volume:
- Only an NTFS partition can be extended.
- Extend Volume can only expand the partition with contiguous unallocated space on its right side.
- You cannot extend the system partition by shrinking any other volumes.
- Disk Management cannot move partitions, so you cannot extend a partition with any non-adjacent unallocated space.
In short, Disk Management can only shrink an NTFS partition to the left and generate unallocated space on the right side. It can only extend a volume by deleting the right adjacent one.
Better Way to Resize the System Drive with Partition Editor
Professional partition manager software is more powerful and there are many choices in the market. However, you had better select a safe one; unreliable software could cause system damage and data loss. This is because all parameters of the disk, partitions, and files must be modified; files in some partitions must be moved to new locations, and system files must be updated. Any slight error leads to boot failure and/or partition corruption.
NIUBI Partition Editor features Hot Clone, Virtual Mode, Cancel-at-Will, and 1-Second Rollback technologies to protect your system and data. Its Hot-Resize technology and advanced file-moving algorithm help resize partitions much faster. It has a free edition for Windows 11/10/8/7 home computer users.
Download this tool, and you will see the initial disk partition size and configuration on the right. Available operations are listed on the left.
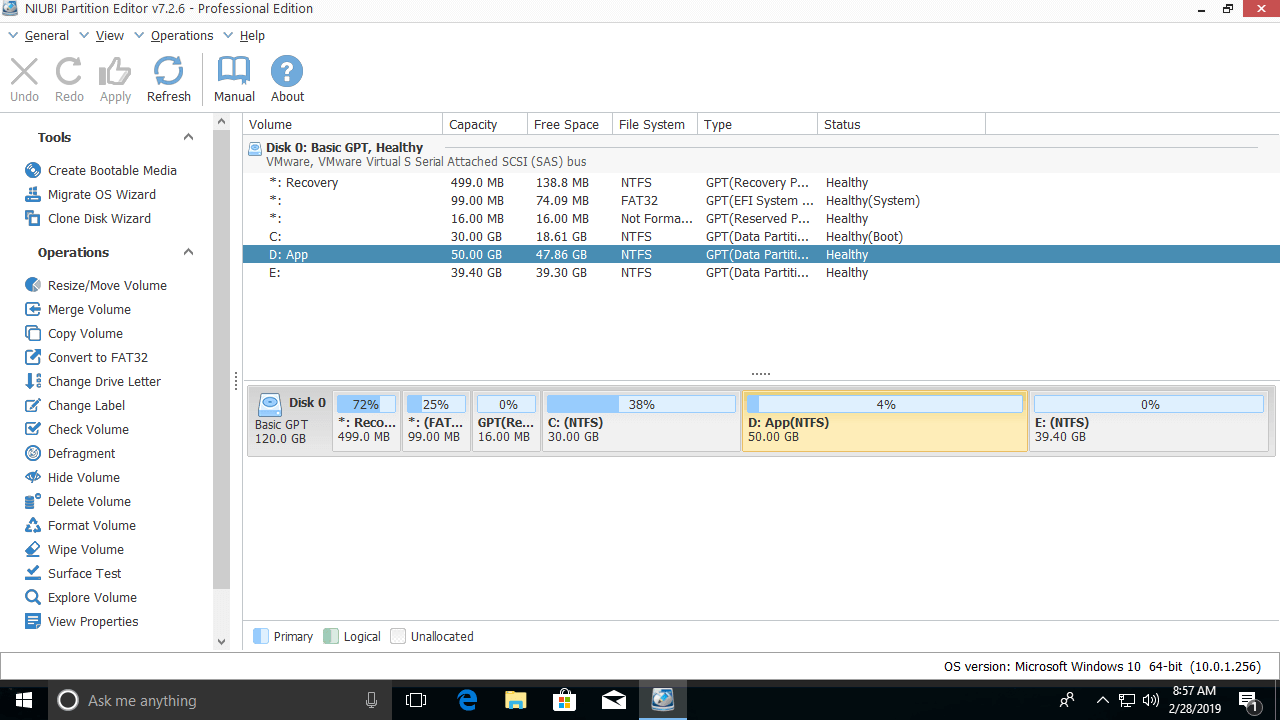
To shrink the system partition C: in Windows 10/11:
Right-click it and select the "Resize/Move Volume" feature; drag the right border to the left in the pop-up window:

The system partition is shrunk, and unallocated space is generated on the right side.
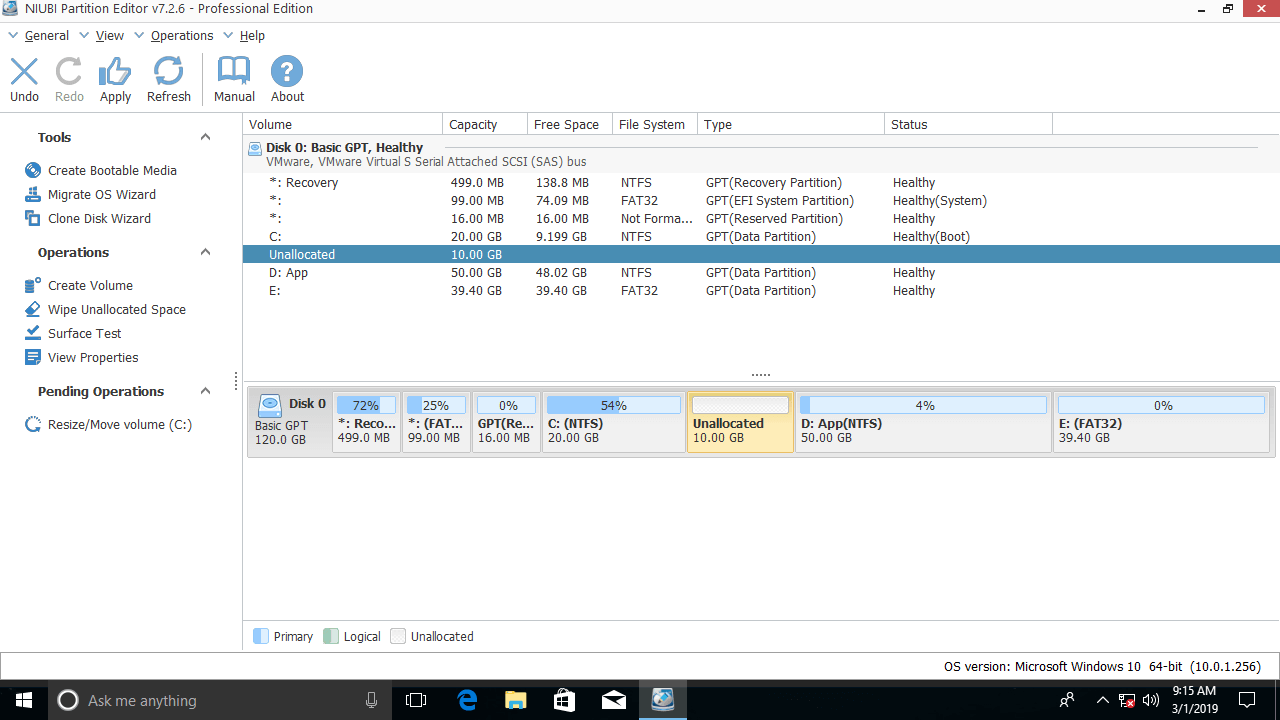
If you drag the left border to the right in the pop-up window, unallocated space will be generated on the left side of the C: drive.
To extend the system partition in Windows 10/11:
In most cases, data volumes are on the right side of the system partition, so shrink the contiguous partition (D:) to the right and generate unallocated space on its left side. To do this, right-click the D: drive and select "Resize/Move Volume"; drag the left border to the right in the pop-up window.
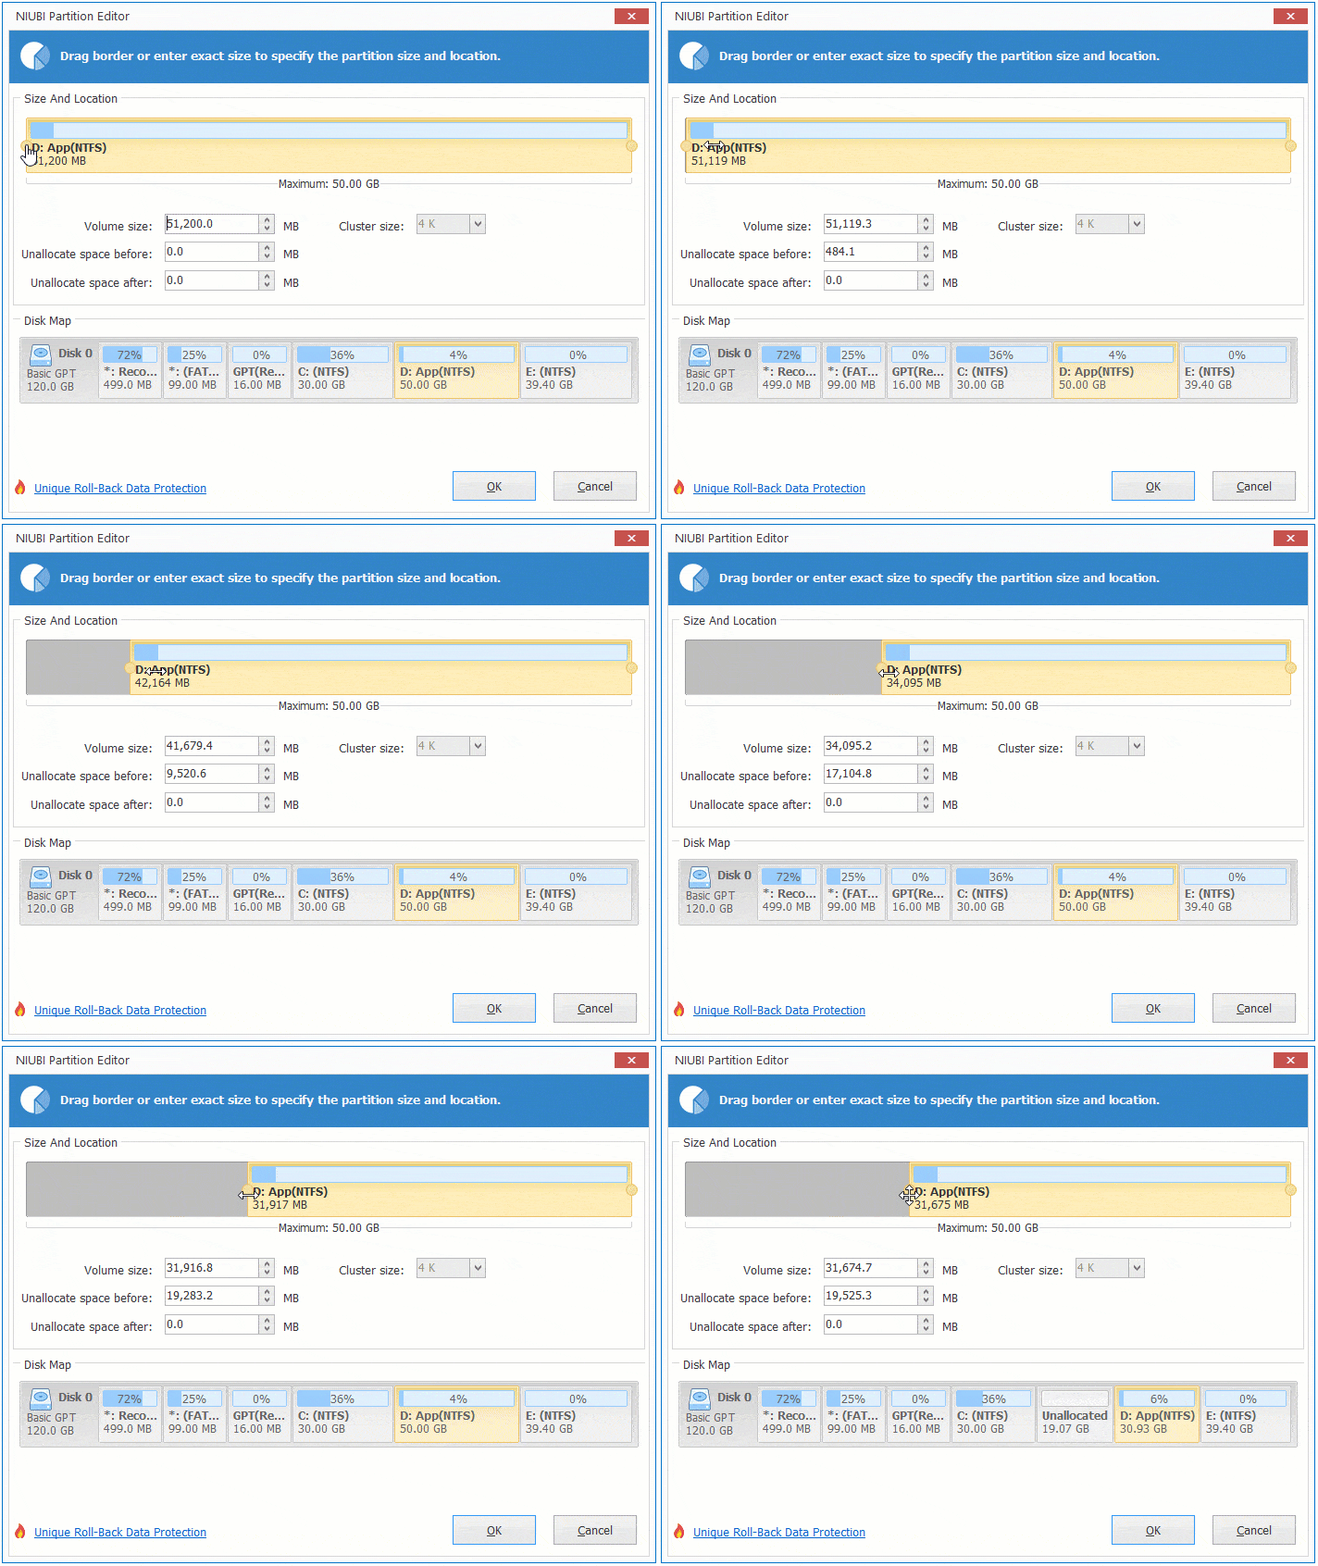
Then right-click the system partition C: and select "Resize/Move Volume" again; drag the right border to the right to merge the unallocated space.
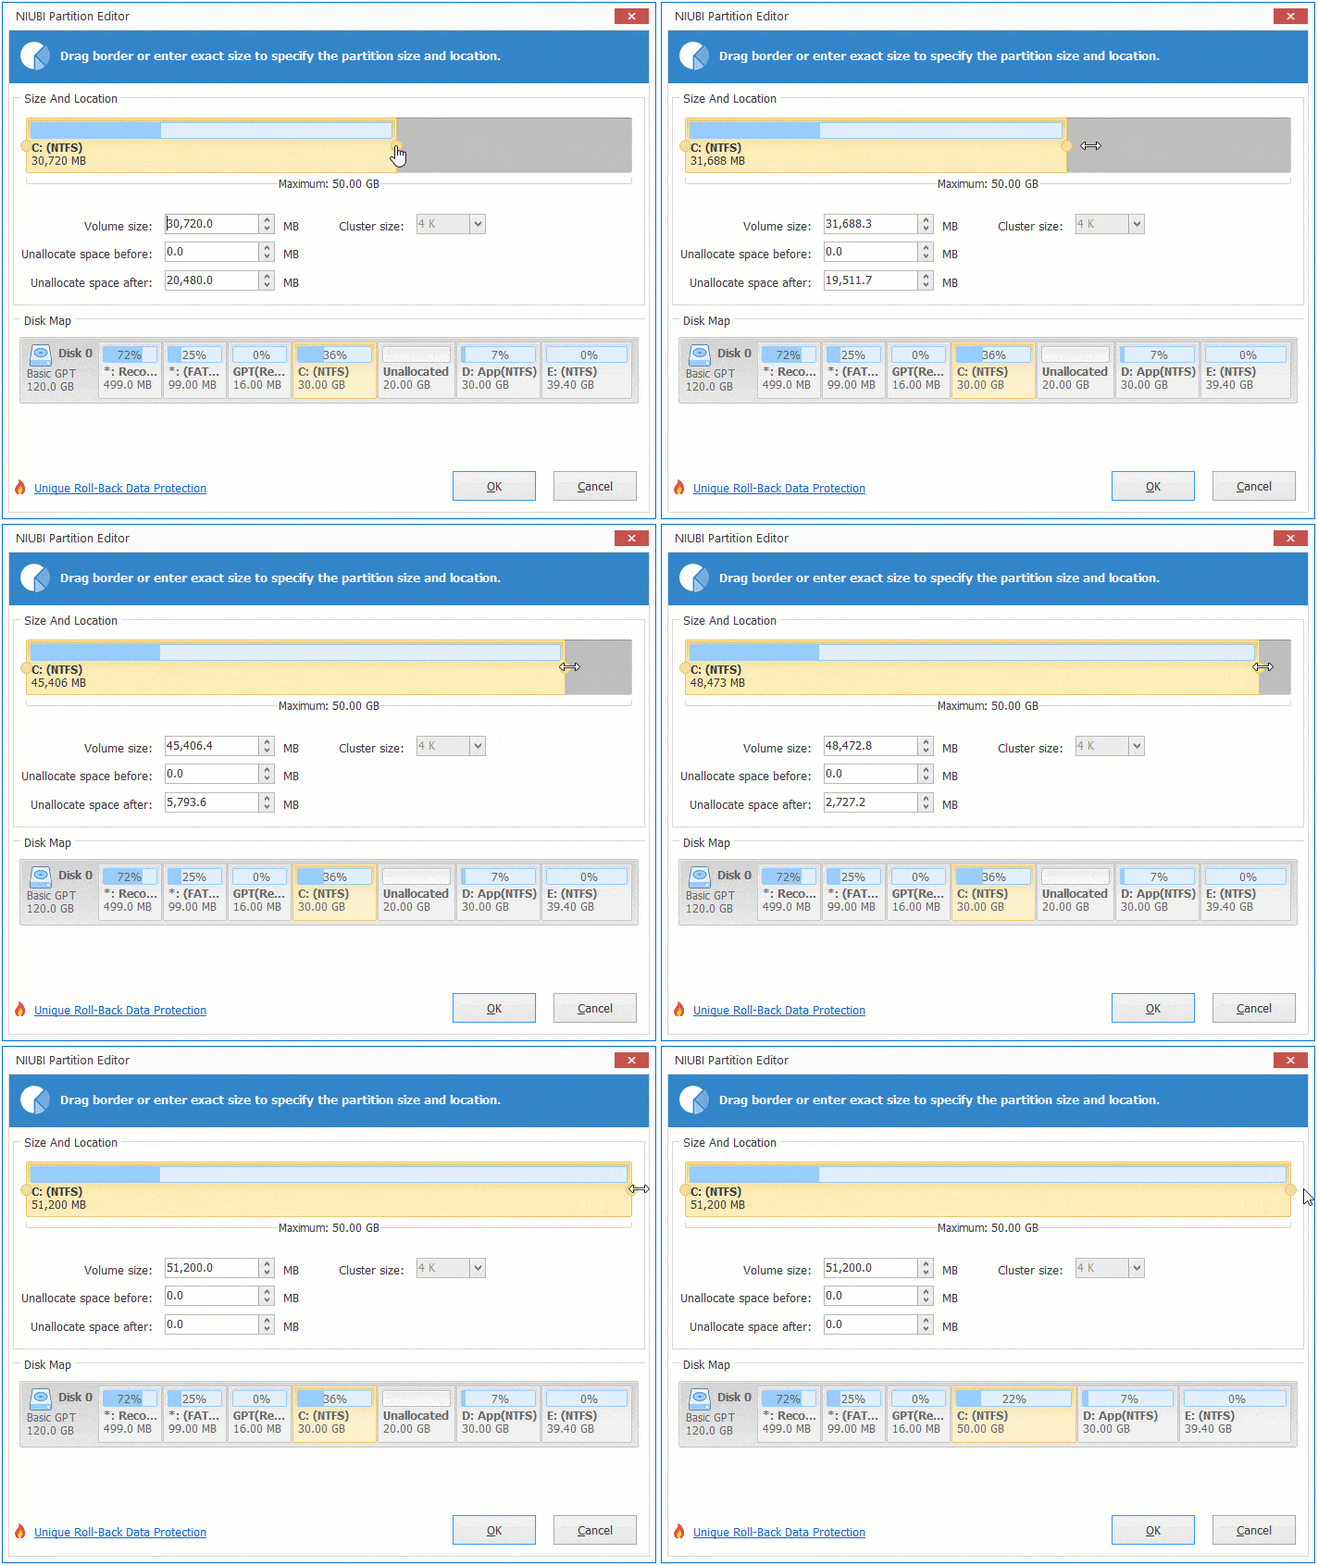
If there is not plenty of free space in the contiguous partition (D:), you can shrink a non-adjacent partition (E:) to generate unallocated space on its left. Before extending the system C: drive, you need an additional step to move the unallocated space from the right side of D: to the left.
To do this, right-click the D: drive and select "Resize/Move Volume"; drag the middle of this partition to the right in the pop-up window. Then, you can swap its position with the adjacent unallocated space.

To resize the system partition in a Windows 10/11 computer, you just need to drag and drop on the disk map, shrink any data volume to get unallocated space, and then merge it into the system C: drive. Besides resizing and moving partitions, NIUBI Partition Editor helps you perform many other disk and partition management operations.
 © 2009 - NIUBI Technology All Rights Reserved. |