
If you forget to create new volumes when installing Windows 10/11, the system partition C: will occupy all the available space on this hard disk. Of course, it is not a good idea to keep this single volume and put everything into it. Then what to do? You can shrink the C: drive to create more volumes without losing data. This article introduces how to shrink the system partition in Windows 10/11 with the native Disk Management tool and free partition editor software.
Shrink the System Partition in Windows 10/11 Without Software
Unlike the Diskpart cmd, Disk Management has a graphical interface, so it seems to be easier to shrink volume partitions.
Steps to shrink the system partition C in Windows 10/11 with Disk Management:
- Press Windows + X on the keyboard, then select Disk Management in the list.
- Right-click the C: drive and select Shrink Volume.
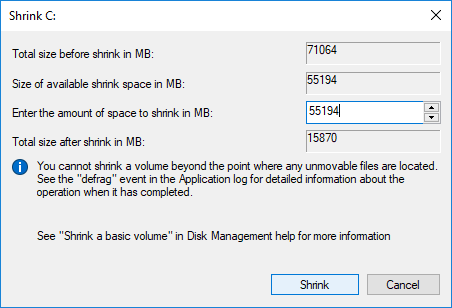
- Enter an amount of space and click the "Shrink" button. The maximum available space will be used by default if you do not enter an amount.
There is a tip in this window: "You cannot shrink a volume beyond the point where any unmovable files are located." This is the reason why many users report that they cannot shrink the C: drive to be smaller, although there is a large amount of free space.
In fact, this "Shrink Volume" function has some other limitations.
Scenarios Where You Cannot Shrink the System Partition
If you opened the shrink volume window but did not click "Shrink", during this time some large files such as Windows Updates are continuously written to the C: drive. As a result, you may receive the error below after clicking "Shrink" because the free space is less than calculated.
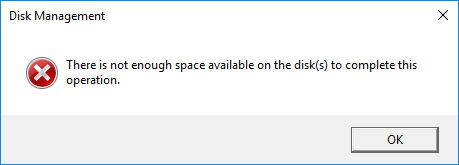
In this case, you may repeat the shrinking operation.
If there is plenty of available free space but you can only enter a little, it means that there are unmovable files in this partition. In that case, you need disk partition software.
If there is a file system error, you cannot shrink the volume even if there is free space.

Shortages of shrinking a partition in Windows 10/11 with Disk Management:
- It can only shrink an NTFS partition; FAT32 partitions are not supported.
- It can only shrink a partition to the left and generate unallocated space on the right side.
- It cannot move the "unmovable" files when shrinking the system partition.
- It cannot extend another partition after shrinking a volume.
Shrink the System Volume with a Free Partition Editor
Compared with Windows Disk Management, NIUBI Partition Editor can move the "unmovable" files, so it can shrink the system volume to the minimum size if you want. It is able to generate unallocated space on either the left or right side when shrinking a partition. This unallocated space can be moved and merged into other partitions on the same disk. There is a free edition for Windows 11/10/8/7/Vista/XP home computer users.
Download this program, and you will see all disk partition info on the right and available operations on the left.
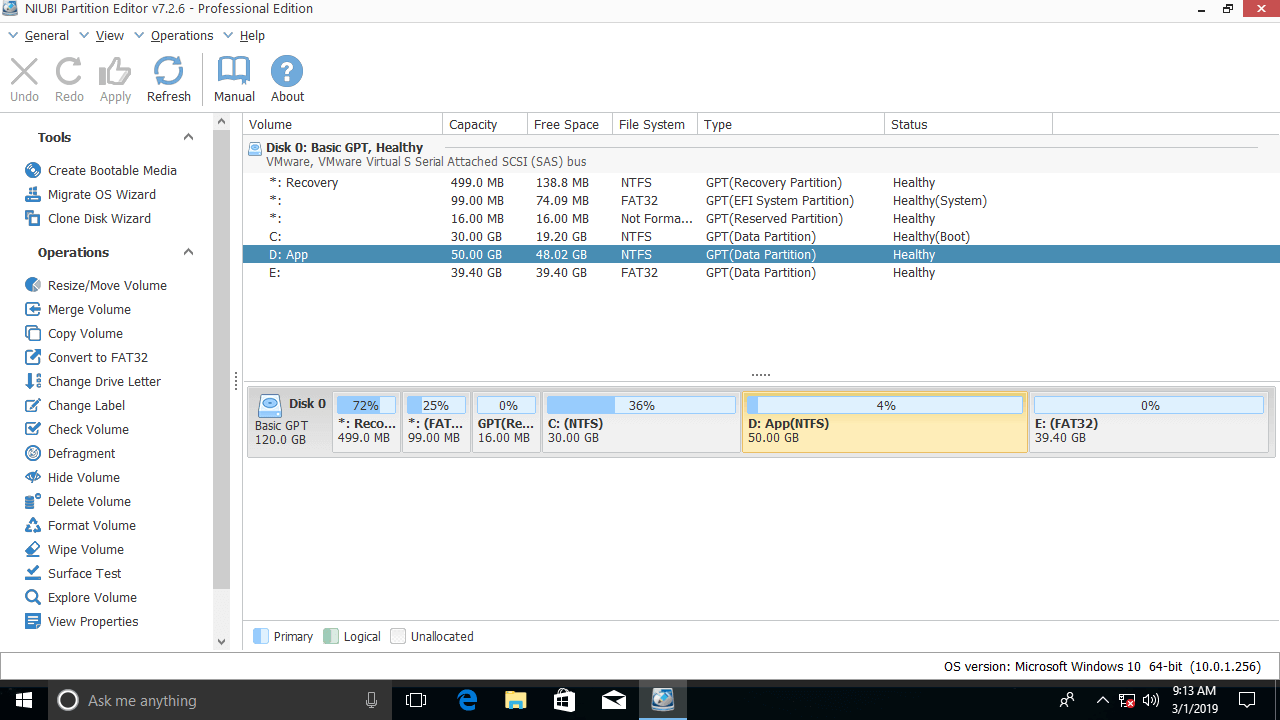
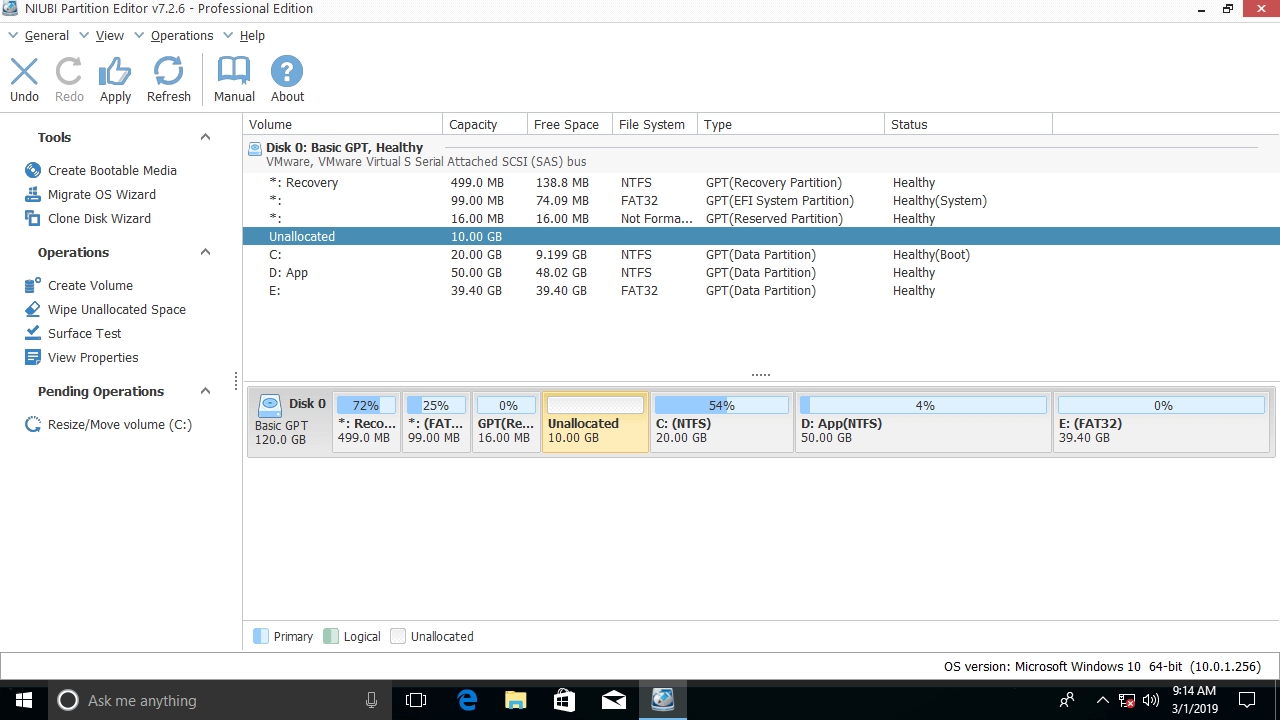
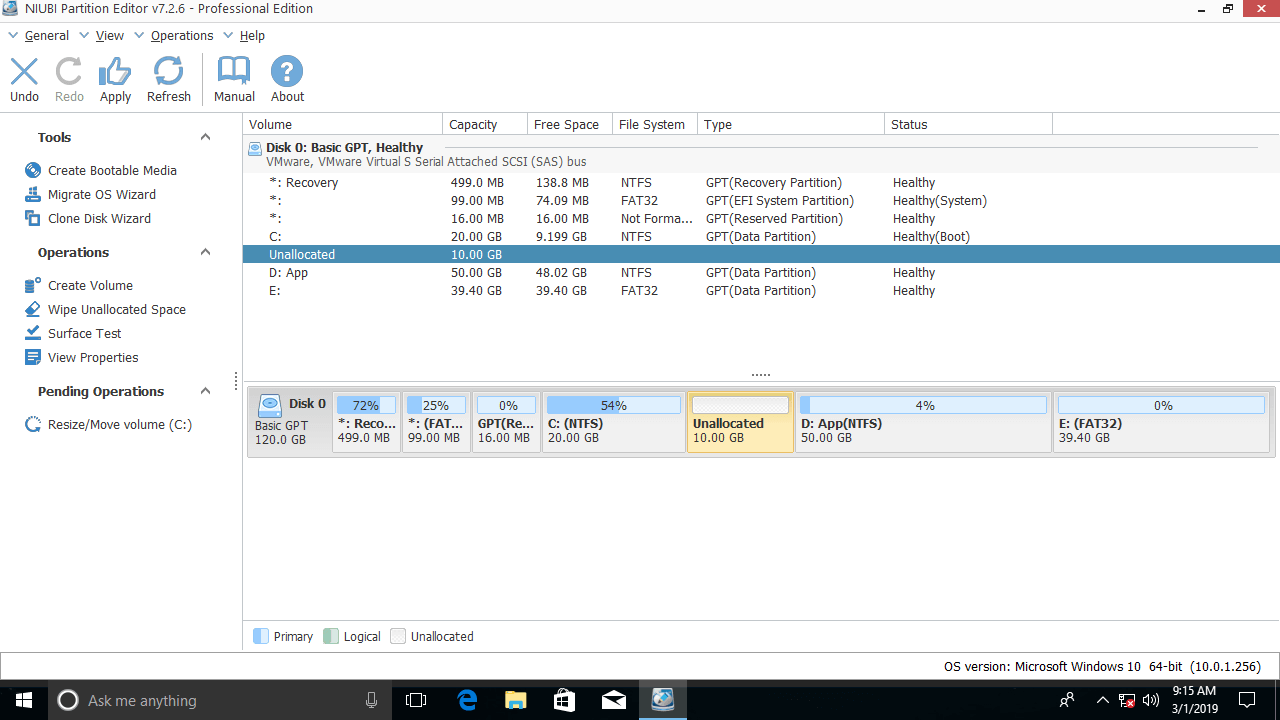
Right-click the C: drive and select "Resize/Move Volume"; you have two options in the pop-up window:
Drag the left border to the right

Then, you can shrink the system partition to the right and generate unallocated space on the left side.
Drag the right border to the left

Then, you can shrink the system volume to the left and generate unallocated space on the right side.
Follow the steps if you want to extend a disk partition in Windows 10.
In Summary
To shrink the system partition in Windows 10/11, you may try the "Shrink Volume" function in the native Disk Management tool. But because of some limitations, you may have trouble. To reduce the partition size in a Windows 10/11 computer, NIUBI Partition Editor is a better choice. You just need to drag and drop on the disk map. Besides shrinking partitions, it helps you perform many other disk/partition management operations.
 © 2009 - NIUBI Technology All Rights Reserved. |