
Windows 10 has a native Disk Management tool, which is the same as in previous Windows 7. Besides the basic ability to create, format, and delete partitions, it has advanced Shrink Volume and Extend Volume functions to resize a partition without losing data (in most cases). As we know, the system C: drive is very likely to run out of space; therefore, more and more Windows 10 users create the C: drive much larger, which causes the D: drive to get full, especially if you have installed many programs in it. In this situation, if you try to increase the D: drive space, the built-in Disk Management cannot help you. This article explains why Disk Management cannot extend the D: drive in Windows 10 and how to solve this problem easily.
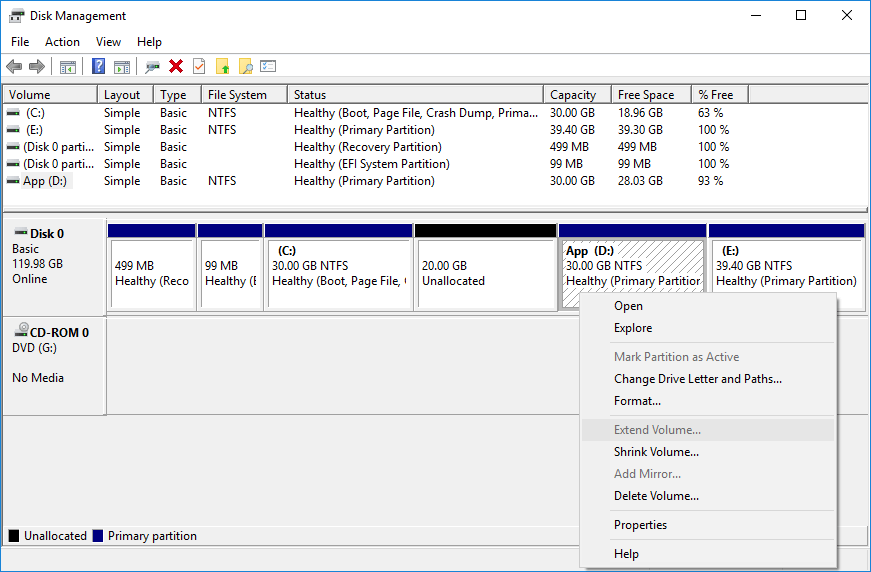
Why Can't Extend the D Drive in Windows 10 Disk Management
There are several reasons, but all are because of the inherent limitations of Disk Management. The most common reasons are:
- Shrink Volume can only generate unallocated space on the right side when you shrink any volume.
- Extend Volume can only merge unallocated space into the left contiguous partition.
To demonstrate this limitation, drives C: (on the left) and E: (on the right) were shrunk one by one:
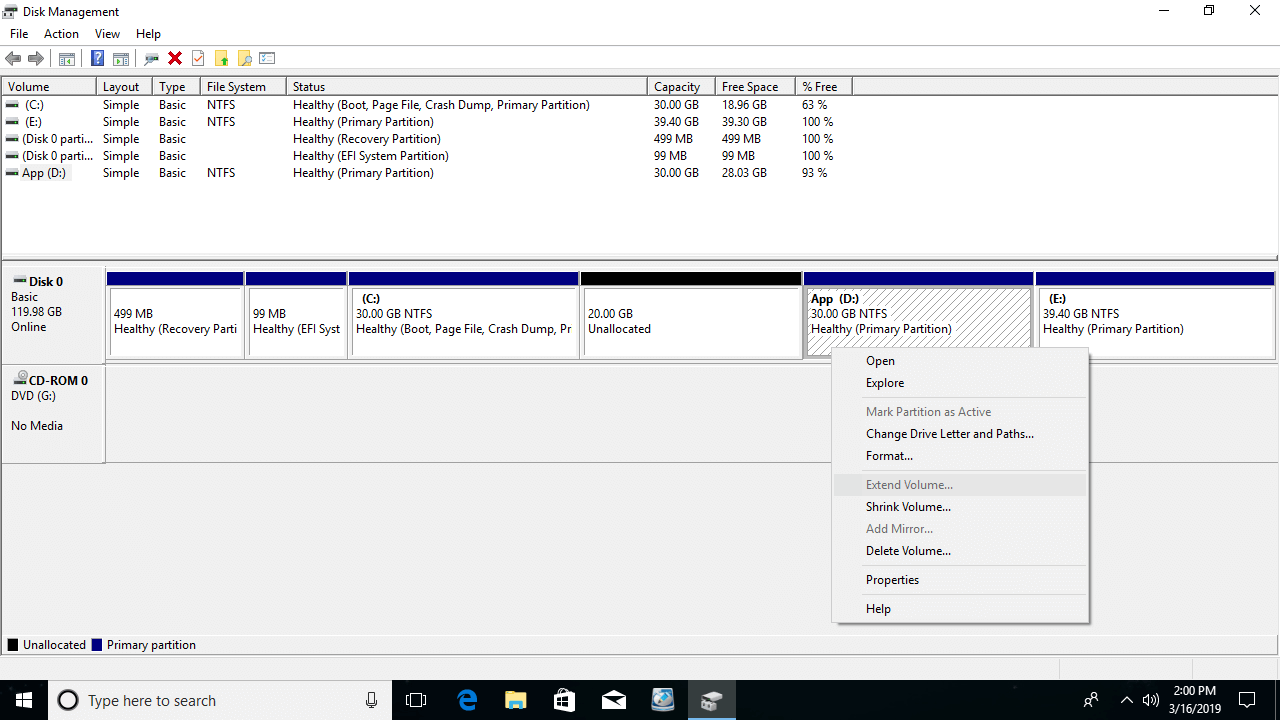
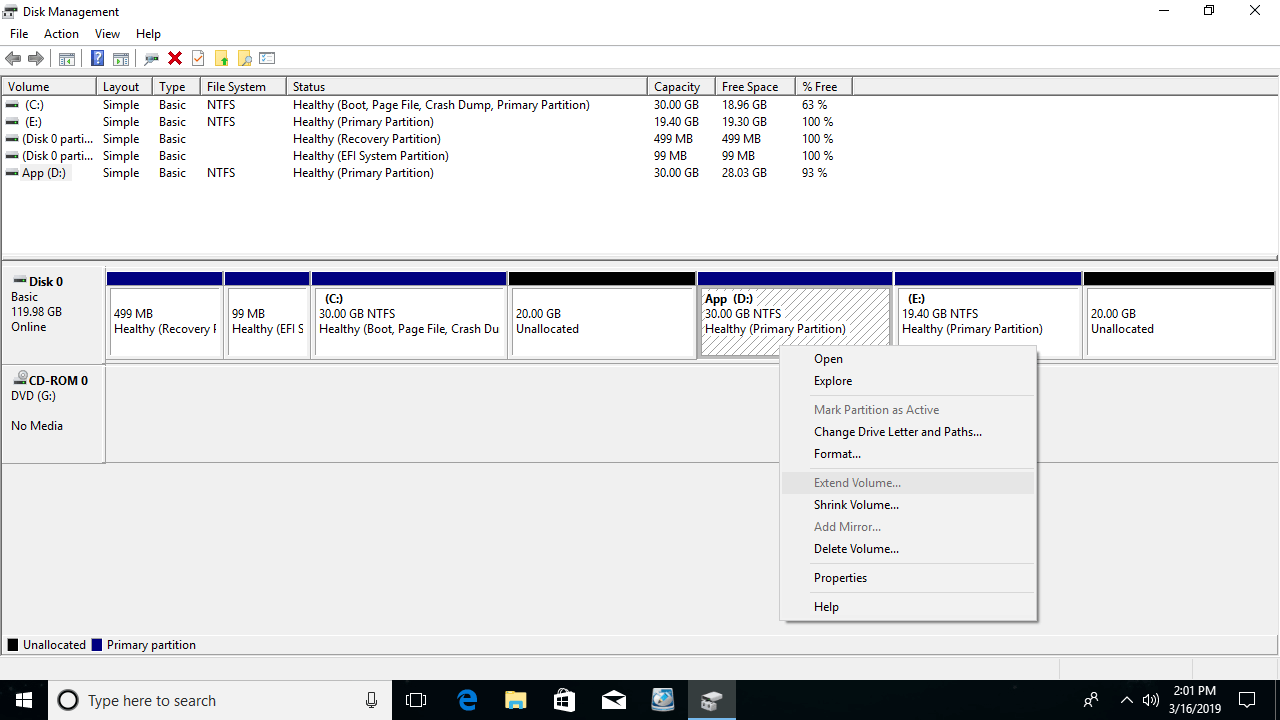
As you can see, after shrinking the C: drive, the unallocated space is on the left side of D. After shrinking the E: drive, the unallocated space is non-adjacent to the D: drive, so Extend Volume is always disabled for the D: drive. Only when there is contiguous unallocated space on the right side of D, is Extend Volume valid.
If you can delete drive E, you will get the required unallocated space to enable Extend Volume for volume D. However, if drive D is formatted as FAT32, you still cannot extend it, because only NTFS is supported.
In addition, if this disk is MBR, volumes D and E must be the same type. This is because the "Free space" generated by deleting a logical partition cannot be extended to any primary partitions. Similarly, unallocated space generated by deleting a primary partition cannot be extended to any logical partitions.
What to Do if You Are Unable to Extend Volume D
To fix this issue, you just need to download NIUBI Partition Editor to merge the unallocated space, no matter whether it is on the left or right side, and no matter whether drive D is an NTFS or FAT32, logical or primary partition.
How to extend drive D after shrinking the C: drive:
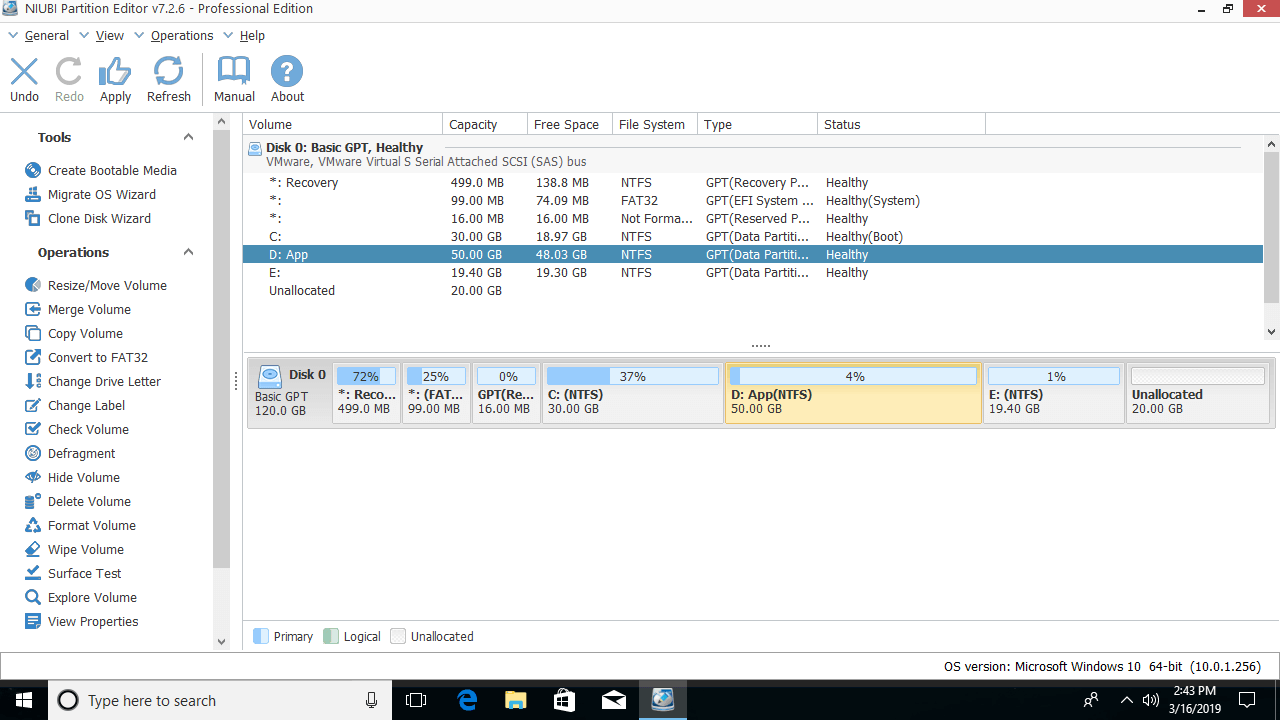
Download NIUBI Partition Editor, right-click drive D, and select "Resize/Move Volume"; drag the left border to the left in the pop-up window:

The unallocated space is merged into the D: drive.
How to extend drive D after shrinking the E: drive:
The unallocated space shrunk from E is on the right side and non-adjacent to volume D, so the steps are different.
Step 1: Right-click the E: drive and select "Resize/Move Volume"; drag the middle of the E: drive to the right in the pop-up window:
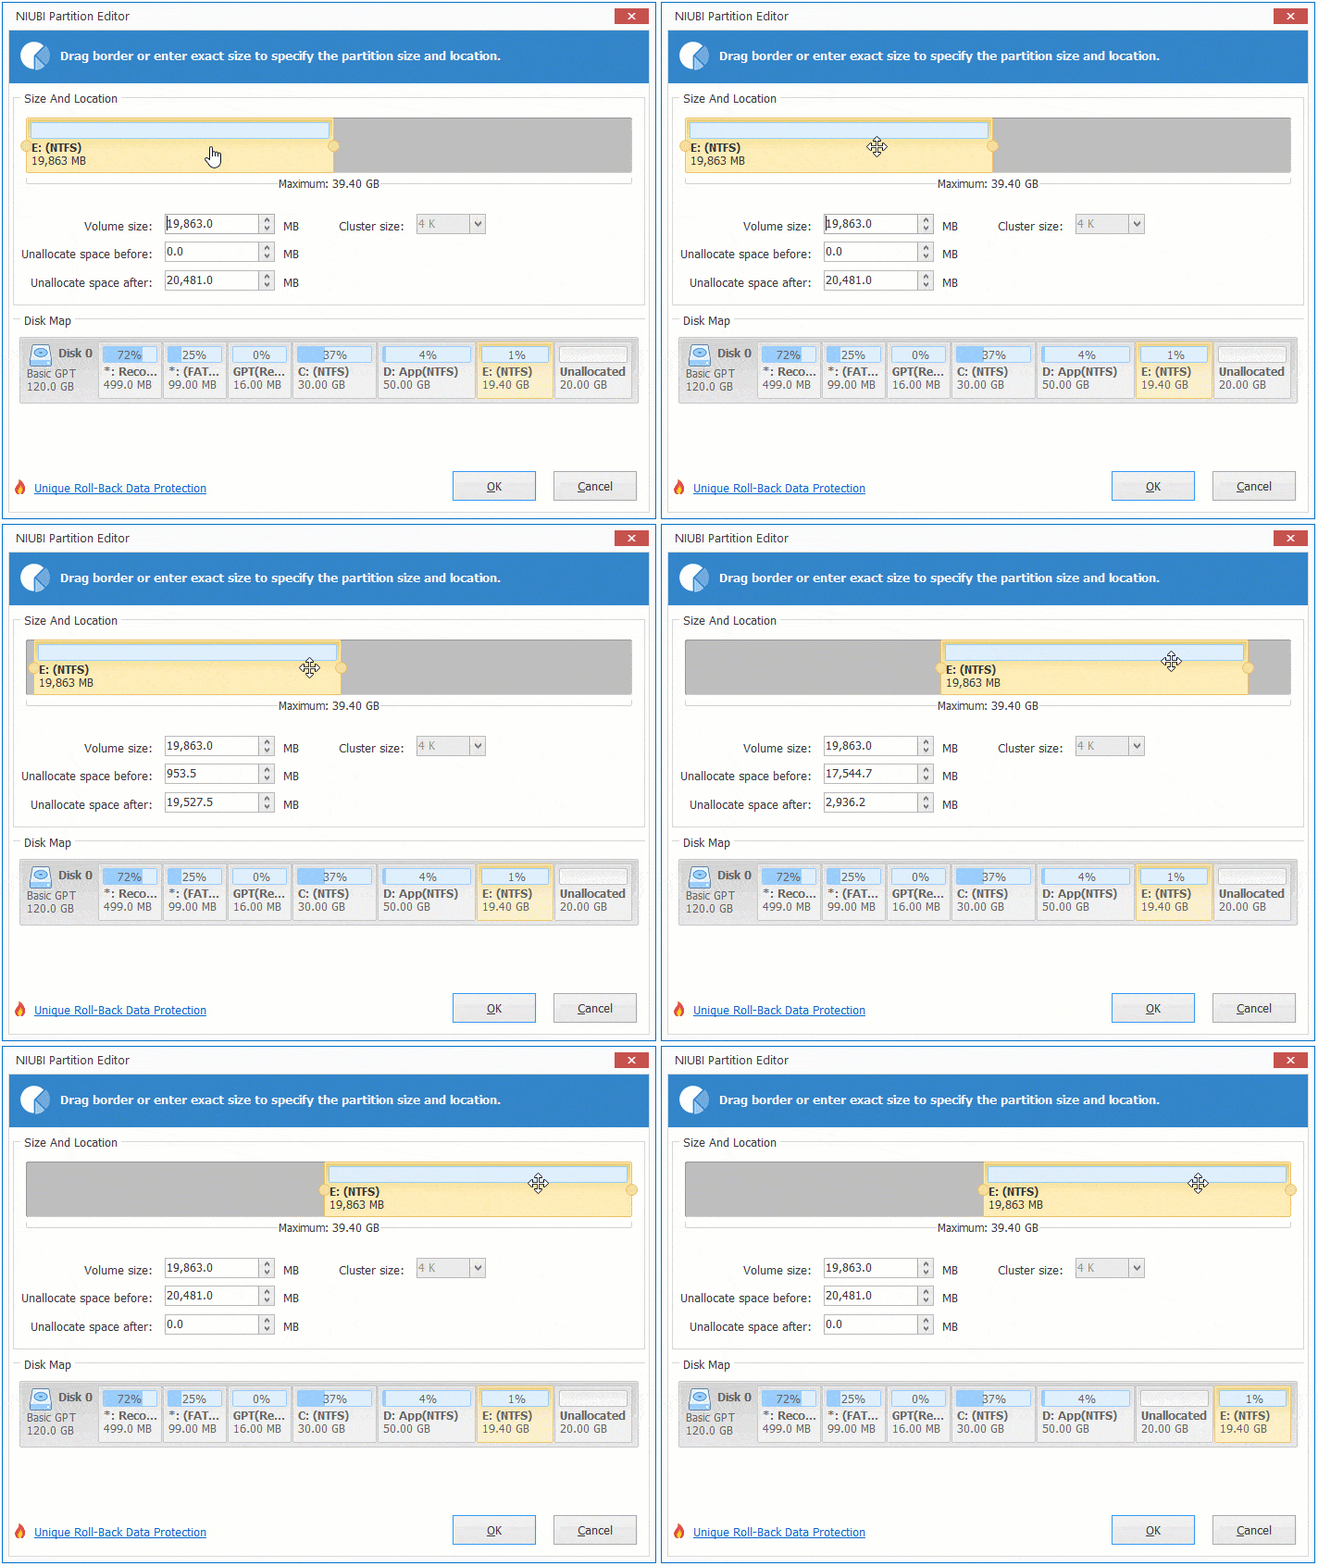
The unallocated space is moved next to the D: drive.
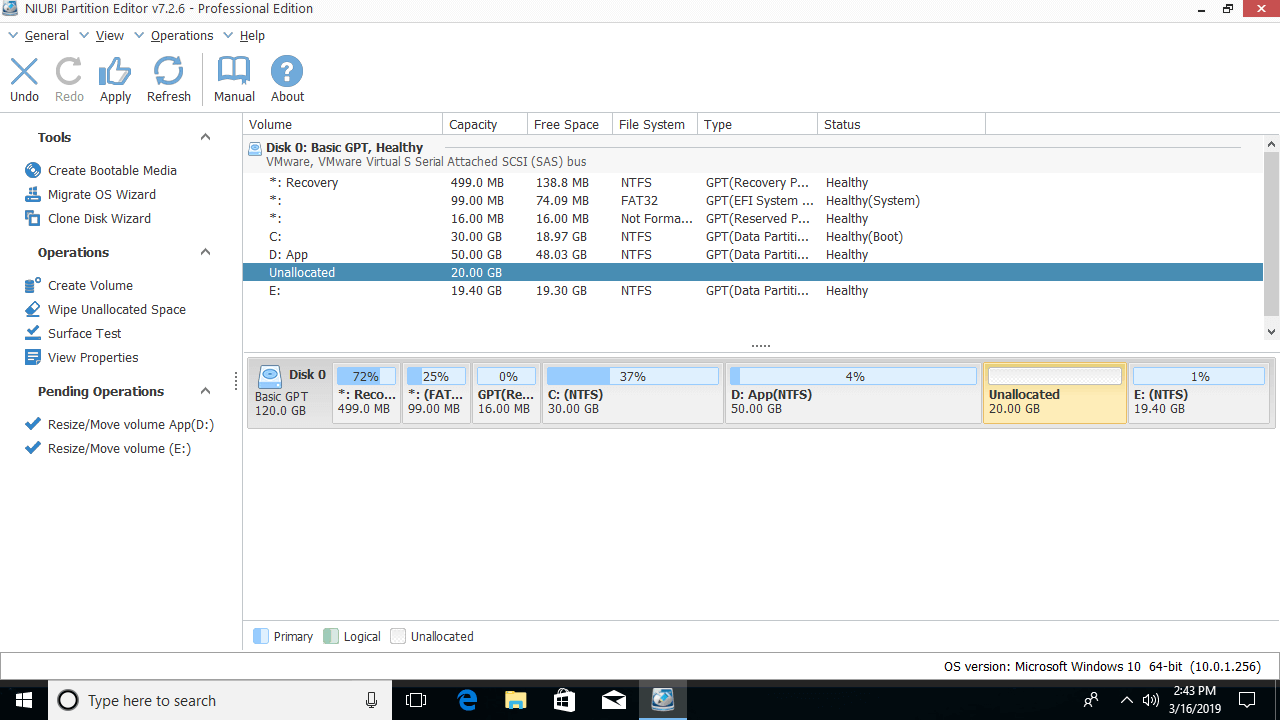
Step 2: Right-click the D: drive and select "Resize/Move Volume" again; drag the right border to the right in the pop-up window:

The unallocated space is merged into the D: drive.
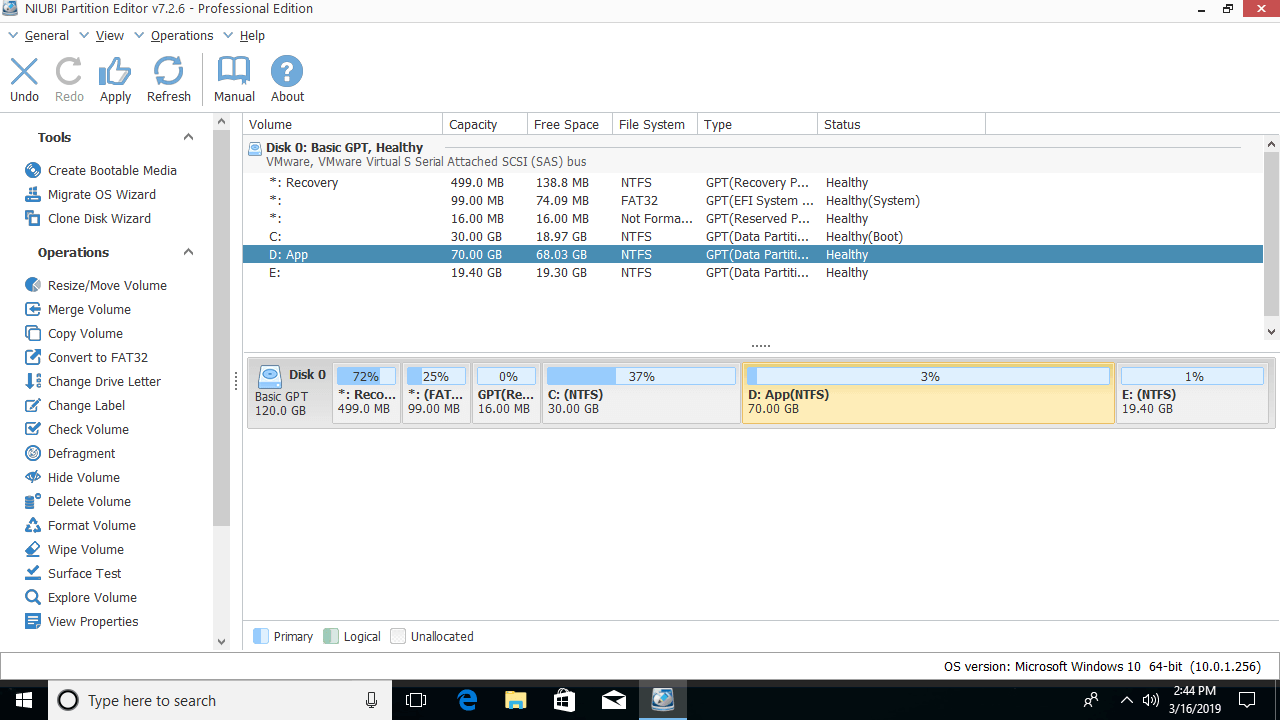
NIUBI is working in virtual mode; to modify real disk partitions, you should click Apply on the top left to confirm and execute.
Be Cautious When Shrinking and Extending a Volume
It is easy to solve this problem if you cannot extend the D: drive in Windows 10 Disk Management. When unallocated space is contiguous on either side, simply merge it into the D: drive. If it is non-adjacent, you just need an additional step to move it before adding it into the D: drive.
However, there is a potential system and data damage risk while resizing and moving disk partitions; it is important to select reliable partitioning software. Better than other tools, NIUBI Partition Editor features Hot Clone, Virtual Mode, Cancel-at-Will and unique 1-Second Rollback technologies to protect your system and data. Furthermore, it is much faster because of the advanced file-moving algorithm.
 © 2009 - NIUBI Technology All Rights Reserved. |